This diary article is not a review, it is my own notes on my
continuing experience using the Fujifilm X100s compact camera.
Photography for me is a hobby and a continual learning curve.
I receive no remunerations from any third party mentioned
herein. However if you have enjoyed your visit or any of my
articles have assisted you - Please consider donating
(the minimum is
£2)
to the
Sick Kids Friends Foundation
The diary content, will EXPAND and it will become more
precise in
each section as I gain experience with the camera and UPDATE
the material. There will be some 'repetition of text' in certain
sections and this is intended to assist as some readers may only read a
particular section and not the entire article. All RAW and camera jpeg
images have been captured using the camera in Aperture
Priority mode (unless otherwise stated).
As of 23rd May 2020, I am still using the Fujifilm X100s
Compact Camera for my street photography.
IMPORTANT:The majority of the larger images
shown in this article are displayed in 1650 pixel format but I
appreciate that many viewers may have a 14"-15" screen tablet
and in any screen size, the images, especially the ones captured
at ISO:3200, can be viewed to show a greater sharpness and
cleaner bokeh by adjusting your browser to 75% or lower
to reduce the image size to your liking.
The Fujifilm
X100s compact camera was purchased as an alternative to a Canon
35L lens. I intend to use
the X100s along with my 35mm 'Full Frame' Canon 5D
MK 1 DSLR camera
system and keep it in the same bag. However, I will also be
comparing it to my existing 'street' camera, the Panasonic GF1
which I have been using since late 2009.
I am very confident regarding the capability of the Fujifilm
X100s camera to deliver exceptional image quality with superb
handling. I have already tested out it's sibling the Fuji X-E1
camera with inter-changeable lenses which proved exceptional.
I never pre-order but the X100s was one camera worth breaking my rule over.
The camera arrived on the 19th March 2013, please check out my
accessories list.
The one accessory that I have left out for the moment is a spare
battery which I will probably regret and eventually have to
purchase. May 2013 - I have now purchased a spare
Fujifilm branded battery.
Camera Jpeg Image Sample
The weather has been appalling since I received my camera but
hopefully it will clear up and I can get into town and take some
street shots. This is an jpeg image, shot outside my house and
it was captured with the camera 'hand held' during a brief pause
in the bad weather when the sun managed to peek through the
clouds. The f8 aperture setting delivered a very respectful
depth of field but not totally unexpected as the lens may have a
35mm 'field of view' but it has a 23mm focal length. The
film simulation was set for Velvia/Vivid, colour +1 and
sharpness +1 with the noise reduction set to 0.
ISO:200 - Aperture f8 - Shutter 1/450secs -
White Balance and DR both set to AUTO
Please click on the 600pixel size to open up a 2000pixel size
that has been re-sized and sharpened using Adobe Lightroom 4.4
software.
The Fuji X100s is a camera that I will use in it's minimalistic
'basic' form and in a similar fashion to my cameras from my
early film days. I have decided (for a limited time) to shoot 'RAW' and JPEG
image files as many readers will be shooting image files in jpeg
mode. My initial tests have shown that Adobe Lightroom 4.4
software 'RAW' developer is capable of producing decent
converted jpegs and tiff image files from RAW files, albeit with
certain (see next section) limitations. The X100s with a 16Gb SDHC card installed and
set for RAW+Jpeg image files is reporting that I can shoot 405
images.
I am sure that the camera produced jpegs will be most excellent
but I still prefer to shoot 'RAW' image files as they are the
nearest I can get to film negatives for development.
I suspect that many photographers will be considering the
Fujifilm X100s compact camera as a step-up from a point and
shoot digital compact and in the initial
stages of using the X100s, it is likely that most will be
content with taking the memory card with their jpeg images to a
local store to have them printed or perhaps send the jpeg files via email
to an 'Internet On-Line Printer Service' to have them printed and
mailed back.
Alternative Image File Format
For projects and capturing certain types of scenes, I normally
shoot 'RAW' image files that provide me with more latitude in
software post processing and which have the edge for image
quality over the camera produced jpeg image files. A 'RAW' file
also provides me with the ability to change the atmosphere in an
image and also to lift highlights and control shadows and the
noise, especially with low light images that have been captured
using higher ISO (1600/3200/6400)
ratings. There is an entire section on RAW Developer Software +
Image Samples.
Internet Reviews - Camera Jpeg Image Cons
Beware of the reviewers who con you with camera jpeg image
examples that the camera could not possibly deliver.
Although there are many Fuji X100s jpeg samples on the Internet
a few of the more excellent ones have been post processed using
Adobe Lightroom or a similar software package. Most reviewers
want to display their best shots but the jpeg image that is
shown in the review may bear very little resemblance to the one the camera
actually captured and very often with a high level of colour
saturation and sharpness that the camera simply cannot reach. The Fuji X100s camera jpegs are excellent but
to make that ruined house jump out of the scene with that
'old world' rendering with vibrant colours (or in monochrome)
and a bold sky requires the use of hardware light filters,
perhaps some HDR and/or
extensive post processing in software and sometimes, even a
little bit of photographic art using a drawing tablet. None of
the camera jpeg samples in this section were captured with any
addon hardware (other than a standard UV filter fitted to
protect the lens) or have been altered in any way, other
than renaming the file using Windows 7 Operating System or
re-sizing it (unaltered) using Adobe Lightroom 4.4
software.
Unaltered Re-sized Camera Jpeg and the 'RAW' Variant Post
Processed in Adobe Lightroom 4.4 Software
Exposure Metering - Multi Pattern Metering Mode
If you are going to shoot camera jpegs only then beware that the
camera exposure multi pattern metering can be thrown off (similar to other
cameras) with certain types of scenes. I tend to separate
the exposure and lock it before I use the shutter button to lock
onto my chosen area of autofocus or when I am using the lens to
manual focus. If you are a camera jpeg shooter, it could be
beneficial to spend more time in setting up the camera to the
style of scenes that are the mainstay of your photography and
adjust the DR, Highlight and Shadow Tones settings in the menu
to suit your tastes.
These are the settings I used for the images shown
in this section -
Aperture Priority - Shutter Dial
A
Focus
Mode Selector - AF-S for single AF shot
Autofocus - Area/Centre
Spot
Exposure Meter -
Multi-Metering
Aperture -
Manually Set on Lens
ISO: - Manually Set
White
Balance - Auto
Dynamic Range - Auto
Film Simulation - Velvia/Vivid
Color +1 or +2
Sharpness +1 or +2
Highlight Tone 0
Shadow Tone
0
Noise Reduction 0
---------------
Camera Produced Jpeg Images - Print Size Limitations When you take a 'full size' jpeg to the printers it is
invariably printed at wallet size or in the case of something a
little bit more substantial - even up to 24" x 16" in size.
This print size is beyond the recommended maximum size in the
Fujifilm camera instruction manual which with the camera set at the
L3:2 image size setting (4,896 x 3,264) the largest print
expected from the camera is 16" x 11" which is approximately A3.
There is a limit to what you can do with the camera jpegs as a
mottled (smearing) effect can appear in the 'full size'
variants, especially in shadows, foliage and distant hills. I
have seen the mottled effect in 'full size' camera jpegs and
also the 'RAW' file variants which proves that Fujifilm (like
other camera manufacturers) have perceived limitations as to
what the camera and lens can deliver in resolution.
Everything is relational, even the price and although the
Fujifilm X100s camera appears expensive in the scheme of things
and costs around £1,000.00 in the UK, bear in mind that a top
notch 35mm professional lens from Canon with large optical glass
costs around £1,720.00 retail. More on
optimum image quality.
Camera Produced Jpeg Image Files and HD TV Display
I have not really spent a great deal of time in setting up the
Fujifilm X100s for camera jpeg shots, its something I have
neglected as I prefer to shoot in 'RAW' image file mode. I have
my camera jpeg saturation and sharpness both set to +2 in the
menu settings. The saturation is probably better at +1 as the
camera jpeg image skin tones, especially the lips are verging on
the red and this is more noticeable on a HD TV display.
Interestingly enough the full size camera jpegs when displayed
on a PC screen at 100% are not that attractive and are better
restricted to around the A3 size or very slightly larger for
viewing BUT on a HD television screen, WOW, you can
really see the clarity, the detail, the sharpness at way beyond
A3 display size. I only found this out the other day as I don't
own a HD TV.
Camera Produced Jpeg Images - Straight of the Memory Card
The following 'Full Size' camera produced jpeg images are
straight off the memory card and renamed using the Windows 7
Operation System. They have not been altered in any way and
(in some cases) the
camera has been set to produce VIVIDLY saturated (Color +2) and HARD
sharpened (Sharpness +2) jpeg images - the 200Pixel and
1650Pixel variants were re-sized for
the web and you can read the image capture settings in the
display plates.
You can save the images down to your hard disk and then view
them on your monitor at a size that suits.
Tipper on Building Site
Using the electronic viewfinder, the first image of the tipper
on the building site was shot without any exposure compensation
(half press of shutter button locks exposure and focus point)
and the second image was shot by first aiming the camera
slightly at the sky to make the exposure meter increase the
shutter speed due to the brighter scene (you can also use the
exposure compensation dial) and then locking the exposure
using the AEL button and finally re-aligning the scene, pressing
the shutter button to lock on the autofocus and finally to take
the shot.
In the tipper images you can see the lens vertical edge
distortion in the scaffolding on the far right and the window
frame on the left.
In the image below (click to open a full size variant) of the coach house
the distortion is even more apparent. The image of the coach house
was shot using the shutter to lock
the exposure and the autofocus without any exposure
compensation. You can clearly see the vertical distortion in the
walls at each side of the image. You can see a CORRECTED
1650Pixel version of the coach house (matching 'RAW' to jpeg conversion) in the RAW Conversion
- Image Samples section of this article.
Camera Jpeg Vs RAW Conversion - Comparison Both these images have been re-sized and sharpened using Adobe Lightroom 4.4 software. The camera produced jpeg is on the left
with a slight purple hue to the sky. The camera jpeg appears to
have less blue fringing on the small leaves in the trees because
the X100s camera jpeg engine has done a better job than Lightroom which has failed (despite many automatic and
manual attempts) to remove the fringing in the RAW to
converted jpeg on the right.
It appears that Lightroom lacks the proper X100s camera
calibration profile and lens profile to completely tackle the
fringing - quite a disappointment. However, in fairness to
Fujifilm, I have experienced the same
problem in this type of scene with my Canon L lenses and
although Adobe Lightroom 4.4 has a camera and lens profile for
the Canon kit, it could not remove the blue fringing in the
Canon RAW conversions to jpeg.
I have also post processed the 'RAW' image file using the
bundled SilkyPix software and you can see a 1650Pixel example in the RAW
Conversion - Image Samples section of this article.
Camera
Jpeg 'Full Size' Images These are
more camera jpeg image samples, some are shot in good light and
some in very dismal light. There are also some matching 'RAW' to jpeg
1650Pixel conversion variants in the
RAW Conversion - Image Samples section of this article.
After discussions with PhaseOne relative to their Capture One
Pro 7.1.3 software, I have decided to remain with
Adobe Lightroom 5 Software.
I am sure that the X100s camera bundled SilkyPix software will
prove most excellent but I prefer Lightroom, especially for the
power of it's catalogues.
August 2013 -
I have upgraded to the latest version of
Lightroom 5 software and re-checked my 'RAW' images but I could
see no 'visible' improvement over the Lightroom 4.4
version that I had been using. There is no
Fujifilm X100s camera calibration profile or lens profile in
Adobe Lightrooom 5 software so I used the default Adobe
profile. You can modify many of the post processing settings
(e.g. colours, saturation, sharpness, noise reduction, etc)
and save them to a pre-set (or pre-sets) for later
selection to quick edit other 'RAW' image files.
Adobe Post Processing PC Display/Print Limitations -
It is interesting that
Fujifilm in their X100s owner's manual, state that with the camera set at the
L3:2 image size setting (4,896 x 3,264) the largest print expected
from the camera is 16" x 11" which is approximately A3. When you
digitally display the actual L3:2 image size on a PC screen at 100%
it actually measures out at around 47.5" x 31.6".
There is no doubt that the Fuji X100s images (camera jpegs
and post processed RAWs) can be digitally displayed or
printed above 16" x 11"
and if you are careful, you can increase the sharpness, contrast
and saturation amongst other settings up to your chosen size to
present a reasonably balanced image without any artifacts such
as
compressions or
a mottled effect (image breakup) but the possibility of
jaggies in non
vertical/horizontal lines may force lighter sharpening. In the end it is all about creating an digital
display and/or
gallery print that is post processed for a specific
viewing distance. For more information please
visit my article on
optimum image quality.
Adobe LR5 RAW Conversion for Gallery Prints - The new (August 2013) Adobe Lightroom
5 software is
excellent for post processing 'RAW' image files and converting
them to tiff format. With careful editing you can create a 100%
full size tiff image which is free from jaggies and compressions and can be used to produce
an excellent gallery print. The actual size of the final gallery
print is determined by how much sharpening has been applied in
post processing as in some cases a 100% print size (around
47.5" x 31.6")
may display a breakup in the rendition.
Adobe
LR5 RAW Conversion for PC Digital Display -
The new (August) Adobe Lightroom 5 software is excellent for post processing
but it has limitations with the X100s (.RAF) files in
relation to sharpening images for digital display as even the slightest over sharpening
will create a 'mottled' breakup of the image at 100% digital
viewing size.
On the other hand if you re-size and sharpen the image
(typically 2000/1650 Pixel sizes) the mottling effect cannot
readily be seen in a PC digital display. However,
the Fujifilm X100s camera does not have an anti-aliasing filter
and there is a
Catch-22
in that images that have
been re-sized and moderately sharpened, even large images at
2000/1650 Pixel sizes can digitally display
jaggies a stair
like effect on
non horizontal/vertical lines (e.g. railings, telephone wires,
window frames, tiles, gutters, etc) which will show jagged edges
or even in the case of rounded railings, you can see continuous
rotational edges. Unfortunately to
remove the jaggies means that you either have to blur
that part of the image in post processing using an adjustment brush (or
specialised software) or the image may
have to be presented without additional sharpening applied. Full
size 100% digitally displayed images do not seem to suffer from this problem as much but
then sharpening is restricted in any case to avoid the mottling
effect.
This 'jaggies' phenomenon is not restricted to the Fuji X100s
camera as it is common in other camera digital images that have
been re-sized and sharpened for PC digital display.
This RAW
converted jpeg image was shot with the camera 'hand held'
- the contrast and saturation have been raised in post processing
(Adobe Lightroom 4.4) for effect.
I have moderately sharpened the 1650Pixel version and
in the Full Size version, I have kept very slight sharpening to the
'mottling' threshold. You can see 'jaggies' in the rounded
railing top of the (left) 1650Pixel variant but not in
the (right) Full Size variant -
ISO:400 - Aperture f8 - Shutter 1/50secs -
White Balance and DR both set to AUTO
This is the camera produced jpeg version which has not been
altered but renamed for the web. The image properly reflects the
scene as it was a very dismal day -
Camera Jpeg Vs RAW Conversion - Adobe Lightroom 4.4 Comparison Both these images have been re-sized and sharpened using Adobe Lightroom
4.4 software.
The camera produced jpeg is on the left with a slight purple hue
to the sky. The camera jpeg appears to have less blue fringing
on the small leaves in the trees because the X100s camera jpeg
engine has done a better job than Lightroom which has failed (despite many automatic and
manual attempts) to remove the fringing in the RAW to
converted jpeg.
It appears that Lightroom lacks the proper X100s camera
calibration profile and lens profile to completely tackle the
fringing - quite a disappointment. However, in fairness to
Fujifilm, I have experienced the same
problem in this type of scene with my Canon L lenses and
although Adobe Lightroom 4.4 has a camera and lens profile for
the Canon kit, it could not remove the blue fringing in the
Canon RAW conversions to jpeg.
Camera Jpeg Vs RAW Conversion - Bundled SilkyPix Comparison
I used the same RAW image file and did some post processing
using the 'bundled' SilkyPix software that came with my Fuji
X100s camera. When you compare it to the camera jpeg file above
on the left the conversion is very similar, the blue fringing is
almost non existent, the far distant background is well balanced
(not bluish as in the Lightroom image) and the sky blue
is more balanced without the purple hue. All in all, it looks
like SilkyPix software is a better option for post processing
RAW image files of similar type scenes than Adobe Lightroom!
Adobe LR4 RAW Conversion/Colour Bleeding - There is
unfortunately
BLUE
colour bleeding on white in the image of the bar (see image
below) but you have to look
carefully and at 100% 'Full Size' to find it. On the table is a
black tray full of white serviettes and if you check out the
printing in the RAW to jpeg converted image you will see colour
bleeding but it is not visible in the camera produced jpeg
version. Unfortunately in some of my images where very small and
thin objects (e.g. light branches on trees, white wings of
seagulls) are set against a blue sky, then you can
visibility (at 100% size) see the white of the object
bleeding white out onto the blue background. In absolute
fairness to Fujifilm, I have seen this same phenomenon in 'RAW'
image files from other digital cameras which have been post
processed and converted to jpeg format using Adobe Lightroom
software.
Adobe LR4 RAW Conversion -
The following Fuji X100s jpeg images of the bar and the beer
glass were converted from RAW files post
processed in Adobe Lightroom 4.4 software. The camera was set
for Jpeg + RAW files so there are also FULL SIZE
camera produced jpeg images in the 300Pixel size sets, below the
600Pixel sets.
The post processing was minimal and as there is not a Fuji X100s camera
profile in LR4, I used the 'Adobe Standard' profile and boosted the
saturation, vibrancy, clarity, contrast and a little noise
reduction. There was no lens distortion correction, vignetting correction
or chromatic aberration removal applied. The images were
captured with the camera 'hand held' the lens wide open, no
flash was used
and the white balance was set to auto. The centre/spot autofocus was positioned on the
dead centre of the bar scene on the broad chrome support in the
first image and on the writing on the beer glass (then scene
re-aligned) in the second image.
There is a great deal of bokeh in the background of the images
with different colours well worth checking - I think the Fuji
X100s camera/lens does a great job wide open at aperture f2.
Please click on the 600 pixel image below which will open up a
2000Pixel
RAW conversion to Jpeg image, click on that and you will
open up a
'FULL SIZE' RAW conversion to Jpeg image.
ISO:800 - Aperture f2 - Shutter 1/75secs -
White Balance and DR both set to AUTO
Please click on the 600
pixel image below
which will open up a 2000Pixel
RAW conversion to Jpeg image, click on that and you will
open up a
'FULL SIZE' RAW conversion to Jpeg image.
ISO:1600 - Aperture f2 - Shutter 1/125secs
-
White Balance and DR both set to AUTO
These are
camera produced jpeg images of the above bar and beer glass
scenes which were shot alongside the RAW image files -
Adobe LR4 RAW
Black + White Conversion -
The following Fuji X100s jpeg image was converted from a colour RAW file post
processed in Adobe Lightroom 4.4 software. I 'hand held' the
camera to take the shot and it was post processed as follows -
The lens
tilt in the scene adjusted to straighten the vertical level
and image auto cropped in the process
Highlights lowered to drop the brightness in the sky
Graduated
filter applied from the base to top of main building to lift the
light in the foreground
Extra saturation and contrast applied
Vignetting applied
Colour
changed to black and white
The
600pixel and 2000pixel images were
re-sharpened when re-sized
Please click on the 600Pixel
image to open up a 2000Pixel variant -
ISO:200 - Aperture f8 - Shutter 1/60secs -
White Balance and DR both set to AUTO
The Cockenzie Power Station in East Lothian, Scotland ceased
operation in March 2013 and will soon be demolished. The harbour
will remain and as you view the image, the broad pier walkway on the
right was rebuilt in 1953 after the storm of that year breached
it and sent several very large pieces of stonework down onto
boats that were berthed in the harbour. My grandfather's boat
had it's engine smashed through the bottom and the remains of
the wooden hull drifted out and down the east coast for many
miles before it was recovered and brought back to Cockenzie.
Adobe Lightroom 4.4
Software - Colour 'RAW' to Jpeg Conversion This image
was shot with the camera 'hand held' and has been softened
with vignetting added in post processing and the
buildings brought back with increased clarity and sharpness. The
viewing distance from the screen should be around 2 feet or more
- please click on the 600Pixel
images to open up the 1650Pixel variants -
ISO:400 - Aperture f8 - Shutter 1/55secs -
White Balance and DR both set to AUTO
Cropped Images
- Adobe Lightroom 4.4
Software - Colour 'RAW' to Jpeg Conversions These shots were captured
with the camera hand held, AEL exposure locked and the
centre/spot autofocus was used on the tractors (+ the
pheasant), half shutter
button press/hold to lock AF and the scene re-aligned the
shutter button pressed fully home and shot taken. The 600Pixel variants of
these converted Jpeg images show the scene as captured - the
1650Pixel variants are the 'cropped' examples - post processed
in Lightroom. The
viewing distance from the screen should be around 2 feet or more
- please click on the 600Pixel
images to open up the 1650Pixel variants -
ISO:200 - Aperture f8 - Shutter 1/450secs -
White Balance and DR both set to AUTO
ISO:200 - Aperture f8 - Shutter 1/450secs
- White Balance and DR both set to AUTO
ISO:400 - Aperture f4 - Shutter 1/400secs
- White Balance and DR both set to AUTO
Adobe Lightroom 4.4
Software - Colour 'RAW' to Jpeg Conversion This ISO:3200,
aperture f2.8 image
was shot with the camera 'hand held' indoors without flash and
is part of a project that I am now working on using the Fuji
X100s - the image has not been cropped. The exposure metering
was set for multi-metering and the centre/spot autofocus was
positioned in the centre of the scene. I was amazed that even at
1/20sec shutter speed and without any image stabilisation, I
could achieve such a reasonably sharp image with the camera. The
image is part of the engine in a restored train. I post
processed the RAW image file using the Adobe Standard camera
calibration profile in Lightroom and raised the saturation,
contrast, sharpness and applied 25 noise reduction. Please click on the 600Pixel
image to open up the 1650Pixel variant -
ISO:3200 - Aperture f2.8 - Shutter 1/20secs -
White Balance and DR both set to AUTO
Development Latitude with Fujifilm X100s RAW Conversions - There is a
tremendous latitude in the Fuji X100s camera 'RAW' image files.
Whether you are using the bundled SilkyPix software that comes
with the camera or Adobe Lightroom 4.4 software, you can recover
images that have been underexposed/overexposed and also tweak
images to create atmosphere in their presentation.
In the following image of the farmhouse I was amazed that the electronic viewfinder coupled with the
exposure metering (multi-mode) displayed a very accurate
account of the scene, similar to what your eye experiences.
However, because there was bright snow in the foreground, I
think the (multi-mode) exposure metering setting balanced
out the view through the EVF because in normal circumstances
with the X100s EVF a bright skyline with a dark foreground tends
to open up the foreground whereby the sky could lose detail. In
any case, as usual with any digital camera, you may have to
open up the exposure to capture more detail in the foreground at
the expense of losing some of the cloud detail. The X100s
dynamic range is excellent but obviously there are limitations
with some scenes. In such instances, the answer is to open up
the exposure on the foreground and either fit a 2 stop graduated
screw filter to the lens (using the Fuji Adapter) to pull
back the cloud detail OR add a software graduated filter to the
skyline in post processing, provided you have managed to keep
some detail in the clouds when the shot was taken.
Farmhouse Image - Camera Produced Jpeg - Image Samples
It is relatively easy to display an image of a well lit scene on a
sunny day but I prefer to show a scene that is difficult to
shoot especially without a tripod or graduated filter and when
faced with oncoming light and a bright sun in the top left
corner - not a scene you would normally shoot at that time of
the day and you would probably wait until the sun had moved
behind you and shining on the front of the house. The following L3:2 image (4,896 x 3,264)
size
was captured in camera RAW + Jpeg mode. This camera produced
jpeg was shot 'hand held' and the scene captured was exactly as
the electronic viewfinder reflected it to my eye - the dynamic
range setting in the menu was set to AUTO. I made no attempt to use the
exposure compensation dial and adjust the (multi-mode)
exposure and lift the foreground light as I wanted the detail in
the clouds for the RAW development. I captured other variants of
this scene but with the foreground exposure lifted the sky was
almost white without any detail in the clouds. Check out the birds in
flight in the skyline and the bird on the top right roosting in
the tree - the centre spot focus was placed on the centre fir
tree just above the fencing.
Image 1 (600pixel) to Image 2
(1650pixel) to Image 3 (FULL SIZE)
The 3 images are from a camera produced jpeg and the 600Pixel
and 1650Pixel sizes have been re-sized (without any other
adjustments) using Adobe Lightroom 4.4 software.
Please click on the Image 1(600Pixel) and it will open up into two (1650Pixel/Full Size) variants by
clicking on each image -
ISO:200 - Aperture f8 - Shutter 1/500secs
- White Balance and DR both set to AUTO
Farmhouse Image -
Jpeg Converted Images - These are jpeg images converted from the RAW File Variant using
Adobe Lightroom 4.4 Software.
Image 1(600pixel) to Image 2(2000pixel) to
Image 3(FULL SIZE) The 3 images are jpegs converted from the RAW file with
extensive digital work and demonstrate the latitude of the RAW
post processing. I have listed the post processing -
The lens
tilt in the scene adjusted to straighten the vertical level
and image auto cropped in the process
Shadows
lifted to raise the light in the foreground
Graduated
filter applied from the base to rooftops - lifts the
(exposure) light in the foreground
Chromatic
aberration correction applied to reduce the red tinge in the
top of the tree branches
The sun
glinting through the tree branches (top/left) was
left to demonstrate the angled sun on the lens
Saturation, contrast and light sharpening applied and the
FULL SIZE image kept below the mottle threshold
The
600pixel and 2000pixel images were (hard)
re-sharpened when re-sized
Please click on Image 1(600Pixel) and it will open up into two (2000Pixel/Full Size) variants by
clicking on each image until you return to this page -
ISO:200 - Aperture f8 - Shutter 1/500secs
-
White Balance and DR both set to AUTO
The main reason for purchasing a
Fujifilm X100s digital camera is because it is compact and
lightweight for general use and street photography. However, I
also purchased my X100s as an alternative to a Canon 35mm L lens
for landscape photography. The following images were post
processed using Adobe Lightroom 4.4 software and the shot settings can be
found on the 1650Pixel display plates.
Manual
Focus Peaking - Tripod - Self Timer
The Fujifilm X100s camera does not have a camera calibration or
lens profile in Adobe Lightroom 4.4 software, instead it uses
the default Adobe profile. The colours are very good but tend to
err towards the colder side which is more apparent in landscape
images. The image above has not been altered for temperature or
tint and I used the aforesaid Adobe profile.
The image below has been altered towards a much warmer delivery
which is easily seen in the white clouds to the left. Post
processing and producing a final image to your own taste might
not suit everyone but Adobe Lightroom 4.4 software is very
flexible and even with the limitations of the camera (Adobe)
calibration profile, you can produce some very nice pre-sets.
Manual
Focus Peaking - Tripod - Self Timer
September 2013 - Software Updates
PhaseOne Capture One 7.1.3 Software -
At present (September 2013) Capture One (C1) does
not have the ability to store RAW files along with their edit
record files (.xmp in Lightroom) in the same directory. The edit
record files are created in the catalogue directory. If you then
create another new catalogue and use some of the same RAW image
files, you will then have to start the edit all over again and
once more the edit record data is stored in a file in the new
catalogue.
This is not an issue for editing and converting tiff, jpeg image
files for gallery prints but it is a serious issue if you use a
number of catalogues and their own web creation section to
create a number of sub photo webs for the internet where some of
images used are converted from the same RAW image files.
PhaseOne Capture One 7.1.3 software supports the Fujifilm X100s
camera.
In C1 you can export a RAW file to a new directory, which will
collect the edit record file from the catalogue and place both
in the new directory. However, this takes up disc space on your
storage device and is time consuming. When you then access the
RAW file in it's new position from a new catalogue, the edit
record activates but if you then make any further edits the edit
record is amended in a new edit record file in the new catalogue
directory.
Adobe Lightroom 5 Software -
Using Lightroom 5 (September 2013 download) you can move a RAW file around anywhere, to
any directory, any storage device and as long as you copy it's .xmp
edit record file along with it you can start a new catalogue,
import the RAW file and the edit record is maintained. You can
leave a RAW file and it's .xmp edit record file in a central
storage directory and access it from any catalogue. WARNING:
If you edit the RAW file again from any catalogue the .xmp file
is updated and the changes are reflected in all your catalogues.
Secure RAW Files -
Using either Capture One 7.1.3 or Adobe Lightroom 5
software, a RAW file is never actually edited or changed in any
way (unless you rename it) - the edit record file holds
the reflected changes. I always make copies (archive the
originals) of my RAW files, so that I can rename the copies,
create edit records and use the jpeg conversions for my webs. ____________________________________________________ The Fuji X100s Camera
Body
The Fuji X100s is a beautiful piece of kit and very well build.
The dials and buttons are all very positive in use and
compliment the retro style of the camera.
I like the size of
the X100s which is slightly larger than my current Panasonic GF1
Micro 4/3rds camera and this is not a bad thing as it suits my
large hands and is slightly easier to manually control.
Electronic/Optical Viewfinder - The
RED
spot front lever is perfectly positioned for a quick finger flip
to toggle between the optical and the electronic viewfinder - see full coverage
of the viewfinder in
other sections of this article further down the page.
Display Screen Data - I use the (all ticked) custom display
for the electronic viewfinder/optical viewfinder and the LCD
screen. It has the 9 zone lines and an artificial horizon indicator line which glows
green when the camera is horizontal. The display also has a
histogram on the bottom left corner of the screen, a blue
distance (metre) scale along the bottom of the screen, a
exposure composition scale on the left side of the screen as
well as many other icons including A
for aperture priority, ISO, shutter and aperture ratings.
The optical viewfinder also has a (toggle using the rear
DISPLAY button) clean frame outline display with minimal
icons and a blue distance scale bar (blue bar only in manual
focus mode) on the
bottom which accurately displays the distance that you have the
lens manual focus set at.
Main Menu + Q (quick) Menu - I am no
problem with either of these menus for accessing, scrolling
through and changing the settings. The buttons and dials do most
of the work in any case.
LCD Screen -
I feel that the LCD screen
could easily be scratched and it lacks real firmness for
cleaning. In fairness to
Fujifilm, I have
experienced the same on other more expensive cameras and my
answer is to strengthen it using a standard 3"
Giottos
LCD screen (glass) protector.
It's not in-expensive but it converts the X100s LCD into a
screen that is more robust.
Please check out my
accessories listfor how to fit. Command Dial and the Command Control Wheel -
I have read that some
photographers have complained about these controls but I like them. They are different in
build to similar placed dials on my other cameras but once you
start to use them, they pose no problem. The rear/top
Command Control Wheel is the one to remember - it has a
little raised notch on the wheel which requires a very light
touch to flick it right or left to make your setting adjustment
or a light ON/OFF press or a light HELD press for other setting
controls. You will get no result from this wheel if you press it
hard and try to turn it!
Switches/Dials - The on/off power switch has a firm click
to it and is robust in design. The shutter and exposure dials
have a reassuring feel to them and like the on/off switch they
have firm movements and solid clicks when you adjust the various
settings. I am not so enthusiastic about the Focus Mode Selector
switch on the side of the camera which slides up and down and
reminds me of those horrible cheap torch on/off switches that
wear out over time and eventually fail to make a power contact.
However, there does not seem to be any bad reports regarding
this switch on the previous model (Fuji X100) so
hopefully my fears will be unjustified!
Shutter Sound - The shutter sound can be lowered or
raised (in the menu) but out of the box it sounded just
fine. It can be heard by the photographer as a very quiet click
but I doubt if anyone else would hear it or if they did, they
might have trouble sourcing it back to the camera. Ideal for
street photography and also casual photography in social
company.
Exposure Metering + Dynamic Range - At present, I have
the exposure meter set-up for multi-pattern metering and the DR in the main
menu set to AUTO. My experience so far of using the DR set to
AUTO and comparing it to the DR 100% setting for the ISO:200
range is that 75% of the time the exposure meter readings are
the same but on the other 25% the DR set to AUTO tends to
underexpose/overexpose by 1/3rd stop up to 1 stop. It appears
that there is a greater occurrence of incorrect exposure when
the shutter button is used to lock the exposure + the
centre/spot autofocus point together on a subject. This area is still a
work in progress but as I use aperture priority mode and
manually selected ISO settings (not auto ISO) my initial
reaction is to leave DR set to AUTO and
concentrate on the histogram and exposure compensation controls
to set-up my exposure and lock it using the
(toggle on/off) AEL button.I
am then free to place the centre/spot on my point of autofocus
and lock it using a half/press hold of the shutter button
(does not affect my already AEL locked exposure),
re-align the scene if necessary and press fully home to take the
shot. Also read the
Electronic Viewfinder Section
regarding the effect on the EVF of locking the exposure using
the AEL button.
Shutter Speed Restrictions at Aperture Settings - There
are (unfortunately) restrictions on the shutter speed at
certain apertures due to the internal shutter mechanism which is
apparently built into the lens. I have laid out a table as a
guidance -
Aperture
1/4000sec
1/2000sec
1/1000sec
f2
Not Available
Not
Available
Available
f2.8
Not
Available
Not
Available
Available
f4
Not
Available
Available
Available
f5.6
Not
Available
Available
Available
f8 - f11 - f16
Available
Available
Available
ND Filter - The neutral density (3 stop) filter
can be used to reduce the shutter speed when the aperture used
(e.g. f2)
dictates that the shutter speed is pushed beyond it's limit
(e.g. 1/1000sec)
and allows the camera to read the correct exposure. The ND
filter can also be used (with the camera on a tripod/timer)
for stopped down apertures (e.g. f16) to slow the shutter
right down for creating (e.g. frothy water) effects.
The only downside is that I use the aperture priority mode, so I
have to enter the main menu (in shooting mode) to change
the ND filter to ON and unfortunately I have to remember to
switch it back to OFF.
Battery - I have tested the supplied battery for shots
per charge and I managed to achieve 128 RAWS + 128 Jpegs (256
total) before the battery displayed a
RED WARNING
and shut down the camera. I did check all the captured
images using the LCD screen which was active (eye switchable)
with the electronic viewfinder, when the camera shutdown. I
have noticed that the battery indicator can be showing 1/3rd
charge left and the next minute the
RED WARNING
light (battery shape icon) appears on the screen. The
battery then takes around 2 to 2.5 hours to re-charge. Normally
I don't take a great deal of shots on any outing but the battery
life is poor compared to other cameras that I use, so I will
require a spare battery. I have now been using the supplied
battery for a couple of months and I have noticed that it's
ability to hold a charge has improved with each charge of the
battery (from near flat) but recently (May 2013) I
purchased a spare (Fuji Branded) battery as a backup for
my street photography.
Adapter/Filter/Hood Assembly -
I have added
the Fuji filter adapter, B+W
MRC UV 49mm filter and the Fuji lens hood which all compliment
the build of the camera as they are all beautifully
manufactured. I leave the adapter/filter/lens hood permanently
fitted and the camera looks great. I have fitted a Gariz wrist
strap as opposed to the supplied shoulder strap and I like to
carry the camera with my hand cupped around the base and my
thumb between the hood and body.
I have no argument with the manual controls as the buttons are
all perfectly placed and (for my needs) I will very
rarely visit the Q menu. In any case, I do not have a problem
with the menu system on the Fuji X100s, it is well laid out and
relatively easy to use but in reality the camera begs to be used
as befitting its' retro style dials and buttons.
Remote Shutter Cable/Tripod -
I like that I can use my old fashioned wire remote from my Nikon
FM3a Film SLR which can be screwed
into the top of the X100s shutter button. The remote is about 6"
in size and is great for popping in the camera bag, goes well
with my TrekPod GO Pro walking stick/monopod/tripod. It is great
for tripod work as it has a beautiful plunger that I press down
to activate the shutter and take the shot - very retro. You can
purchase a modern one (albeit a lot longer) from
Amazon.co.uk - http://www.amazon.co.uk
The
Fujifilm X100s compact is proving to be an excellent choice of
camera and I am now getting to grips with the autofocus. Initially I had problems with the AF-S
area/centre/spot autofocus which would not lock onto certain
subjects, typically in very low light, close-up flowers and subjects
with a large colour areas (e.g. clear blue skies, large
doors)but generally for 98% of my shots
the autofocus was fast and accurate enough to deliver a very
high keeper rate. On the odd occasion the autofocus went into
free fall and refused to lock onto anything but I established
that this invariably happened when there was a large movement in
the lens glass typically shooting a close up subject and then
shooting a subject near or at infinity and vice versa. The
answer is to keep the lens glass near the centre of its travel
distance for general distance (e.g. street photography)
shooting. I also found that separating the exposure, by adjusting it
and locking it, using the AEL button, BEFORE the
half/press/hold of the shutter button to lock the autofocus on a
subject, delivered the 'optimum' exposure and autofocus
accuracy.
Simple Mistake
- Out of the blue, I discovered a simple mistake to make. It was
nearing dusk and the sun was dropping on the barns in the far
field at my home and I was
trying to get the camera to autofocus on the main building but
it would just come up with the
RED
rectangle error. I was in a hurry to
catch the light and get the shot; I tried other areas of the landscape scene but
still the
RED
rectangle error came on in the viewfinder and the autofocus
would not lock. Everything was set to my normal settings in the
viewfinder and I was starting to panic that the camera had
developed a fault, when I finally noticed that the macro light was on -
the camera was in macro mode - duh!
Autofocus Limitations - Overview Section
Speed - The autofocus
(half press/hold shutter button) is not lightning fast but nevertheless it is acceptable. The AF
appears to be very
slightly slower using the optical viewfinder
(faster with the optical viewfinder power save switched off)
but again (for
my uses) acceptable. I have found that switching the auto
capture preview display to OFF and using the optical viewfinder plain view
display (power save switched off), I get the optimum speed out of the camera bearing in
mind that I am shooting Fine Jpeg + RAW image files.
Large Single Contrast Areas -
When I use centre/spot autofocus there are occasions when it
refuses to lock on to an area in a scene (e.g. clear blue
skies, coloured door)
so I quickly focus on another area (e.g. distant trees, the door edge)
lock the focus by using a half/press hold of the shutter button,
re-align the scene and press the shutter button down to take the
shot.
I have to watch that I do not overlap my centre/spot (AF/Area) autofocus rectangle over the edge
of a primary subject in the foreground with an area in the
background (or foreground) as it can throw the autofocus
off whereby the primary subject appears to be sharp in the LCD
screen playback display but it is actually slightly blurred when
the image is viewed at 100% full size or even when
re-sized/re-sharpened for a digital display. This is more
apparent with images that have been captured using apertures
(f2-f4) which produce less depth of field. These are rare
occurrences as I can shoot street photography all day with the
area/centre spot autofocus (AF rectangle at full size)
and yet achieve an exceptionally high keeper rate. For difficult scenes and if in doubt and there is time, I use
manual focus peaking instead of autofocus.
When shooting images that are
close up, especially macro type images with a wide open aperture
like f2, I would normally use a tripod and the lens manually
with the focus peaking aid but on this occasion, I used the
camera hand held and (not macro mode) centre/spot
autofocus. I was disappointed with the (half press/hold shutter button)
autofocus as I tried
many times to get it to lock onto the petals of the flower
(even slightly further away) but without any success.
Finally it managed to lock onto the small buds below the flower
which have turned out rather nice, you can even see a small
water droplet on them. At aperture f2 the depth of field is very
thin as the subject is very close. I have a solution to this
problem (using step down) as explained in the
paragraph below.
Stepping Down the Autofocus Distance -
I have established that when I
have a problem with the
(half press/hold shutter button) autofocus locking onto a close up subject, I can step
down the
centre/spot autofocus by starting to lock
onto the subject from about 3 feet away, then lock on at 2 feet
away and so on until I reach the desired close up distance.
Surprisingly, this actually works virtually every time and
appears to have everything to do with the distance of travel of
the glass in the lens during autofocus. It is
more accurate than autofocusing at infinity and then back onto
the close up subject when (on occasions) I have
experienced that the
AF will JUST NOT lock-on,
even with the AF Illuminator
set to ON in the menu.
This can happen at any
subject distance and
invariably the shot is lost
as the AF will hunt and hunt
and the camera seems to go
into a tailspin. It happens
at all aperture settings; it
is not frequent but when it
does happen you can have a
devil of a job to get the AF
to re-engage. I am not sure
100% that it is relative to
the subject contrast material as the
camera behaves
(sometimes) like a
falling plane with the pilot
trying to get the engine to
start and when it does the
AF locks on to the original
subject like a ferret on a
rabbit, very fast and deadly
accurate.
I established that this invariably happened when there was a
large movement in the lens glass typically shooting a close up
subject and then shooting a subject near or at infinity and vice
versa. The answer is to keep the lens glass near the centre of
its travel distance for general distance (e.g. street photography)
shooting. I also found that separating the exposure, by adjusting it
and locking it, using the AEL button, BEFORE the
half/press/hold of the shutter button to lock the autofocus on a
subject, delivered the 'optimum' exposure and autofocus
accuracy.
Taking steps
down to the close up range works and the following image is a
good example. With this flower I tried everything to get the AF
to lock on, even drawing slightly back in case I was too near
(I was not using macro mode) but without success. Using the
step down method (as described above) the AF locked on
every time. The flower is actually 1.25" (31.75mm) in
size - across the petals and
I post processed the 'RAW' image file and converted it to a jpeg
using Adobe Lightroom 4.4 software - the
image has not been cropped.
The lens is very well made with a 'smooth motion' manual focus ring and
behind it an aperture ring with click stops and two raised
ridges for your finger and thumb to grip on either side which
makes changing the aperture setting whilst the camera viewfinder
is up at your eye most enjoyable. Any aperture change is
reflected in the (both) viewfinder so you don't have to
take your eye away to make the aperture change.
Lens Performance -
Border Weakness - Field Curvature - With a L3:2 image size setting
(4,896 x 3,264) viewed at 100% digital viewing size, it
is possible to see the weaknesses
in the resolution of the lens
at certain apertures. The lens centre resolution rises and
peaks at apertures f4, f5.6 and f8 before gradually falling off
at f11 and f16. The borders gradually rise in resolution from
aperture f8 until they almost match the best centre resolution
of the lens at f16 - yes the borders are softer but in
comparison to other lenses, even some of the more expensive
primes, the image quality remains excellent. There is a
crossover in resolution between the centre and the borders and I
reckon the optimum aperture for the best overall image image
quality has to be f8 based on placing the centre performance as
the primary objective. There is no doubt that my lens has some
sort of 'field curvature' weakness which can be seen (some
images) in landscapes shot at infinity. This is seen as a
border resolution weakness and in some cases can only be seen on
one side of the image. This is more apparent if the lens is
positioned to the right (or left) and off centre to the
scene when the shot was taken. The further the landscape
scene is away from the lens the more apparent the border
weakness becomes but more so with infinity focusing. It may well
be lens 'field curvature' and I suspect it is in the design and
build of the 23mm lens (rather than a poor copy). At
aperture f16 with an infinity focus landscape shot, the border
edges display the optimum resolution, however at f16 the lens
centre is at maximum diffraction and
it's resolution is
therefore weaker. In any case
up to A3 display/print size it is much harder to recognise any
resolution deficiencies in the lens.
Adapter/Filter/Hood Assembly -
I have added
the Fuji filter adapter, B+W
MRC UV 49mm filter and the Fuji lens hood which all compliment
the build of the camera as they are all beautifully
manufactured. I leave the adapter/filter/lens hood permanently
fitted and the camera looks great. I have fitted a Gariz wrist
strap as opposed to the supplied shoulder strap and I like to
carry the camera with my hand cupped around the base and my
thumb between the hood and body.
I have no argument with the manual controls as the buttons are
all perfectly placed and (for my needs) I will very
rarely visit the Q menu. In any case, I do not have a problem
with the menu system on the Fuji X100s, it is well laid out and
relatively easy to use but in reality the camera begs to be used
as befitting its' retro style dials and buttons.
Manual Mode Learning
Curve -
No digital camera is
perfect, otherwise we would
all probably
purchase
just one in our lifetime and
the camera manufacturers
would be out of business.
The Fujifilm X100s with it's
fixed 23mm (35mm field of
view) lens is fairly
close to the mark for general everyday use and special projects.
It's not a camera that is
instantly useable (manual
mode) without a breaking in period, there is a learning
curve in it's handling and I guess that is why there are a few
negative reports on the gear forums regarding the X100s. I am
still learning and I have been using it (May
2013) for 2
months.
Exposure Wrinkles - The exposure metering is probably the main area that catches out
the camera jpeg shooters who report overexposure in a number of
their shots.
At present, I have
the exposure meter set-up for multi-pattern metering and the DR in the main
menu set to AUTO. My experience so far of using the DR set to
AUTO and comparing it to the DR 100% setting for the ISO:200
range is that 75% of the time the exposure meter readings are
the same but on the other 25% the DR set to AUTO tends to
underexpose/overexpose by 1/3rd stop up to 1 stop. It appears
that there is a greater occurrence of incorrect exposure when
the shutter button is used to lock the exposure + the
centre/spot autofocus point together on a subject. This area is still a
work in progress but as I use aperture priority mode and
manually selected ISO settings (not auto ISO) my initial
reaction is to leave DR set to AUTO and
concentrate on the histogram and exposure compensation controls
to set-up my exposure and lock it using the
(toggle on/off) AEL button.I
am then free to place the centre/spot on my point of autofocus
and lock it using a half/press hold of the shutter button
(does not affect my already AEL locked exposure),
re-align the scene if necessary and press fully home to take the
shot. Also read the
Electronic Viewfinder Section
regarding the effect on the EVF of locking the exposure using
the AEL button.
Lens Resolving Distance -
The Fuji X100s camera lens is very capable and even without a
tripod or image stabilisation and when hand held it manages to
deliver excellent images. With the lens aperture set to f2 wide
open at ISO:3200 or even ISO:200 the image quality is very good.
At aperture f8 it manages to deliver very reasonable landscape
images and with a decent depth of field. I am still shooting
camera jpegs + RAW image files but for best image quality the
RAW image files, properly post processed, come out marginally
ahead. Every lens has limitations for resolving very distant
subjects (houses, fences, hedges, trees, ships) in
landscape shots, especially without a tripod but overall the
X100s 23mm fixed lens performs very well in this respect.
Re-sized, re-sharpened digital images for the web cannot
properly demonstrate the qualities of the lens as
jaggies
or
compressions
often materalise but no such problems arise when post processing
a raw image file to tiff or jpeg format (without re-sizing)
for a gallery print.
This is a jpeg image that has
been converted from a 'RAW' image file using Adobe Lightroom 4.4
software and it was shot with the camera 'hand held' at aperture
f8 - the lens has managed to resolve
the distant landscape rather well.
Comparing the Landscape Image from a Canon 5D MK I DSLR Camera Combo
Hand held camera shots should be avoided for serious landscape
photography and a tripod used instead but most photographers
purchase the Fujifilm X100s camera for it's compactness and in
many cases, specifically for street photography. For indoors,
street photography and with subjects that are relatively close,
the image quality from the X100s is exceptional but it is very
hard to judge just how good the X100s lens is with distant
landscape shots. It appears to be very good but then it should
be for a camera that costs around £1,000.00 in the UK.
Below is a 'RAW' conversion to jpeg comparison image taken with
a 35mm full frame, Canon 5D MK 1 DSLR Camera with a 12MPixel
sensor + Canon 24-105L Zoom Lens 'hand held' shot at 24mm focal
length (24mm field of view) -
Below is a 'RAW' conversion to jpeg comparison image taken with
the Fuji X100s Camera with a 16MPixel sensor 'hand held' shot at
23mm focal length (35mm field of view) -
Below is a 'RAW' conversion to jpeg comparison image taken with
a Sony Alpha A57 SLT camera(hand held) with a
relatively in-expensive Sony DT 35mm f1.8 SAM prime lens with a
52mm field of view. The shot settings are ISO:100, aperture f5.6
and shutter 1/320sec. The Sony combo costs £514.00 vat
inclusive in the UK.
Autofocus & Manual Focus - I
have found that the autofocus in normal lens mode and macro mode
is not always consistent for close distance. Sometimes I can autofocus
closer (on the same subject) in both modes, especially
after first using manual focus and the focus peaking aid. In any
case, using focus peaking and manual focusing, I can get much
closer to the subject in normal and macro mode.
I
have the filter adapter, UV filter and lens hood fitted and I
have checked that my B+W 49mm UV filter clears the lens movement
as it extends.
Manual Focus Ring -
I mainly use autofocus for speed but on the occasions when I
have tried out the manual focus ring of the lens, I find it
pleasingly responsive
and the manual focus ring throw is exactly half a turn between
0.1 metre to 0.5 metres and
again another half turn from 0.5 metres to infinity.
However, I tried using my thumb and finger
to rotate it and they started to cramp up (age thing)
especially when they were brushing past a raised ridge of the
aperture ring and in-between the small space between the
aperture ring and the back of the lens hood. I have now started to rest my thumb under the
camera on the left
bottom side of the base and using my index finger to rotate the
manual focus ring. Without doubt, if I removed the adapter,
filter and lens hood assembly, I would have much more room to
operate the manual focus ring.
For me this will not be a serious problem as I will only be
using the manual focus in extreme conditions where the AF will
not lock on or for tripod work.
Street Photography -
Many photographers will prefer to use the optical viewfinder for
street photography and using the lens, some prefer autofocus and
others manual focus.
The autofocus is
very slightly slower when using the optical viewfinder but
nevertheless with a spot/centre autofocus focus point it does a
great job. Using the optical viewfinder, the lens in manual
focus mode has no manual focus aids other than a
blue bar distance (metres) scale
displayed on the bottom of the optical viewfinder. Using the
blue bar distance scale you could set-up the focus of the lens
by applying the hyperfocal infinity method
or a pre-determined depth of field. There is no doubt that the ultimate shooting speed is
achieved by this approach, even faster than autofocus using the
electronic viewfinder. However, one must take into account that
it will prove slower to isolate subjects from the background and
that is where exposure lock,
autofocus
lock and using the electronic viewfinder come into their own.
To get the maximum speed out of the camera,
switch the optical viewfinder power save to OFF and the capture
preview to OFF.
The lens can be used in
hyperfocal mode by
switching the camera Focus Selector switch to manual and using the blue
distance/metre scale on the bottom of the
viewfinder OVF/EVF + LCD screen
to the required distance setting to match the aperture depth of
field.
There is no
depth of field scale on the
lens but with practice I reckon I will figure out the ratio
between the aperture settings and the blue bar distance (metres) scale
in the viewfinder OVF/EVF + LCD screen.
Also, infinity is clearly marked on the blue bar scale so for speed you
can set aperture f8 and use hyperfocal mode back from infinity
which should cover most street shots. The lens manual focus ring
throw is exactly half a turn between 0.1 metre to 0.5 metres and
again another half turn from 0.5 metres to infinity. In manual
focus mode, If you set the lens up for a set distance and then
switch the camera off and later back on, the lens will return to
that same set distance - PROVIDED the camera remains in
manual focus mode all the time. ____________________________________________________ Camera Faults Database
19th March 2013 -
Camera delivered - set-up with accessories and in working order.
3" Giottos Screen - Slight Flaw - Since purchasing the camera and the Giottos
screen, I have noticed that in the very cold spell that we had
here in Scotland and when the camera body was very cold, a tiny bubble appeared in the centre of the screen which I reckon
was caused by the back of the Giottos
screen slightly touching the LCD screen of the camera. This bubble disappears when the camera body heats up and is not
a problem in warm weather. I have never had any problems with Giottos
screens on my other cameras but obviously there is tight gap
between the two screens on the X100s which is drawn closer at
one point when the camera body is very cold.
3rd April 2013 - Whilst shooting in aperture priority
mode and having captured about 5 (RAW + Jpeg) images -
then on locking the exposure using the AEL button and
half/pressing the shutter button to autofocus, the camera locked
up and the display of the scene in the electronic viewfinder was
replaced with a compact mosaic pattern. I had to remove the
battery to unlock the camera controls and start again. To date
(23rd May 2020) this has not happened again.
11th June 2013 - Autofocus - Initially I had problems with the AF-S
area/centre/spot autofocus which would not lock onto certain
subjects, typically in very low light, close-up flowers and subjects
with a large colour areas (e.g. clear blue skies, large
doors)but generally for 98% of my shots
the autofocus was fast and accurate enough to deliver a very
high keeper rate. On the odd occasion the autofocus went into
free fall and refused to lock onto anything but I established
that this invariably happened when there was a large movement in
the lens glass typically shooting a close up subject and then
shooting a subject near or at infinity and vice versa. The
answer is to keep the lens glass near the centre of its travel
distance for general distance (e.g. street photography)
shooting. I also found that separating the exposure, by adjusting it
and locking it, using the AEL button, BEFORE the
half/press/hold of the shutter button to lock the autofocus on a
subject, delivered the 'optimum' exposure and autofocus
accuracy. ____________________________________________________ Optimum Image Quality
Camera Produced Jpeg Image Files and HD TV Display
I have not really spent a great deal of time in setting up the
Fujifilm X100s for camera jpeg shots, its something I have
neglected as I prefer to shoot in 'RAW' image file mode. I have
my camera jpeg saturation and sharpness both set to +2 in the
menu settings. The saturation is probably better at +1 as the
camera jpeg image skin tones, especially the lips are verging on
the red and this is more noticeable on a HD TV display.
Interestingly enough the full size camera jpegs when displayed
on a PC screen at 100% are not that attractive and are better
restricted to around the A3 size or very slightly larger for
viewing BUT on a HD television screen, WOW, you can
really see the clarity, the detail, the sharpness at way beyond
A3 display size. I only found this out the other day as I don't
own a HD TV.
Adobe Post Processing PC Display/Print Limitations -
It is interesting that
Fujifilm in their X100s owner's manual, state that with the camera set at the
L3:2 image size setting (4,896 x 3,264) the largest print expected
from the camera is 16" x 11" which is approximately A3. When you
digitally display the actual L3:2 image size on a PC screen at 100%
it actually measures out at around 47.5" x 31.6".
There is no doubt that the Fuji X100s images (camera jpegs
and post processed RAWs) can be digitally displayed or
printed above 16" x 11"
and if you are careful, you can increase the sharpness, contrast
and saturation amongst other settings up to your chosen size to
present a reasonably balanced image without any artifacts such
as
compressions or
a mottled effect (image breakup) but the possibility of
jaggies in non
vertical/horizontal lines may force lighter sharpening. In the end it is all about creating an digital
display and/or gallery print that is post processed for a specific
viewing distance. For more information please
visit my article on
optimum image quality.
Adobe LR5 RAW Conversion for Gallery Prints -
The new (August 2013) Adobe Lightroom 5 software is
excellent for post processing 'RAW' image files and converting
them to tiff format. With careful editing you can create a 100%
full size tiff image which is free from jaggies and compressions and can be used to produce
an excellent gallery print. The actual size of the final gallery
print is determined by how much sharpening has been applied in
post processing as in some cases a 100% print size (around
47.5" x 31.6")
may display a breakup in the rendition.
Adobe
LR5 RAW Conversion for PC Digital Display - The new (August 2013) Adobe Lightroom
5 software is excellent for post processing
but it has limitations with the X100s (.RAF) files in
relation to sharpening images for PC digital display as even the slightest over sharpening
will create a 'mottled' breakup of the image at 100% digital
viewing size.
On the other hand if you re-size and sharpen the image
(typically 2000/1650 Pixel sizes) the mottling effect cannot
readily be seen in a PC digital display. However,
the Fujifilm X100s camera does not have an anti-aliasing filter
and there is a
Catch-22
in that images that have
been re-sized and moderately sharpened, even large images at
2000/1650 Pixel sizes can digitally display
jaggies a stair
like effect on
non horizontal/vertical lines (e.g. railings, telephone wires,
window frames, tiles, gutters, etc) which will show jagged edges
or even in the case of rounded railings, you can see continuous
rotational edges. Unfortunately to
remove the jaggies means that you either have to blur
that part of the image in post processing using an adjustment brush (or
specialised software) or the image may
have to be presented without additional sharpening applied. Full
size 100% digitally displayed images do not seem to suffer from this problem as much but
then sharpening is restricted in any case to avoid the mottling
effect.
This 'jaggies' phenomenon is not restricted to the Fuji X100s
camera as it is common in other camera digital images that have
been re-sized and sharpened for digital display.
This jpeg image has been converted
from a 'RAW' image file using Adobe Lightroom 4.4 software and
it was slightly cropped for effect. It was captured (aperture
priority mode) using the LCD screen with the camera hand
held in one hand and shot through the thick glass of my patio
door - the pheasant is wild but comes up to my house for
handouts; hence his tameness in front of the camera. He is in
full colour for the mating season and already has one hen that
he brings along to get fed. The Fuji X100s handled the shot very
well considering that he was bopping and moving around, pausing
only for a split second for this shot to be taken. Please click
on the 600pixel image to open up a 1650pixel size image.
ISO:400 - Aperture f4 - Shutter 1/180secs -
White Balance and DR both set to AUTO
Full Frame -
Even at around
47.5" x 31.6" when digitally displayed at 100% an ISO:200
rated jpeg image produced from the Fuji X100s camera is probably
up there with a similar image produced from a 35mm 'full frame'
digital camera. The X100s jpeg image files are very clean and
the RAW files are excellent for post processing with a great
deal of latitude, although the caveat for X100s RAW (.RAF) files is that you require
compatible software - please see the section in this article on
RAW Developer Software.
Exposure Metering + Dynamic Range -
At present, I have the exposure meter set-up for multi-pattern
metering and the DR in the main menu set to AUTO. My experience
so far of using the DR set to AUTO and comparing it to the DR
100% setting for the ISO:200 range is that 75% of the time the
exposure meter readings are the same but on the other 25% the DR
set to AUTO tends to underexpose/overexpose by 1/3rd stop up to
1 stop. It appears that there is a greater occurrence of
incorrect exposure when the shutter button is used to lock the
exposure + the centre/spot autofocus point together on a
subject. This area is still a
work in progress but as I use aperture priority mode and
manually selected ISO settings (not auto ISO) my initial
reaction is to leave DR set to AUTO and
concentrate on the histogram and exposure compensation controls
to set-up my exposure and lock it using the
(toggle on/off) AEL button.I
am then free to place the centre/spot on my point of autofocus
and lock it using a half/press hold of the shutter button
(does not affect my already AEL locked exposure),
re-align the scene if necessary and press fully home to take the
shot. Also read the
Electronic Viewfinder Section
regarding the effect on the EVF of locking the exposure using
the AEL button.
Opening up Dynamic Range - For (tripod/remote)
landscape photography and even photography on the hoof you can
squeeze more dynamic range out of the Fuji X100s camera and
create effects using hardware filters. These come into their own for that important capture and
especially if the scene has very uneven light (very bright
skyline against a dark foreground). I use Lee filters with
my Canon 5D MK I DSLR camera system and now Lee Filters have
introduced a compact kit for cameras including the Fuji X100s
called the Seven5 Micro Filter System. You can use this with the
X100s but you will require the Fuji adapter which allows the Lee
Seven5
screw on 49mm adapter to be fitted to the front of the
lens. Please read my
Lee Filter Article for more
information and links regarding the Lee Filter Seven5 Micro
Filter System.
For Autofocus - I have to watch that I do not overlap my
centre/spot (AF/Area) autofocus rectangle over the edge
of a primary subject in the foreground with an area in the
background (or foreground) as it can throw the autofocus
off whereby the primary subject appears to be sharp in the LCD
screen playback display but it is actually slightly blurred when
the image is viewed at 100% full size or even when
re-sized/re-sharpened for a digital display. This is more
apparent with images that have been captured using apertures
(f2-f4) which produce less depth of field. If in doubt and
there is time, I use manual focus peaking instead of autofocus.
Low Light -
The image quality at
ISO:3200 and aperture f2 (lens wide open) is
excellent but when working in low light and for a reasonable
increase in depth of field the f2.8 aperture is a far better
choice. The following image was captured with the camera 'hand
held' and is a jpeg converted from a RAW file -
ISO:3200 - Aperture f2 - Shutter 1/40secs -
White Balance and DR both set to AUTO
Black and White Conversions - At present, I am using Adobe Lightroom
4.4 software to post process my colour 'RAW' file images and
convert them to black and white jpegs. This image is a good
example of a black and white conversion from a 'RAW image file
captured using ISO:3200 at aperture f2.8 - it has been HARD
sharpened and I have added some vignetting in post processing.
When re-sharpening the 1650Pixel (click image below to open) variant
I did encounter 'jaggies' along the top of the case in the
forefront but I was able to reduce them by adjusting the clarity
along the top using the adjustment brush in Lightroom. The 'jaggies'
are not present in the full size image variant (display or
print) and as expected,
without any HARD sharpening, the 'jaggies' are almost non
existent in the re-sized web display variants -
I have set-up the Fuji X100s camera similar to a Lecia rangefinder but only switching to manual
focusing (electronic viewfinder) and the focus peaking aid when the autofocus fails.
Originally, I was using the manual focus split/image system which is similar to that on my
film Nikon FM3a SLR camera but focus peaking (for me) is
now the better option.
My camera is set-up in Aperture Priority Mode
A(shooting RAW + JPEG)
which on power up will reflect my aperture priority settings
including any Main menu or Q menu edits whilst in previous use.
I have
also set-up a Custom 1
sub menu to reflect my aperture priority (jpeg file image)
settings because if I want to restore those
to my aperture priority mode default settings, all I have to do is select Custom 1
from the camera Main menu or the Q button/menu.
Custom 1 or 2 or 3 Sub Menu Settings
ISO
Dynamic Range
Film Simulation
White Balance
Color
Sharpness
Highlight Tone
Shadow Tone
Noise Reduction
Using the X100s in
Aperture Priority
mode-
Camera - Aperture
Priority
A
- Basic Set-Up -
Top main shutter speed dial
set to
A
- Aperture priority mode
Lens set
for manual f# aperture choice on the barrel (not on
A)
Menu - ISO set to 200
Menu - Image Aspect Ratio set to L3:2
Menu - Image Quality set to Fine+RAW
(ISO:100 now not possible - minimum ISO:200)
Menu - Dynamic Range set to AUTO
Menu - Film Simulation = Velvia/Vivid
Menu - ND set to OFF
Menu - Colour +1
Menu - Sharpness +1
Menu - Highlight Tone set to 0
Menu - Shadow Tone set to 0
Menu - NR 0
Menu - NR Long Exposure set to ON
Menu - Fn button set to ISO
Menu - Display Custom Settings set to EVF/LCD (all custom
setting choices selected)
Menu - Framing Guidelines set to 9
Menu - Manual Focus Assist set to Focus Peaking
Menu - Advanced Filter set to OFF
Menu - AF Mode
set to AREA
Menu - AF Illuminator set to ON
Menu - AE-L button Lock Mode set to ON/OFF
(toggle on/off)
Menu - AE-L button set to exposure lock only
Tools Menu -
Focus Check set to ON (magnifies manual focus
area)
Tools Menu -
Sound Setup/Operation Volume set to Speaker +1
Tools Menu - Sound Setup/Shutter Volume set to Speaker +2
Tools Menu - Screen Setup/Image Display on capture set to
OFF
Tools Menu -
Power Management/Auto Power Off set to 2 minutes
Tools Menu - Power Management/High
Performance set to ON
Tools Menu - Power Management/OVF Power Save set to OFF
Tools Menu - Eye-F Transfer set to ON
Rear Command Dial flip/pad - WB set-up for AUTO
Rear/left
AE button
set-up for exposure multi-metering
Rear/left DRIVE Mode button - camera is set-up for STILL
IMAGE
Rear/left VIEW
Mode button - camera is set-up for auto (eye)
switching between viewfinder and LCD screen
Front/side Focus
Mode Selector switch set to AF-S for single AF shot
AF button then
centre the autofocus spot/point using the rear top/command
control wheel by turning it to increase or decrease the
chosen spot size (I selected size 3 out of 5)
Top Fn button
set-up for calling up ISO (ISO
set to 200 - basic starting point)
Adjust the viewfinder diopter wheel setting to suit eye
focus
Front
red spot
lever flicked to right (looking from the rear of camera)
and select either electronic viewfinder or optical
viewfinder
The Focus Mode Selector on the camera side and the AF, AE, DRIVE and VIEW MODE buttons on the
rear
provide fast access for changing settings and once I
have the main menu set-up and the top Fn button assigned (default) to ISO
in Aperture Priority Mode,
the camera is relatively straight forward to use with the Q (quick menu) button and command rotating dial providing
quick access for alternative settings.
Q
Button/Menu -
Select Custom Settings
ISO
Dynamic Range
White Balance
Noise Reduction
Image Size
Image Quality
Film Simulation
Highlight Tone
Shadow Tone
Color
Sharpness
Self-Timer
AF MODE
Flash MODE
LCD Brightness
My Basic Use - (
Electronic
Viewfinder)
Please note that the LCD Screen operates in exactly the same
way at the Electronic Viewfinder
Set my aperture using the ring on the lens barrel (rotate
to appropriate f stop) as seen on the barrel for my
required depth of field (f2 shallow to f16 deep)
Take in
the entire scene through the electronic viewfinder (if required
adjust the shutter speed using the Fn
button to call up the ISO menu
and raise or lower the shutter speed by changing the ISO
setting - also if required use the top exposure compensation dial +/- to adjust
the scene exposure - NOTE:
You
can view the settings effects to the scene in the electronic
viewfinder)
lock the exposure using the AE-L button (toggles on/off)
......NOTE: Please read about the viewing effect of
AE-L Lock in the
Electronic Viewfinder Section
Use
the centre spot AF point to focus
on the primary area of the scene and half press/hold shutter button to
lock the focus
(if AF fails, flick the side Focus Mode Selector switch to MF
which automatically engages the split/image assist then
lightly press/release the back/top control wheel to
magnify the subject and
manually focus on the subject using the lens barrel focus
ring and the split/image aid in the electronic viewfinder -
lightly press/release the
the rear/top control wheel to return to normal view
- you can also toggle the manual focus aids by lightly press/hold
the
rear/top control wheel until split/image changes to focus
peaking and again to standard and again back to split/image)
then re-align the scene (if required)
in the electronic viewfinder to suit and press the shutter button fully
home to take the shot >>>>> NOTE: It is
important that if you are shooting with a very shallow depth
of field (e.g. aperture f2) that you watch any
re-alignment of a scene as the depth of field (area in
focus) may not take in the primary area that you
originally focused on, which will then be out of focus in
the final shot
The automatic preview in the electronic viewfinder/LCD
Screen has been switched to OFF
Set my aperture using the ring on the lens barrel (rotate
to appropriate f stop) as seen on the barrel for my
required depth of field (f2 shallow to f16 deep)
Take in
the entire scene through the optical viewfinder (if required
adjust the shutter speed using the Fn
button to call up the ISO menu
and raise or lower the shutter speed by changing the ISO
setting - also if required use the top exposure compensation dial +/- to adjust
the scene exposure - NOTE: you cannot view the settings
effects to the scene in the optical viewfinder)
lock the exposure using the AE-L button (toggles on/off)
Use
the centre spot AF point to focus
on the primary area of the scene and half press/hold shutter button to
lock the focus
(there is only a centre green rectangle and beep when
autofocus is achieved - there are no manual focus aids
available )
then re-align the scene (if required)
in the optical viewfinder to suit and press the shutter button fully
home to take the shot
>>>>> NOTE: It is important that if you are shooting
with a very shallow depth of field (e.g. aperture f2)
that you watch any re-alignment of a scene as the depth of
field (area in focus) may not take in the primary
area that you originally focused on, which will then be out
of focus in the final shot.
The automatic preview in the LCD Screen has been switched to
OFF
The electronic
viewfinder (also the LCD screen) accurately displays the
scene and any changes in the light - the refresh rate is fast
enough when reflecting extreme light changes (e.g. night dark
shadows to a bright street light) and I am not disappointed.
When I make changes to the exposure using the exposure
compensation dial or the aperture on the lens, the visual
effects are displayed in the
electronic viewfinder (also the LCD screen).
In aperture priority mode, the electronic viewfinder and the
camera manual controls are designed in such a way that you can
keep your eye at the viewfinder whilst you use the dials/buttons
on the body to make quick setting changes to the lens aperture,
ISO, exposure compensation and apply exposure lock THEN
autofocus center/spot lock or switch to manual focus and use the
lens manual focus ring and the manual focus aids, including
subject magnification, before taking the shot THEN view the
captured image with zoom in/zoom out/move around image controls
for as long as you like whilst still looking through the
viewfinder. Naturally the LCD screen operates in exactly the
same way with the same displays.
The electronic viewfinder coupled with the
exposure metering (multi-mode) displays a very good
account of the scene, similar to what your eye experiences. However,
with scenes that have a very dark foreground and a very bright
skyline, you may have to reduce the exposure to enhance the
cloud detail and balance the exposure so that the foreground
does not become too dark. The X100s
dynamic range is excellent but obviously there are limitations
with some uneven lighting scenes. In such instances, the answer is to open up
the exposure on the foreground and either fit a 2 stop graduated
screw filter to the lens (using the Fuji Adapter) to pull
back the cloud detail or add a software graduated filter to the
skyline in post processing, provided you have managed to keep
some detail in the clouds when the shot was taken.
When I pan the camera around, I experience a very slight lag in the
electronic viewfinder but not enough to spoil my photography. If
I hold the shutter button down at the same time as panning, the
view is blurred. The beauty of the Fuji X100s camera is that it
has an ace up it's sleeve, so if you want to pan around to find
your shot, use the 'switchable' optical viewfinder, so no lag, no problem!
AE-L Exposure Lock -
When setting up the exposure of a scene, even using the exposure
compensation dial, the scene through the EVF will reflect the
changes
(also the LCD screen
if used instead of the EVF).
Then using the AE-L button (toggle on/off) you can lock
the exposure
(the
AE-L button indicator 'E over L'
appears in the viewfinder between the locked aperture and locked shutter
settings)BUT then the EVF (also the LCD screen if used instead of the EVF)
reverts to a
normal scene view. With the AE-L locked you cannot change the
settings, even using the exposure +/- adjustment wheel and
ONLY when
you half/press hold the shutter button to lock the autofocus the exposure of the scene
changes in the viewfinder to match the AE-L exposure locked settings. I think
this is great, the one downside with my Panasonic or my Sony
camera is when you adjust the exposure for very uneven light (e.g. bright sky and very dark foreground) the viewfinder
invariably cannot clearly display all the scene - not so with
the X100s, it behaves very optically in AE-L exposure lock
mode until you actually half/press hold the shutter button to
autofocus on the primary subject and then re-align and fully
press down to take the shot. This is my favourite method of
shooting and especially useful for isolating subjects from the
background using a f2 aperture with a thin depth of field. NOTE: It is important that if you are shooting
with a very shallow depth of field (e.g. aperture f2)
that you watch any re-alignment of a scene as the depth of
field (area in focus) may not take in the primary
area that you originally focused on, which will then be out
of focus in the final shot.
The optical viewfinder does what it states on the tin and is a
pleasure to use in autofocus mode. In manual focus mode, there
are no manual focus aids (standard,
split/image, focus peaking modes) when
using the optical viewfinder and like autofocus mode, it cannot
reflect any changes to the scene in the viewfinder when you
change camera/lens settings. Without question the optical
viewfinder comes into it's own for street and photo journalism
photography and to achieve the optimum autofocus speed, switch
the optical viewfinder power save to OFF and the capture preview
to OFF.
When using the optical viewfinder you can see a part of the lens
hood in the bottom right of the scene frame but this viewing
experience is assisted by the vents cut in the lens hood which
you can see through. The optical viewfinder scene frame has the
classic area of the scene around it which makes it ideal for
viewing subjects coming into the scene frame. The viewing frame
lines are very bright in normal lighting but in brighter
conditions the lines can still be seen but are less visible.
However, when you half/press hold the shutter button the viewing
frame lines become much brighter. The optical viewfinder has two displays available -
a full display with
everything (my settings) displayed and the second (toggle using the rear
DISPLAY button) has a clean frame outline with minimal
icons and a blue distance scale bar on the
bottom
(no blue bar in autofocus mode only available in manual focus) which accurately displays the distance that you have the lens
focus set.
I like using the clean frame plain display which is very similar
to a rangefinder camera view with a bright frame line for the
area to be captured and the outer area around the frame displays
the entire scene. Instead of toggling the optical displays, I
tend to just flick the viewfinder (front
RED
spot toggle lever)
and switch to the electronic viewfinder for more information,
make any adjustments, even lock my AEL exposure and toggle back
to the plain display in the optical viewfinder. The autofocus
works in all these views and if you are using the optical
histogram in the full display, remember to switch OFF the power
save for the optical viewfinder or the histogram will not work.
Street Photography -
Many photographers will prefer to use the optical viewfinder for
street photography and using the lens, some prefer autofocus and
others manual focus.
The autofocus is
very slightly slower when using the optical viewfinder but
nevertheless with a spot/centre autofocus focus point it does a
great job. Using the optical viewfinder, the lens in manual
focus mode has no manual focus aids other than a
blue bar distance (metres) scale
displayed on the bottom of the optical viewfinder. Using the
blue bar distance scale you could set-up the focus of the lens
by applying the hyperfocal infinity method
or a pre-determined depth of field. There is no doubt that the ultimate shooting speed is
achieved by this approach, even faster than autofocus using the
electronic viewfinder. However, one must take into account that
it will prove slower to isolate subjects from the background and
that is where exposure lock,
autofocus
lock and using the electronic viewfinder come into their own. To
get the maximum speed out of the camera,
switch the optical viewfinder power save to OFF and the capture
preview to OFF.
The lens can be used in
hyperfocal mode by
switching the camera Focus Selector switch to manual and using the blue
distance/metre scale on the bottom of the
viewfinder OVF/EVF + LCD screen
to the required distance setting to match the aperture depth of
field.
There is no
depth of field scale on the
lens but with practice I reckon I will figure out the ratio
between the aperture settings and the blue bar distance (metres) scale
in the viewfinder OVF/EVF + LCD screen.
Also, infinity is clearly marked on the blue bar scale so for speed you
can set aperture f8 and use hyperfocal mode back from infinity
which should cover most street shots. The lens manual focus ring
throw is exactly half a turn between 0.1 metre to 0.5 metres and
again another half turn from 0.5 metres to infinity. In manual
focus mode, If you set the lens up for a set distance and then
switch the camera off and later back on, the lens will return to
that same set distance - PROVIDED the camera remains in
manual focus mode all the time.
There are three types of manual focus aids that can be used with
the electronic viewfinder (or LCD screen) -
Standard
Split/Image
Focus Peaking
Once the Focus Selector switch on the side of the camera is set
to MF(manual focus mode) you can toggle between
the three manual focus aids by lightly pressing/hold/release the
rear/top Command Control Wheel
until split/image changes to focus peaking and again to standard
and again back to split/image.
You can
magnify the subject and manually focus on the subject using
the lens barrel focus ring and any manual focus aid in the
electronic viewfinder by light quick press/quick release
the
rear/top Command Control Wheel and
repeat to return to normal view
or press the shutter button to take the shot.
The rear/top
Command Control Wheel has a
little raised notch on the wheel which requires a very light
touch to change the manual focus mode or to magnify the subject. You will get no result from this wheel if you press it
hard and try to turn it!
From my early trials with the camera, I have found that the
Focus Peaking manual focus aid is actually better than the
split/image for foliage, trees and landscapes, especially scenes
that are a fair distance from the lens. I have tried the split/image aid
for other subjects but in the end I prefer focus peaking by
default.
I
have found that the autofocus in normal lens mode and macro mode
is not always consistent for close distance. Sometimes I can autofocus
closer (on the same subject) in both modes, especially
after first using manual focus and the focus peaking aid. In any
case, using focus peaking and manual focusing, I can get much
closer to the subject in normal and macro mode.
I
have the filter adapter, UV filter and lens hood fitted and I
have checked that my B+W 49mm UV filter clears the lens movement
as it extends.
The Movie Mode is selectable between 1920 x 1080 30fps or 60fps
- I went with 60 fps.
Basic Steps to Shoot Video -
Set lens aperture to
A
(For stills, I am using aperture priority so my shutter dial
is also set to
A)
Set Focus Selector on the side
of the camera to AF-C (continuous)
To select Movie Mode - press the rear/left DRIVE button to
display the DRIVE menu
Use the rear Command
(paddle/flip) Control, scroll
to MOVIE and press rear Menu/OK button to accept
Use the electronic viewfinder by placing your eye to it or
just use the LCD screen (eye detect settings)
Press the shutter button down to shoot the video
(RED
light flashes on the rear/right/top of camera body)
Press the shutter button
down to stop the video
To return to STILL IMAGE - Re-run steps 2, 4 but select
AF-S and STILL IMAGE
Basic Steps to Playback Video -
Press the rear green arrow playback button and using the
rear
Command (paddle/flip) Control, scroll to clip
Then press WB to start video clip and AF to stop video clip.
Basic Steps to Setup Movie Mode in DRIVE Menu -
To select Movie Mode - press the rear/left DRIVE button to
display the DRIVE menu
Use the rear Command
(paddle/flip) Control, scroll down to MOVIE and press
rear Menu/OK button to accept
With the LCD screen ready to shoot video - press the
rear Menu/OK button to display Movie Mode menu
Use the rear Command
(paddle/flip) Control, scroll to
Movie Mode and highlight it
Use
the rear Command (paddle/flip) Control, right
(flash) flip for sub menu and highlight 1920 x 1080
60fps
Press the
rear Menu/OK button to accept
Press the rear Display/Back button to exit out to EVF or LCD screen
to start video shooting
WARNING -
There are other settings in the MOVIE MODE menu and sub menus,
especially the Film Simulation mode which provides you with a
large number of filter styles, however if you change this
setting, remember that it also will change the setting in the
Film Simulation for stills shooting in aperture priority.
NOTE:
I have the camera set-up for eye detect so by looking through
the electronic viewfinder, I can switch to it and then when I
press the shutter button to start, the electronic viewfinder is
locked and I cannot use the LCD screen until I press the shutter
button again to stop the video.
Test Video - Camera Set To Full Automatic
The following is a basic test video with the camera set-up for
60fps,
A
on the shutter dial and
A
on the lens aperture ring and the Focus Selector switch on the
side of the camera set-up for AF-C Continuous Focus.
The video was shot with the camera 'hand held and I have left
the bad in with the good. There are various occasions when the
autofocus fails to lock-on but it was below freezing which may
have some bearing on the matter. There is a traffic boom in the
background which is coming from the main motorway about 1/2 a
mile away.
The Movie Mode is selectable between 1920 x 1080 30fps or 60fps
- I went with 60 fps and I set-up my MOVIE mode DRIVE menu
parameters as in the above Basic Set-up steps and used PLAYBACK
as above.
Whist in
A
aperture priority STILL IMAGE mode you can set-up the
following (you cannot alter any settings once you have
switched to MOVIE MODE) -
Set the aperture on the lens scale to suit your depth of
field
Set the Focus Selector on the side of the camera for AF-C
Continuous Focus or set it for Manual Focus
To select Movie Mode - press the rear/left DRIVE button to
display the DRIVE menu
Use the rear Command
(paddle/flip) Control, scroll
to MOVIE and press rear Menu/OK button to accept
Use the electronic viewfinder by placing your eye to it or
just use the LCD screen (eye detect settings)
Press the shutter button down to shoot the video
(RED
light flashes on the rear/right/top of camera body)
In AF-C Continuous Mode the
lens will automatically adjust to the subject distance
In Manual Mode the lens can be
manually adjusted to focus in/out on a subject
Press the shutter button
down to stop the video
To return to STILL IMAGE - Re-run steps
2 to 4 but select
AF-S and STILL IMAGE
NOTES:
Changing the ISO setting does not seem to make any difference,
either before or after switching to MOVIE Mode? I have the
camera set-up for eye detect so by looking through the
electronic viewfinder, I can switch to it and then when I press
the shutter button to start, the electronic viewfinder is locked
and I cannot use the LCD screen until I press the shutter button
again to stop the video. I found the lens relatively easy to
manual focus with my finger and thumb, even with the lens hood
fitted, as I could move my finger in front of the viewfinder
without obstructing my view. Setting up the aperture for a
(manual) f# setting could mean that if the light conditions
in a changing scene are outwith the range of the camera
settings, the video may display abnormalities in parts of the
recording.
Test Video
The following is a test video which includes a AF-C Continuous
Focus + Aperture f2 test in the first part AND a Manual
Focus + Aperture f2 test in the second part. The video was shot
in freezing conditions.
The
manual focus test video (test 2) is very rough but it
magnifies the problems when manually focusing the lens including
the noise and the jerkiness as my fingers move the manual focus
ring. A professional videographer would use the manual focus to
shoot clips that have already been manually pre-focused,
selecting the depth of field, the aperture and then shooting the
video. In this way there is no manual focus during the actual
(each clip) shoot which cuts out the jerkiness and any
camera noise. The clips are then stitched together in the final
video.
The video was shot with the camera 'hand held and
there is a traffic boom in the background which is coming from
the main motorway about 1/2 a mile away.
The Fuji X100s camera holds up very well against my Panasonic
GF1 Micro 4/3rds camera with it's
Lumix 20mm f1.7 ASPH prime pancake lens. The size of the
X100s is more appealing as it is slightly larger in the main
body which makes it easier for my hands to grip it and also work
the manual controls. Please click on the image to open up a
larger version with back and side views.
Both cameras manual controls are very similar but the X100s has
that all important electronic/optical viewfinder built into the
body whereas the GF1 has a clip on (no optical)
electronic viewfinder which plugs into a dedicated electronic
socket as it slides onto the flash shoe.
Both cameras have excellent manual controls, although the GF1 is
the preferred camera for the number of switchable controls on
the top plate. However, I like the exposure compensation dial
control and the lens aperture setting ring on the X100s. For
everyday use, the Fuji X100s comes out on top as the 'basic'
manual controls that you use on a constant basis are very
accessible when the camera viewfinder is up at your eye and the
X100s viewfinder is miles better than the GF1 clip on.
The main plus towards the GF1 has to be the centre/spot
autofocus which has never ever let me down - it is fast,
accurate and locks onto the subject. I cannot state that about
the X100s which on occasions will not lock onto areas of flat
contrast and you have to aim the centre/spot AF rectangle to an
area that has an edge or a variance in contrast.
As expected, technology has moved on and the X100s benefits from
usability at higher ISO settings, certainly at ISO:1600 and
above compared to the sensor of the GF1. There is not a great
deal of difference in the depth of field when the lenses on both
cameras are wide open as the Lumix 20mm f1.7 ASPH lens is
formidable at f1.7 and it competes on a par with the Fujion 23mm
lens at f2, provided the GF1 RAW image files are post processed
and converted to tiff or jpeg format for prints.
Without a shadow of a doubt it is the image quality that the
Fuji X100s delivers that places it ahead of the Panasonic GF1
camera. The X100s digital sensor is larger, it opens up the
dynamic range and the camera produced jpeg and RAW image files
are superior to the those from the GF1. I have used the GF1 for
3+ years and it's main weakness is the jpeg images it produces
and the work that has to be undertaken with the RAW image files
in post processing to deliver decent colours and dynamic range.
In all the time (apart from initial tests) I have used my
GF1, I have never shot any jpeg images straight out of the
camera but the X100s camera jpegs are superb, almost to the
point of not bothering about the RAWs.
I have managed to get out and about in Edinburgh to to try out the Fuji X100s camera on the
street. The Panasonic GF1 camera with the Lumix 20mm f1.7 ASPH lens
is awesome but the Fuji X100s triumphs it with it's superior
electronic viewfinder and the pièce de
résistance
is the optical (Leica M style) viewfinder. The X100s
manual controls did not let me down, the autofocus set for
area/center/spot with the largest rectangle was fast and deadly
accurate and kept up with the accuracy of the Panasonic GF1.
I became so confident shooting the X100s that I very rarely
checked the image preview on the LCD screen.
There is no doubt that (for me) the main enhancements in favour
of the new Fuji X100s over the recently released Fuji X-E1 are -
Intelligent Hybrid AF
(available with Optical + Electronic Viewfinder)
Focus Peak Highlight function
Digital Split Image display
Optical + Electronic
Viewfinder (flick lever
switchable)
Autofocus is the preferred route for fast action but there
are occasions like macro shooting or when the AF will not respond
properly in low light where the alternative is switching the lens to
manual focus. Anyone who has used a Nikon FM3a with it's split image
(rangefinder style) manual focusing or a Sony Alpha A57 SLT camera
with
focus peaking (manual focus assist) to put a sugar frosting
coating over the areas in focus will enjoy the extra technology the
X100s offers.
The current Fuji X100 delivers excellent image quality and the new X100s
with the 16MP X-Trans sensor is set to (at least) match the X-E1 but in
it's favour the X-E1 is a camera that can interchange Fuji X lenses as
well as mount Leica M and other brand lenses using various lens
adapters.
However, similar to the Fuji X100s camera I have used a 24mm lens on a 1.6x crop APS-C sensor DSLR producing a
38mm field of view and a 20mm lens on a 2x crop sensor Micro 4/3rds
camera with a 40mm field of view and the killer limitation has always
been the inability (even at f2) to produce a nice background blur
(bokeh) 3D effect on a primary subject (e.g. full size person)that is a reasonable distant from the lens. You can create a nice bokeh
effect when the subject is close to the lens or part of a subject, like
a person's head and the X100s with a fixed 23mm lens on an APS-C 1.53x
crop sensor does have the (full size person) limitation which will not suit some photographers. You can
see examples of the depth of field limitations in the Portrait Section.
The Fuji X100s is a cracking camera
but the ability of the Fuji X-E1 to mount the
Fuji 18-55mm f2.8-4 R LM OIS XF Fujinon zoom or perhaps even better the
Fuji 35mm f1.4 R prime lens with it's 53mm field of view and tighter depth of field at
f2 or even at f1.4 might outweigh the advantages of the X100s
optical + electronic
viewfinder, faster
auto focus, focus peaking and split image manual focusing?
Using the X100s, which has full manual controls and a fixed
prime lens, especially a 23mm with a 35mm 'field of view' can
prove daunting for any photographer stepping up from a point and
shoot camera. It is a fantastic learning curve and there is no
doubt that using the X100s in full manual mode or even aperture
priority mode will make you concentrate on your photography -
bearing in mind that you can always switch it to full automatic
if required.
To avoid frustration a photographer using the Fuji X100s will
have to accept that with a 23mm focal length lens you will be
limited even at the widest aperture of f2 as to how much
(real world) diverse control you will have in shooting out
of focus (beautiful 3D bokeh shots). Added to this, there
are some shots that you will lose to distance or a wider aspect
of scene. The camera has a 16MP digital sensor so there is the
option to post process using software and crop into an image for
a different perspective (pulling the core of the scene
closer) certainly up to a 45mm field of view, without losing
to much resolution. On the wider scenes there is the
(optional purchase) wide conversion lens opening the field
of view to 28mm but it is not an option for me - that road should
be taken with the Fuji X-E1 and a couple of interchangeable
prime lenses at extra expense or the Fuji X-E1 + 18-55mm zoom
kit combo for around the same money as the Fuji X100s.
I see the Fuji X100s more of a camera for niche work like street
photography or as a second camera, even an alternative purchase
to a very expensive 35mm prime lens. However, if it is your only
camera then the possibility of the frustration that I described
above, could prove very real.
Normally 85mm is the preferred focal length for a portrait lens
but
I normally shoot portraits with my Canon 5D MK 1 'full frame' DSLR and a Canon 100mm f2 USM lens.
The Fujifilm X100s camera with it's relatively wide 23mm lens is
still capable of portrait photography. However it is very easy
to get in too close whereby the face can become distorted.
My son and his family visited over the Easter period and my twin
grandsons (17 months) were boisterous as usual running
around the room and very difficult to photograph, especially if
I wanted their eyes in focus. Kids at that age seem to
understand what a camera is because every time they stopped and
saw it in front of them, they were off again. Their Gran was
easy meat to photograph, no chance of a 90 year old getting up
and running around the room. The Fuji X100s, with the image capture
preview switched off, delivered a fast enough autofocus and
minimum lag with the
camera set to AF-S single shot, the drive
mode set to still image and AF to area/centre/spot.
I found the LCD screen a far easier way
of tracking the kids, focusing in on their eyes and grabbing the shot.
This is a portrait shot of Gran captured with the X100s 'hand
held' and no flash was used - it has not been cropped and provides a reasonable idea
of background and bokeh at aperture f2.8. This is a jpeg image converted from the RAW File Variant using
Adobe Lightroom 4.4 Software -
Image 1 (600pixel) to Image 2
(1200pixel) to Image 3 (2000pixel)
The 3 images are jpegs converted from the RAW file and I have listed the post processing -
Saturation, vibrancy, clarity and contrast slightly
increased (No Noise Reduction)
Re-sized and slight re-sharpened
No noise
reduction applied - in camera or during post processing
Please click on Image 1(600Pixel) and it will open up into two (1200/2000Pixel) variants by
clicking on each image -
ISO:1600 - Aperture f2.8 - Shutter 1/125secs -
White Balance and DR both set to AUTO
This
is a
portrait shot of Flynn captured with the X100s 'hand held'
and no flash was used -
aperture f2.8 and it has not been cropped. This is a jpeg image converted from the RAW File Variant using
Adobe Lightroom 4.4 Software -
Image 1 (600pixel) to Image 2
(1200pixel) to Image 3 (2000pixel)
The 3 images are jpegs converted from the RAW file with
extensive digital work and demonstrate the latitude of the RAW
post processing. I have listed the post processing -
The
entire image reduced in clarity
The
adjustment brush used to paint around the face with the
painted background exposure dropped
The eyes
and lips brought back to sharpness using the adjustment
brush
Some milk
spots and food crumbs spotted out on the face
Vignetting added
Saturation, contrast and vibrancy slightly increased
No noise reduction applied - in camera or during post
processing
The 3 images all re-sized and light overall sharpening applied
Please click on Image 1(600Pixel) and it will open up into two
(1200/2000Pixel) variants by
clicking on each image until you return to this page -
ISO:1600 - Aperture f2.8 - Shutter 1/120secs -
White Balance and DR both set to AUTO
The
image quality is superb considering that Flynn was on the turn
of his run when the shot was taken. I have never been keen on
shooting frames in portrait mode, I prefer the landscape
frame style but as you can see, the subject shot at 23mm focal
length has a lot of space on either side and Flynn shot at that
distance is just about within distortion range. It is unlikely
that I will use the Fuji X100s for portraits and only because I
have another camera and lens. However, at the correct distance
and with the subject shot in portrait framing, the Fuji X100s
camera and 23mm lens are more than capable of producing
excellent images.
Low Light + Wide
Aperture f2 - The Fuji X100s lens is superb in low light
even wide open and manages to produce excellent images. I have
not pushed the ISO rating beyond ISO:3200 but even so at
aperture f2, I can manage to achieve reasonable shutter speeds
(without flash) indoors. This shot was taken in a bar in
Edinburgh and the 'RAW' image file converted to a jpeg using
Adobe Lightroom 5 software.
I was using the camera, hand held, no flash, in
aperture priority mode,
manual ISO, multi-pattern exposure metering, AF-S and
area/center spot autofocus set to it's largest rectangle size
and the AF locked on with a half press/hold of the shutter
button and then pressed fully home to take the shot. Roy has had
a touch of the sun on his face, hence the redness.
LR 5 minimal post processing -
Reducing the saturation
Slight
Vignetting added
Noise
+ color reduction applied
Image
re-sized and sharpening applied
ISO:3200 - Aperture f2 - Shutter 1/90secs -
White Balance and DR both set to AUTO
I
remain surprised to find a macro mode built into the Fujifilm
X100s, especially as the camera is more in keeping for reportage
and street photography. I have
checked out the difference between the lens standard focal length
and the macro menu switched version. There is not a great deal
of extra magnification of the subject with the camera in macro
mode almost to the point of being negligible but I suppose any
increase is worth it for those photographers who enjoy macro
photography.
I have found that the autofocus in normal lens mode and macro
mode is not always consistent for close distance. Sometimes I can
autofocus closer (on the same subject) in both modes,
especially after first using manual focus and the focus peaking
aid. In any case, using focus peaking and manual focusing, I can
get much closer to the subject in normal and macro mode.
I
have the filter adapter, UV filter and lens hood fitted and I
have checked that my B+W 49mm UV filter clears the lens movement
as it extends.
The following 2 images are camera produced jpegs and they were
captured with the camera positioned on a very sturdy tripod with
the camera main menu set to 10 second timer mode. They were shot
in
Exposure
Metering=Multi, Drive Mode=Still Image,
AF-S,
AF=Area/centre/spot autofocus mode and the lens was placed at
the minimum distance away from the 50p coin for the AF to latch
on. I noticed that in timer mode, if the camera powers down or
is switched off/on, the main menu 10 second timer setting (in
aperture priority mode) resets to OFF.
The images were re-sized and slightly re-sharpened (no other
settings were changed) using Adobe Lightroom 4.4 software.
The image on the left is in standard lens mode and the image on
the right is in macro (macro menu switched) mode - please
click on either image to open up a 2000Pixel size.
ISO:200 - Aperture f8 - Shutter 1/180secs
- White Balance and DR both set to AUTO
Macro Image - Exposure Compensation +1 step and Shutter 1/120secs
It was a cloudy day
with the sun coming out in flashes and disappearing again so it
was difficult to get a like for like shot but the images serve
well to display the size/range differences using macro mode. The
images were not shot from the same position as the camera did
have to be moved forward with the tripod to get closer for the
macro mode shot. The 50p coin is slightly tilted backwards
(not completely vertical) and the opening of the bucket in
front of the coin is the diameter of the coin which can just fit
in the bucket. It is unlikely that I will ever use macro mode,
the normal lens mode is more than sufficient for my needs.
Insects are the favourite macro
subjects and I had a go at shooting a moth on my front door. The
camera was in macro mode, hand held and I used the LCD screen at
head height to capture to a 'RAW' image file. I have found that by stepping down
the autofocus to the subject by locking on from a greater
distance and then a nearer distance in probably about 3 steps to
the subject, I can get in much closer than the camera's
(normal) macro AF limit. The aperture of f2.8 is not the ideal
setting as the depth of field is very thin and the main area in
focus was the head.
I am not into macro photography but ideally (if possible)
this insect should have been shot using external lighting or a
macro flash, a higher shutter speed, an aperture of around f5.6
to f8 with the Fuji X100s on a tripod and tripped by a remote
shutter cable or using the camera timer to take the shot.
The first (not cropped) image is a 600Pixel size and by
clicking on it you can open the 1650Pixel (not cropped)
variant and by clicking on that you can open up a 750Pixel variant which is a
heavy crop and again
clicking on that you can open up a 1200Pixel variant
which is a heavy crop
- all post processed in Adobe Lightroom 4.4 software. The
750Pixel to 1200Pixel size cropped variant is about the maximum size for a print
or a digital display as any larger and the crops resolution
quality starts to dissipate -
Flowers are another favourite for
macro photography and taken very much the same way as insects
with a tripod and the shutter tripped with a remote cable.
However, as the X100s is a compact camera and most photographers
will not use it for macro photography or carry around a tripod,
I shot the two images below 'hand held' without flash and the
'RAW' files post processed using Adobe Lightroom 5 software.
Both images have been softened for effect as the originals were
very sharp - please click on the 300Pixel sizes to open up the
1650Pixel variants.
The first image was shot with the lens in it's normal mode and
the second (close up of flower on the left of first image)
in macro mode. I deliberately attempted to achieve a 'glow'
effect by setting the aperture at f2.8 to create a very thin
area of focus on the flower -
I am not into flash photography but there are times when using
the built in flash of the Fuji X100s camera is important to achieve the desired effect in an
image. I usually have my camera set-up to SUPPRESSED Flash and
the Red Eye Reduction is set to OFF....................The
X100s flash is easy to set-up by using the
rear Command Dial flip/pad - right Flash Icon + Menu switched to
FORCED FLASH.
With scenes which have a very bright background and the primary
subject is dark it can be extremely difficult to balance the
camera exposure metering to brighten the primary subject without
over exposing the background and blowing the colour and details
away. This is where the flash comes into it's own by filling in
the primary subject, yet leaving the background properly
exposed. I learned very quickly to remove the Fujifilm lens hood
as it will block part of the flash light on the base of the
primary subject, depending on any raised angle of the camera
when the shot is taken. Even with the hood removed and with the
camera level to shoot a CLOSE UP subject, the lens might still
manage to partially block the flash light on the base of the
subject. For that all important shot, it is better to shoot from
a 'slightly' further distance achieving a broader spread of
flash light and then in post processing crop into the image.
Using the camera in aperture priority mode,
I achieved the optimum exposure and autofocus by first locking
(using the AEL button) the exposure of the background to
my liking and then using the half press/hold of the shutter
button to lock the autofocus on my primary subject
(re-aligning the scene if necessary) and pressing the
shutter button fully home (also activates the flash on the
area of the primary subject) to take the shot.
The
following images were all shot with the camera 'hand held' with
the Forced Flash set to ON -
The other day (18th September 2013) the men came to tar
the main drive into the new development next to my house and
parked their road roller at my gate.
The X100s has a great dynamic range but with the sun shining
down my drive the back of the road roller was very dark so I put
the camera into 'forced flash' to light up the back and you can
see that everything reflective caught the flash, including the
rear lights of the road roller, the tar machine and the cone on
the left. I used exposure multi-metering, aperture f4 and
I used the AE-L button to lock my exposure (attempting to
balance the sky against the foreground) before focusing
using the centre area spot AF point on the rear of the
road roller in an attempt to place the tar machine and the
houses out of focus which was unsuccessful; I should have
engaged the ND filter and used aperture f2 or f2.8 for better
effect. My X100s has the Fuji lens hood permanently fitted and
it did a great job of deflecting most of the direct light that
might cause flare. The cone is actually covering a metal
stanchion that serves as a stopper for the gate and protects the
dogs and my grand children from hurting themselves; I still
require another cone for the other side. This 'RAW' image was
post processed, re-sized and converted to a jpeg using Adobe
Lightroom 5.2 software and moderately sharpened for the web
display using Canon DPP software -
The summer weather in Scotland finally arrived so I went into
Edinburgh the other day for some lunch and a stroll in the sun.
Near the end of the day, I met up with friends at a local bar
for some drinks so the Fujifilm X100s camera was well tested.
I carried the camera around in my right hand for most of the
time with it's backup
Gariz wrist strap
fitted and when my right hand was holding a glass of cold beer,
I popped the camera in my
Lowepro Apex 100 AW
and slung the shoulder bag around my neck. The Fuji X100s is not
a camera that you want to lose or have nicked.
I must admit I was
bit apprehensive about the autofocus speed and accuracy as I
had experienced 'hunting' problems with close up and low light
shots. For street photography, I was using the camera in
aperture priority mode,
manual ISO,
multi-pattern exposure metering, AF-S and area/center spot autofocus
set to it's largest rectangle size. I shot only in RAW image
file mode as I wanted to get the maximum 485 shots out of the
16Gb memory card but at the end of the day, I had only taken 90
shots and of those I kept 49 which I have put into a sub web -
see the link further down this section.
The weather and light conditions were excellent and the cameras
performance was flawless in electronic and optical viewfinder
modes. The
AF locked on 100% of the time,
delivered 100% accuracy and so much so that I became confident
with just one shot per scene and never bothered to check the
preview of the shots. Whether using the electronic or the (my
preference) optical viewfinder, the X100s handled
beautifully. When shooting directly at the street with very
little (if any) skyline there was no requirement to lock
the exposure using the AEL button as the lighting was fairly
even - just place the AF full size rectangle on the primary
subject, half press/hold the shutter button to lock the exposure
+ AF, re-align the scene in the viewfinder and press home the
button to take the shot. In most cases I was shooting at
aperture f8 with a decent depth of field so very little need to
isolate a primary subject and re-align a scene. However there
was the odd time, when I did have to lock the exposure first
(separating it from the AF) using the AEL button, due to a
darker foreground and bright skyline
as well as those times when I was shooting
with a wider aperture for placing a subject in focus and the
background out of focus.
The images captured in
the bar were all shot at ISO:3200 and most were taken with a
wide open aperture at f2 or f2.8. Indoors and in low light the camera
AF locked on 100% of the time, delivered 100% accuracy and again
performed flawlessly.
The other day (18th September 2013) the men came to tar
the main drive into the new development next to my house and up
to my gate. At the same time the roofers arrived to finish my coach
house roof and install a new chimney stack which had been
removed by the previous owners of my property.
The tar men brought all their heavy equipment and I thought it
was a moment in time well worth recording. That's where the Fuji
X100s compact came in and I grabbed it from the house and went
outside to capture the scene. I asked everyone if they minded
being in the photographs and with no dissenters, I ran off a few
shots.
The X100s has a great dynamic range but with the sun shining
down my drive the back of the road roller was very dark so I put
the camera into 'forced flash' to light up the back and you can
see that everything reflective caught the flash, including the
rear lights of the road roller, the tar machine and the cone on
the left. I used exposure multi-metering, aperture f4 and
I used the AE-L button to lock my exposure (attempting to
balance the sky against the foreground) before focusing
using the centre area spot AF point on the rear of the
road roller in an attempt to place the tar machine and the
houses out of focus which was unsuccessful; I should have
engaged the ND filter and used aperture f2 or f2.8 for better
effect. My X100s has the Fuji lens hood permanently fitted and
it did a great job of deflecting most of the direct light that
might cause flare. The cone is actually covering a metal
stanchion that serves as a stopper for the gate and protects the
dogs and my grand children from hurting themselves; I still
require another cone for the other side. This 'RAW' image was
post processed, re-sized and converted to a jpeg using Adobe
Lightroom 5.2 software and moderately sharpened for the web
display using Canon DPP software -
The sun was popping out and in all the time but the X100s coped
very well with the changing light and like the first shot of the
road roller, I used the AE-L button to lock my exposure
(attempting to balance the sky against the foreground)
before focusing using the centre area spot AF point and taking
the shot. The rest of the images were taken with the flash
switched off. All the 'RAW' images were post processed, re-sized
and converted to jpegs using Adobe Lightroom 5.2 software and
moderately sharpened for the web display using Canon DPP
software -
The main reason for purchasing a Fujifilm X100s digital camera
is because it is compact and lightweight for general use and
street photography. However, I also purchased my X100s as an
alternative to a Canon 35mm L lens so I will also use it on a tripod
for landscape photography.
I have completed a
few test shots and the images captured with the camera
mounted on the tripod (to me eyes) have the edge for
resolution - the shot settings can be
found on the 1650Pixel display plates.
X100s Manual
Focus Peaking - Tripod - Self Timer
X100s
Autofocus - Hand Held
X100s
Autofocus - Tripod - Self Timer
The Fujifilm X100s camera does
not have a camera calibration or lens profile in Adobe Lightroom
4.4 software, instead it uses the default Adobe profile. The
colours are very good but tend to err towards the colder side
which is more apparent in landscape images.
The images above have not been altered for temperature or tint
and I used the aforesaid Adobe profile.
The image below has been altered towards a much warmer delivery
which is easily seen in the white clouds to the left. Post
processing and producing a final image to your own taste might
not suit everyone but Adobe Lightroom 4.4 software is very
flexible and even with the limitations of the camera (Adobe)
calibration profile, you can produce some very nice pre-sets.
X100s Manual
Focus Peaking - Tripod - Self Timer (Temp Lifted in
LR 4.4)
Comparing the Landscape Image from a Canon 5D MK I DSLR Camera Combo The jpeg image below was
captured later in the year with a
Canon 5D MK I DSLR camera with a Canon 24-105L zoom lens set at
35mm. It was
converted from a 'RAW' image file
using Adobe Lightroom 4.4 software and the Canon 5D camera
calibration profile
-
Canon 5D MK I DSLR + Canon 24-105L Lens -
Autofocus - Hand Held
There is a further Landscape (Tree) 4 Camera image sample
test near the foot of this section.
Resolving Distance -
The Fuji X100s camera lens is very capable and even without a
tripod or image stabilisation and when hand held it manages to
deliver excellent images. At aperture f8 it manages to deliver very reasonable landscape
images and with a decent depth of field. I am still shooting
camera jpegs + RAW image files but for best image quality the
RAW image files, properly post processed, come out marginally
ahead. Every lens has limitations for resolving very distant
subjects (houses, fences, hedges, trees, ships) in
landscape shots, especially without a tripod but overall the
X100s 23mm fixed lens performs very well in this respect.
Re-sized, re-sharpened digital images for the web cannot
properly demonstrate the qualities of the lens as
jaggies
or
compressions
often materalise but no such problems arise when post processing
a raw image file to tiff or jpeg format (without re-sizing)
for a gallery print.
This is a Fuji X100s camera jpeg image that has
been converted from a 'RAW' image file using Adobe Lightroom 4.4
software and it was shot with the camera 'hand held' at aperture
f8 - the lens has managed to resolve
the distant landscape rather well.
X100s
Autofocus - Hand Held
Comparing the Landscape Image from a Canon 5D MK I DSLR Camera Combo
Hand held camera shots should be avoided for serious landscape
photography and a tripod used instead but most photographers
purchase the Fujifilm X100s camera for it's compactness and in
many cases, specifically for street photography. For indoors,
street photography and with subjects that are relatively close,
the image quality from the X100s is exceptional but it is very
hard to judge just how good the X100s lens is with distant
landscape shots. It appears to be very good but then it should
be for a camera that costs around £1,000.00 in the UK.
Below is a 'RAW' conversion to jpeg comparison image taken with
a 35mm full frame, Canon 5D MK 1 DSLR Camera with a 12MPixel
sensor + Canon 24-105L Zoom Lens 'hand held' shot at 24mm focal
length (24mm field of view) -
Canon 5D MK I DSLR + Canon 24-105L Lens -
Autofocus - Hand Held
Below is a 'RAW' conversion to jpeg comparison image taken with
the Fuji X100s Camera with a 16MPixel sensor 'hand held' shot at
23mm focal length (35mm field of view) -
X100s
Autofocus - Hand Held
Comparison Landscape
Image - Sony Alpha A57 SLT Camera Below is a 'RAW' conversion to jpeg comparison image taken with
a Sony Alpha A57 SLT camera (hand held) with a
relatively in-expensive Sony DT 35mm f1.8 SAM prime lens with a
52mm field of view. The shot settings are ISO:100, aperture f5.6
and shutter 1/320sec. The Sony combo costs £514.00 vat
inclusive in the UK.
Sony Alpha A57 + Sony DT 35mm f1.8 SAM Lens -
Autofocus - Hand Held
Landscape - 4 Camera
Comparison
The following were all captured within minutes of each other
(5 shots each - best used) and
the 'RAW' image files from each camera were post processed using
Adobe Lightroom 5.3 Software and re-sized and re-sharpened using
Canon DPP Software. Click on each image to open up a 1650 Pixel
variant which is approximately A3 print size.
The Cameras + Lenses Used -
* Panasonic G6 Lumix Camera + Panasonic Lumix 20mm f1.7 ASPH MK
I Prime Lens
(No image stabilisation)
* Sony Alpha A57 SLT Camera + Sony DT 18-55mm f3.5/f5.6 SAM MK I
Zoom Lens(Camera image stabilised)
* Fujifilm X100s Compact Camera with 23mm f2 Fixed Prime Lens
(No image stabilisation)
* Canon 5D MK I DSLR Camera + Canon 24-105L f4 IS Zoom Lens
(Lens image stabilised)
The Panasonic G6 camera has a Micro Four Thirds (2x crop)
16 Mega Pixel digital sensor, the Sony Alpha A57 SLT has
an APS-C (1.5x crop) 16 Mega Pixel digital sensor, the
Fujifilm X100s has an APS-C
(1.53x crop) 16 Mega Pixel digital sensor and the Canon
5D has a '35mm Full Frame'
12 Mega Pixel digital sensor.
The cameras were all 'hand held' and set in the menus for
maximum 'RAW' image file size. The 'RAW' images were all post
processed in a similar fashion with minimum saturation and
contrast applied. The white balance temperature and tint were
matched for all the images. The shadows were slightly lifted in each image and they
all had equal sharpening applied during re-sizing for the web.
Panasonic G6 + Lumix 20mm f1.7 ASPH Lens
Sony
A57 + Sony DT 18-55mm MK I Zoom Lens
Fujifilm X100s Compact Camera
Canon
5D MK I DSLR + Canon 24-105L IS Lens
Some more Fuji X100s Landscape
Images The Fujifilm X100s camera
is great to carry around and is now my preferred choice when out
and about walking 'Brad' my dog. One of his favourite walks is up
on Blackford Hill which has a relatively steep climb and
overlooks the
Edinburgh Castle and
Arthur's Seat,
the extinct volcano. The shots of Edinburgh were taken on
separate days, hence the different lighting conditions. These are 'RAW' conversion to jpeg comparison images
which have been post processed using Adobe Lightroom 5 software
and the sharpness (small versions) tweaked for the web display using Canon DPP
software.
The 1st image was taken down at
Duddingston Loch at
the east foot of Arthur's Seat and you can see the detail in the
seagulls, high in the sky.
The grass is not like normal
bladed grass, it is hard packed, coarse and extremely short
which I suspect is due to years of bird droppings and people
walking on it to feed the birds -
These two images are
seascapes and were captured using the camera 'hand held'
from South Queensferry overlooking the Forth Estuary in
Scotland. They are jpegs converted from 'RAW' image files using
Adobe Lightroom 5 Software. They have been slightly warmed -
This image was shot near dusk
at my home at Hermiston. It was captured with the camera 'hand
held' as I was out walking the dogs, I saw the low sun glinting
on the distant barns and ran back inside to grab my camera
before the light disappeared. I used the electronic viewfinder,
raised the camera to the sky until the scene balanced more
evenly to give me a more naturally 'dusk scene' and locked the
exposure using the AEL button. I focused on the larger barn and
pressed/held the shutter button to lock the AF, realigned the
scene and pressed fully home to take the shot. This is a
jpeg converted from a 'RAW' image file using Adobe Lightroom 5 Software
and has been slightly warmed. Click on the image to open up a
1650 pixel size variant -
Another image (ISO:800) shot earlier in the month -
I have used Adobe Lightroom software to post process my 'RAW'
file images since version 3 and it works very well with all my
camera 'RAW' image files, including Canon, Panasonic, Sony and
now Fujifilm. However when it comes right down to the fine
detail in a Fujifilm X100s landscape image, especially trees,
bushes and all types of foliage, Lightroom very often leaves the
converted image just below my desired sharpness. This is
expatiated when I am converting a smaller size pixel image for
the web presentation. Very often, I have to use a third party
image sharpening software to finally tweak the converted jpeg
and lift it's sharpness. In fairness to Fujifilm, I very often
have to use the same work routine for my other camera converted
jpeg landscape images.
Lightroom has been rated for a long time as one of the great
digital 'RAW' developer software packages but PhaseOne have now
released Capture One 7.1.3 software which competes very well
with Lightroom. The following image was developed using both
software packages WITHOUT any third party sharpening software
being used. I raised the sharpness levels in both packages to a
limit just below where noise started to creep into the sky and
no noise reduction was applied. I kept the raising of the
clarity, contrast and saturation to a reasonable level in both packages
without any other editing.
The PhaseOne image does have sharper detail and there is more
brown in the trunk of the central tree, the fence railings and
some of the bushes.
You can see an example of the same image (X100s Manual
Focus Peaking - Tripod - Self Timer)
in the Landscape Section
(above) which have been post processed using Adobe
Lightroom 4.4 and has been sharpened using third party
sharpening software. I tend to use Canon DPP Software which is
bundled with my Canon cameras to sharpen my converted jpeg
images for the web.
The 23mm lens on the Fujifilm X100s camera with it's 35mm field
of view is perhaps not ideal for wildlife photography but if the
animals are accommodating and will allow closer access then it
is not impossible.
This jpeg image has been converted
from a 'RAW' image file using Adobe Lightroom 4.4 software and
it was slightly cropped for effect. It was captured (aperture
priority mode) using the LCD screen with the camera hand
held in one hand and shot through the thick glass of my patio
door - the pheasant is wild but comes up to my house for
handouts; hence his tameness in front of the camera. He is in
full colour for the mating season and already has one hen that
he brings along to get fed. The Fuji X100s handled the shot very
well considering that he was bopping and moving around, pausing
only for a split second for this shot to be taken. Please click
on the 600pixel image to open up a 1650pixel size image.
ISO:400 - Aperture f4 - Shutter 1/180secs -
White Balance and DR both set to AUTO
These jpeg images have been converted
from 'RAW' image files using Adobe Lightroom 4.4 software and
were slightly cropped for effect. They were captured (aperture
priority mode) using the LCD screen with the camera hand
held in one hand and shot through the thick glass of my patio
door. Please click on the 200pixel image to open up a 1650pixel
size image.
I visited the
Duddingston Loch which is a
great place to get in close to the wildlife.
These jpeg images have been converted
from 'RAW' image files using Adobe Lightroom 5 software and
were slightly cropped for effect.
They were captured (aperture
priority mode) using the LCD screen with the camera hand
held in one hand. Please click on the 300pixel image to open up a 1650pixel
size image.
These jpeg images of
insects have been converted
from 'RAW' image files using Adobe Lightroom 5 software and
were cropped in by about 1/3rd with some vignetting added
for effect.
They were captured (aperture
priority mode) using the electronic viewfinder and using the
lens in normal mode (not macro). Please click on an image to open up a 1650pixel
size image -
The Fujifilm X100s compact camera is not my first choice for
macro
photography or even close ups but when a spider pops up through the
drain hole in your bath, it is always at hand to get the shot. Not that I
take the X100s into a bath with me but it is the one camera that is
lying around in the living-room.
I always leave a towel over the edge of the bath so it was not long
before this big guy scuttled up and over it onto the bath room floor. I
never kill spiders and I can pick them up without any hassle but usually
they get the run of the house.
Please click on the image - it opens up a 1650 Pixel variant
and you can see all the hairy bits -
I am impressed with the
low light performance of the Fuji X100s camera. I have kept my
shots at ISO:3200 or below and I intend to avoid ISO:6400 where
possible. At ISO:3200, I can post process in some noise
reduction and retain decent image sharpness.
Some jpeg image samples converted from 'RAW' image
files post processed using Adobe Lightroom 4.4 software -
The Fujifilm X100s camera is excellent for shooting images of
flowers, especially with a wide aperture setting which
transforms the images into a more artistic appearance with a
nice bokeh, out of focus background. These images were all shot
with the camera 'hand held' and without flash. I used the normal
lens setting so these are not macro shots,
although most of the flowers are tiny in size.
I used Adobe Lightroom 5
software to post process the 'RAW' image files and converted
them to jpeg for the web display. To finish my jpeg images for
web display, I invariably raise the sharpness level using Canon
DPP software. The settings are on the 1400Pixel plates (click
on the images to open) and my favourite is the first one -
The Fujifilm X100s compact is ideal for general, everyday
photography - a camera that you can take anywhere. The 23mm lens
(35mm field of view) is good for a broad spectrum of
scenes and the 16MPixel digital sensor provides enough
resolution headroom for cropping in software post processing to
provide a narrower field of view and pull the primary subject
closer in the digital display or gallery print.
Hill Walking - I like to take Brad (my dog) for
long walks in the Pentland Hills, near Edinburgh, Scotland. It's
usually a 4 to 5 hour hike with a lunch break at the top of the
climb when we can relax and watch the wildlife activity on one
of the reservoirs. I take along a medium 'picnic' backpack
filled with sandwiches, biscuits, coffee flask, cups and a
bottle of water for Brad, although he digs into his share of the
sandwiches. The Fuji X100s camera is carried in a separate
shoulder bag the
Lowepro Apex 100 AW which will
accommodate the X100s with the adaptor/filter/lens
hood and wrist strap (or neck strap) fitted and
wrapped up in a large cleaning cloth. The spare battery slips
into the front compartment.
The X100s with it's 23mm fixed lens is more than adequate to
take on such trips, it is compact, lightweight and during the
autumn season it's 35mm field of view
is wide enough to capture some decent images. I can 'hand hold'
the camera
for most of the time and when I want to slow the shutter speed
right down, I can use the ND filter setting and my
Trekpod walking stick which
doubles up as a monopod and tripod.
I like the separate bag idea as it is relatively easy to work
with the X100s and if the rain starts (as it often does)
I can just slip the camera into the Apex 100AW and pull out/fit
it's all weather
plastic rain cover to protect it from soaking through in heavy
downpours. These pictures from a recent hill walking trip were
shot in dull overcast weather.
The Fujifilm X100s compact camera is excellent for those awkward
shots, especially my two year old
grandchildren who will not sit still and pose for the camera.
They were sitting at a table using their crayons and drawing
books and still recovering from very bad colds.
I dropped the idea of sitting on the floor and using the
viewfinder because at my age I am unlikely to get back up again.
It's a lot easier to stand beside them, hold the camera with the
right hand down at the face and using the LCD screen to centre
the centre/spot AF point on the eyes, half press the shutter
button for a very fast lock-on and then press full down to take
the shot.
These images were captured using the camera in aperture priority
mode, ISO:3200 and the aperture set at f2.8 which kept the
shutter speed up at around 1/150secs to assist 'freeze' any
movement. The 'RAW' image files were post processed using Adobe
Lightroom 5.3 software and converted to jpegs for the web
display. I ran off a number of quick 'single' shots and all were
in good focus.
Click to open to 1250 Pixel size:
Click to open to 1650 Pixel size:
During May
- July 2014, I decided to get a full motorcycle licence so I
trained with a local company, Saltire Motorcycles and after
getting my licence at the end of July, I purchased a motorcycle.
Images taken with the Fujifilm X100s
-
Recently I went along to the
Carole Nash Scottish Classic Motorcycle Show
in Edinburgh, Scotland and captured these 'low light' images using the
Fujifilm X100s camera -
Even
with a limited 23mm (35mm field of view) the Fujifilm X100s
compact camera lens
can capture a reasonable image of an 'eclipse of the sun' and
there is a fair bit of scope to crop the original in post processing
without losing much detail. Fortunately on the 20th March 2015, whilst
outside my home at Hermiston, Edinburgh, Scotland, I experienced a
partial eclipse of the sun as the moon crossed over in front of the
Earth and I was very lucky because just at that moment a seagull decided
to get in on the shot -
The Fujifilm X100s compact is more than capable of capturing my
fast moving grand children, Elliot and Flynn in the conservatory
at their home. The autofocus is accurate enough to provide a
high number of keepers. These camera produced jpeg full size image files
(renamed using Windows 7) were captured 'hand held' and in aperture priority, AF-S, and AF
full size rectangle mode - without using the flash. Even at
aperture f4 there is a reasonably shallow depth of field.
I have not really spent a great deal of time in setting up the
Fujifilm X100s for camera jpeg shots, its something I have
neglected as I prefer to shoot in 'RAW' image file mode.
I have my camera jpeg saturation and sharpness both set to +2 in
the menu settings. The saturation is probably better at +1 as
the camera jpeg image skin tones, especially the lips are
verging on the red and this is more noticeable on a HD TV
display. Interestingly enough the full size camera jpegs when
displayed on a PC screen at 100% are not that attractive and are
better restricted to around the A3 size or very slightly larger
for viewing BUT on a HD television screen, WOW, you can
really see the clarity, the detail, the sharpness at way beyond
A3 display size. I only found this out the other day as I don't
own a HD TV.
I have included some
images shot in sequence, some f2 wide open shots and some general shots. Brad as usual (the dog) had to get
in on the act. Click on the small images to open up to full size
camera jpeg image files - best viewed at around A3 size -
____________________________________________________ Night Photography
The other night, I went into Edinburgh to see the Christmas
lights; I had the Fujifilm X100s with me and it was the first
time I had used it for night photography on the street. It can
take a while to get used to a camera, especially on dark nights
with bright lights popping up all over the
place but the X100s is great for handling and the autofocus
behaved flawlessly.
I used the X100s in aperture priority mode, single shot mode,
exposure multi-metering, centre spot autofocus and I found that
it required (95% of shots) a -1 exposure compensation to
balance the overall exposure. The camera without any exposure
compensation adjustment tended to meter the darkness out of the
sky and over expose it to produce a light brown glow with noise
and the resolution of the foreground was lost in the brighter
areas. The -1 exposure compensation also gave me the advantage of
gaining a faster shutter speed.
Keeping the ISO rating down is no easy matter as very often you
want to freeze subject movement with a high shutter speed like
the spinning carousel below where I was using a shutter speed of
1/200sec to 1/320sec to capture the detail. I found myself
working on average between ISO:1600 and ISO:3200 and at
apertures of f2.0 and f2.8. Any images shot in the dark of
distant subjects like the one below of the blue lit castle had
to be kept at ISO:3200 as ISO:6400 resulted in too much loss of
resolution. Shooting was straightforward enough once the
exposure was properly set-up with the desired aperture and
shutter speed determining the ISO rating; select primary subject
area with centre spot AF point, half press shutter button/hold,
realign scene and press shutter button fully home.
These 'RAW' image files were
all shot without a tripod or flash and the camera was 'hand
held' at all times.
I post processed them using Adobe Lightroom 5.2 Software and noise reduction was applied
(around 10-15) for luminance and colour. The converted
re-sized 1650 Pixel jpegs were finally re-sharpened for the web
using Canon DPP software.
treet
Photography - Sony A7/A7R
or Fuji X100s Camera!
The favourite 'field of
view' for 'Dedicated
Street Photography' is
35mm and this is because
when shooting at close
quarters on the street, the
photographer is able to
capture
full
body shots with a decent
scene of activity in the
background. Also, with a
'high resolution' digital
sensor a more distant and
wider scene can later be
cropped into for effect in
computer software post
processing and/or within
some cameras after the shot
is taken. Many street
photographers also like to
shoot in low light and at
night under street lights,
so a decent wide aperture
(f1.4/f1.8/f2) lens is
desirable and one which can
mate to a digital camera and
can produce clean images at
night with a low noise vs
image quality at around
ISO:1600/3200.
The modern 'enthusiast'
camera can shoot in digital
jpeg and 'RAW' image file
formats. Some photographers
prefer to shoot the camera
produced jpegs ready for
printing or posting on a
website and others the 'RAW'
format which they can later
develop/post process using
software on a computer.
With the announcement of the
new Sony Alpha A7/A7R
'full frame' compact system
cameras with interchangeable
lenses I reckon there will
be a rush by 'enthusiast'
street photographers to
purchase a camera system
that many have been seeking
for a long time! However, if
you are into dedicated
street photography you
may not be able to afford
the Sony A7 with a
Sony/Zeiss FE
35mm f2.8 ZA
Sonnar T* prime
lens
as the expected price will
be around £1,885.00
on pre-order vat inclusive
in the UK.
The Sony A7 will certainly
be far less expensive than a
corresponding Leica M240
with Leica 35mm f1.4
Summilux prime lens and
shooting the Sony A7/A7R
camera
'hand held' with a 35mm lens
at night under street lights
without image
stabilisation (same with
the Leica M) is no big
deal as the 'full frame'
sensor will facilitate a
reasonably low shutter
speed; in any case the A7
should be more than capable
of delivering excellent
image quality at ISO:3200
therefore allowing a faster
shutter speed with that wide
open f2.8 aperture.
However, the A7 does not
have a faster f1.4 or even
an f2 aperture on it's lens
OR that beautiful optical
(body)
viewfinder
with the
'inner framed'
rectangle (capture area)
that also lets you see what
is entering the scene from
either side of the total
viewing area. So what is the
best alternative, similar to
a Leica M in use and
delivering excellent image
quality at a lower price?
I currently use a
Fujifilm X100s
digital compact camera which
has a
'fixed 23mm'
(35mm field of view) f2
aperture lens and it also
does not have image
stabilisation but 'quid pro
quo' the lens is 23mm native
so on an APS-C 1.53x cropped
sensor, it too can easily
facilitate lower shutter
speeds and it can also
deliver excellent low light noise vs
clean image quality up to
ISO:3200.
The X100s has
a
hybrid viewfinder, an
optical one designed with an
rectangle outline so that
your eye can see around the
rectangle viewed scene and
take in what subjects are
coming into the scene and
ALSO an electronic one
(both toggled by a flick
switch) which conveys
accurately the changing
light and focus in the scene
to the eye, similar to the
rear LCD screen. Phase
detection autofocus
(0.08sec) is also
included in both viewfinder
modes and when using the
lens in manual focus mode
there is a distance scale in
the optical one and 'what
you see is what you get'
in the electronic one as
well as focus peaking and
split image manual focus
aids. My camera costs around
£999.00 vat inclusive
in the UK.
Fujifilm X100s Compact -
Basic Specifications:
*
Fujifilm-designed 16.3MP APS-C X-Trans CMOS II sensor
* Excellent low light noise vs clean image quality up to
ISO:3200
* On-sensor phase detection 0.08sec autofocus
*
Continuous drive : 6 frames
per second
* 14Bit 'RAW' image files and camera produced jpegs
* No optical low-pass filter
* EXR Processor II image processor
* Hybrid optical / electronic viewfinder with 2.35M dot
resolution
* Dedicated dials for shutter speed, aperture and exposure
compensation
* Fixed 23mm f2 lens (35mm field of view) * Manual focus system (lens focus ring, focus peaking
and split image displays)
* 2.8" 460k dot rear LCD
* 'Q' control panel and tabbed menu system
* Full HD 1080 60p/30p movie recording, (H.264 MOV -
36Mbps bit rate)
* Socket for electronic remote release/stereo microphone
23rd May 2020- The Fujifilm X100s camera
is one of the best compact cameras that I have ever
used.
Handling + Manual Controls - For street photography the
Fuji X100s compact does not get any better for handling. It
performs at it's best (for me) with the lens set in
either manual hyperfocal or autofocus modes and the electronic
viewfinder is great but the optical viewfinder is awesome. I
purchased the camera as an alternative to a Canon 35L lens and
the X100s has not disappointed in this respect. For general use,
it is compact, lightweight and easy to carry around in my hand
(or waist belt/shoulder bag) all day (wrist strap for
backup) or in a larger bag alongside my 35mm 'full frame'
DSLR for project work.
Autofocus - Initially I had problems with the AF-S
area/centre/spot autofocus which would not lock onto certain
subjects, typically in very low light, close-up flowers and subjects
with large colour areas (e.g. clear blue skies, large
doors)but generally for 98% of my shots
the autofocus was fast and accurate enough to deliver a very
high keeper rate. On the odd occasion the autofocus went into
free fall and refused to lock onto anything but I established
that this invariably happened when there was a large movement in
the lens glass typically shooting a close up subject and then
shooting a subject near or at infinity and vice versa. The
answer is to keep the lens glass near the centre of its travel
distance for general distance (e.g. street photography)
shooting. I also found that separating the exposure, by adjusting it
and locking it, using the AEL button, BEFORE the
half/press/hold of the shutter button to lock the autofocus on a
subject, delivered the 'optimum' exposure and autofocus
accuracy.
Firmware Fault + Battery Life - To date (23rd M\ay
2020) I have had only
one lock-up of the firmware with a battery removal to clear it
and the problem has never repeated. The battery life leaves a lot
to be desired, especially if you use the built in flash but for some reason the life is longer if you
allow the battery to properly drain before a full charge. Small
top up charges do not seem to last as long. I have a spare
battery and I recommend that you purchase a Fujifilm brand
battery as a backup.
Optimum Image Quality - The Fuji X100s lens
is exceptional all the way from the widest aperture at f2 and
stopped down to f16 but I reckon aperture f8 (ISO:200) is
the optimum for image quality, delivering a reasonable balance
across the entire image with a decent depth of field. I tend to
shoot 'RAW' image files which restricts the camera to ISO:200
for optimum image quality as ISO:100 cannot be used. Like any other 23mm lens it has it's
limitations for resolving at distance which should not be
pushed, especially in lower light conditions. I tend to remain
at ISO:3200 or below for low light shooting where the noise is
very well controlled with exceptional resolution, however in
good light, ISO:6400 is more than adequate for A4 size digital
displays and prints. The 'optimum' image quality is achieved by
shooting in 'RAW' image file format and post processing in Adobe Lightroom
5 or PhaseOne Capture One 7.1.3 software but with
the correct exposure the camera produced jpegs image files are
exceptional.
Camera Produced Jpeg Image Files and HD TV Display
I have not really spent a great deal of time in setting up the
Fujifilm X100s for camera jpeg shots, its something I have
neglected as I prefer to shoot in 'RAW' image file mode. I have
my camera jpeg saturation and sharpness both set to +2 in the
menu settings. The saturation is probably better at +1 as the
camera jpeg image skin tones, especially the lips are verging on
the red and this is more noticeable on a HD TV display.
Interestingly enough the full size camera jpegs when displayed
on a PC screen at 100% are not that attractive and are better
restricted to around the A3 size or very slightly larger for
viewing BUT on a HD television screen, WOW, you can
really see the clarity, the detail, the sharpness at way beyond
A3 display size. I only found this out the other day as I don't
own a HD TV.
Adobe Post Processing PC Display/Print Limitations -
It is interesting that
Fujifilm in their X100s owner's manual, state that with the camera set at the
L3:2 image size setting (4,896 x 3,264) the largest print expected
from the camera is 16" x 11" which is approximately A3. When you
digitally display the actual L3:2 image size on a PC screen at 100%
it actually measures out at around 47.5" x 31.6".
There is no doubt that the Fuji X100s images (camera jpegs
and post processed RAWs) can be digitally displayed or
printed above 16" x 11"
and if you are careful, you can increase the sharpness, contrast
and saturation amongst other settings up to your chosen size to
present a reasonably balanced image without any artifacts such
as
compressions or
a mottled effect (image breakup) but the possibility of
jaggies in non
vertical/horizontal lines may force lighter sharpening. In the end it is all about creating an digital
display and/or gallery print that is post processed for a specific
viewing distance. For more information please
visit my article on
optimum image quality.
Adobe LR5 RAW Conversion for Gallery Prints -
The new (1st September 2013) Adobe Lightroom 5 software is excellent
and a slight improvement over the 4.4 version for post
processing
'RAW' image files and converting
them to tiff format. With careful editing you can create a 100%
full size tiff image which is free from jaggies and compressions
and can be used to produce
an excellent gallery print. The actual size of the final gallery
print is determined by how much sharpening has been applied in
post processing as in some cases a 100% print size (around
47.5" x 31.6")
may display a breakup in the rendition.
Adobe
LR5 RAW Conversion for PC Digital Display - The new (1st
September 2013) Adobe Lightroom 5 software is excellent and
a slight improvement over the 4.4 version for post processing
but it has limitations with the X100s (.RAF) files in
relation to sharpening images for PC digital display as even the slightest over sharpening
will create a 'mottled' breakup of the image at 100% digital
viewing size.
On the other hand if you re-size and sharpen the image
(typically 2000/1650 Pixel sizes) the mottling effect cannot
readily be seen in a PC digital display. However,
the Fujifilm X100s camera does not have an anti-aliasing filter
and there is a
Catch-22
in that images that have
been re-sized and moderately sharpened, even large images at
2000/1650 Pixel sizes can digitally display
jaggies a stair
like effect on
non horizontal/vertical lines (e.g. railings, telephone wires,
window frames, tiles, gutters, etc) which will show jagged edges
or even in the case of rounded railings, you can see continuous
rotational edges. Unfortunately to
remove the jaggies means that you either have to blur
that part of the image in post processing using an adjustment brush (or
specialised software) or the image may
have to be presented without additional sharpening applied. Full
size 100% digitally displayed images do not seem to suffer from this problem as much but
then sharpening is restricted in any case to avoid the mottling
effect.
This 'jaggies' phenomenon is not restricted to the Fuji X100s
camera as it is common in other camera digital images that have
been re-sized and sharpened for digital display.
For the Digital Purist Photographer
The Fuji X100s compact camera is designed for the purist
photographer who likes to shoot camera jpegs in aperture
priority and manual modes. Once you strip away the 'bells and
whistles' it has the essential manual controls and the ability
to pre-set the jpeg 'capture settings' in the menu to allow the
photographer to experience the most basic form of capturing
images with a camera. The 49mm filter thread on the
(optional) Fujifilm adapter can accommodate screw in
hardware filters as well as accepting screw adapters for sliding
filters such as the 75mm and 100mm
Lee Systems. The electronic
viewfinder is excellent but if the photographer wishes an even
more 'basic' experience, the optical viewfinder emulates the
frame display of the Leica M series cameras. It is unfortunate
that the lens does not have a
depth of field
scale on the barrel but
hyperfocal
and depth of field zone focusing can be accomplished by setting
the camera in manual focus mode and using the blue bar scale in
the optical or electronic viewfinders to pre-set the required
distance. The camera can also be used in camera jpeg plus 'RAW'
image file capture for those photographers who wish to post
process 'RAW' image files with minimum editing to covert and
produce a tiff image file variant.
Overall - I cannot fault the Fuji X100s, it's manual
controls, the electronic and optical viewfinders and the
handling deliver a terrific buzz, especially for street
photography. As a camera for general use, for carrying around
with you in domestic, social and even for specific project work,
the X100s compact excels. Some photographers might expect too
much from the X100s with it's 23mm 'fixed' lens and 35mm 'field
of view' but it is designed from the ground up to be used as a
lightweight compact, delivering excellent image quality similar
to a larger and much heavier 35mm 'full frame' DSLR camera.
If this article has assisted you in any way - please
donate to my Charity of Choice - The
Sick Kids

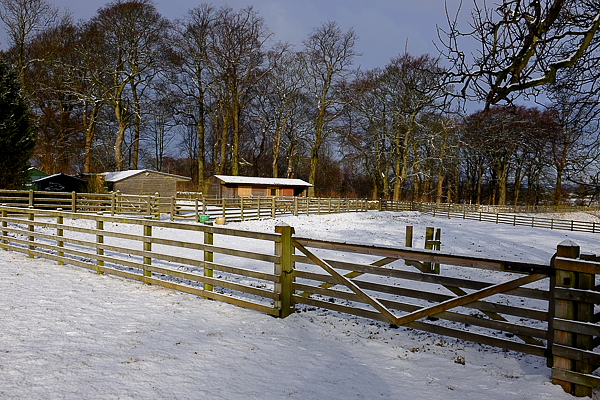
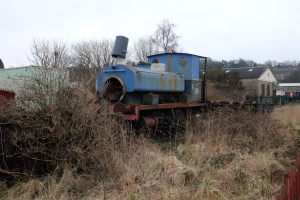
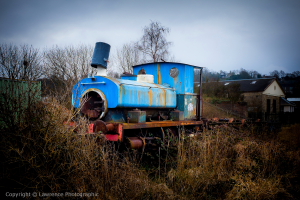

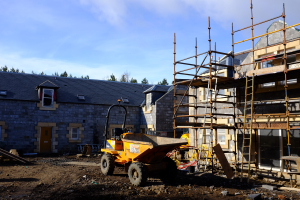
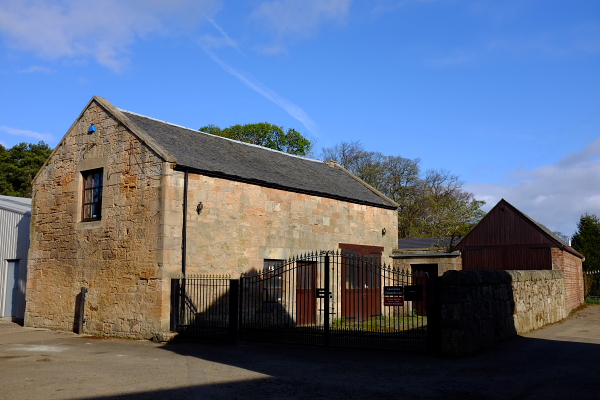
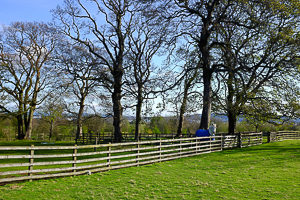
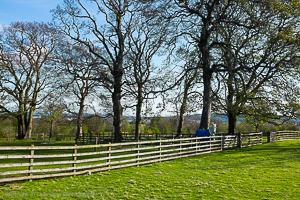
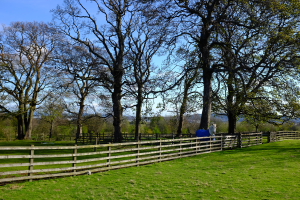
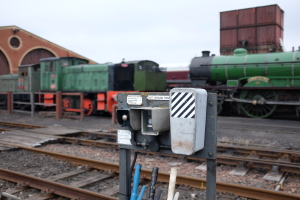
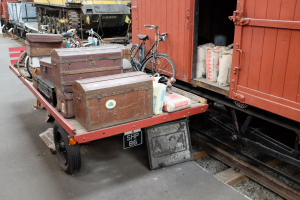
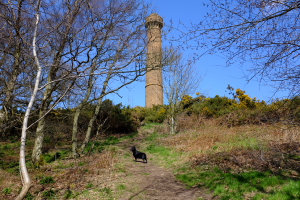
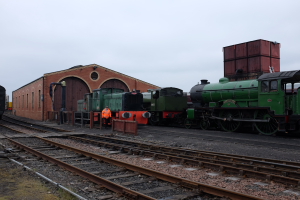
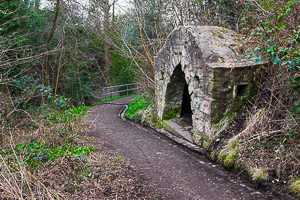

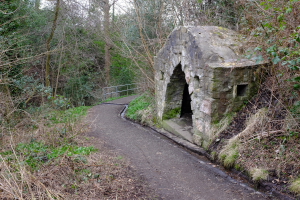
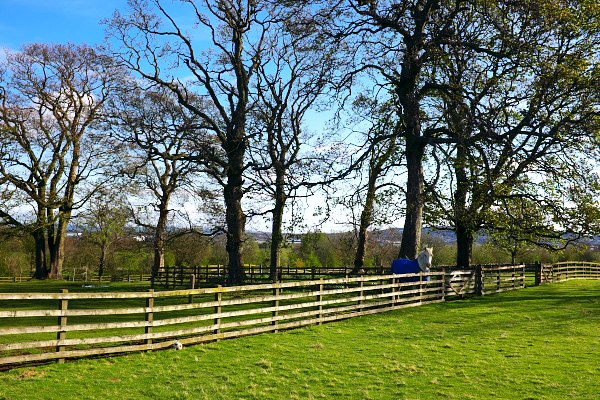

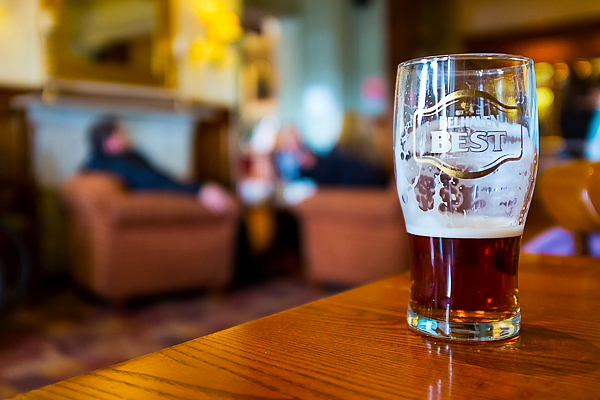

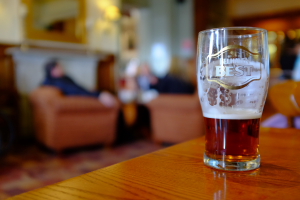
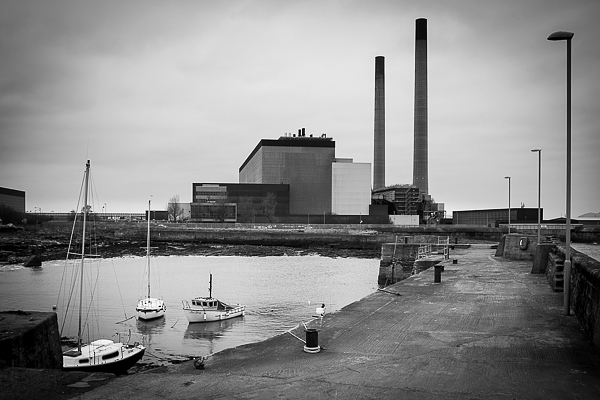
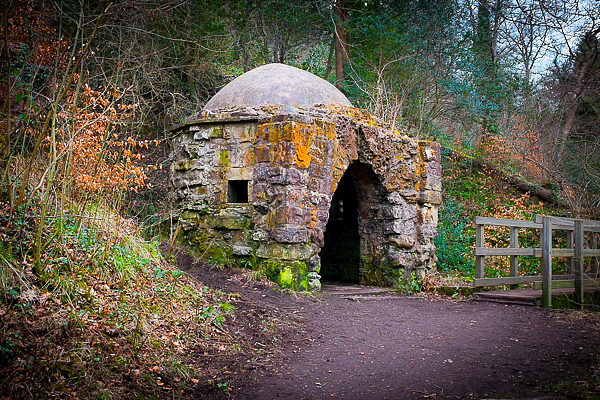
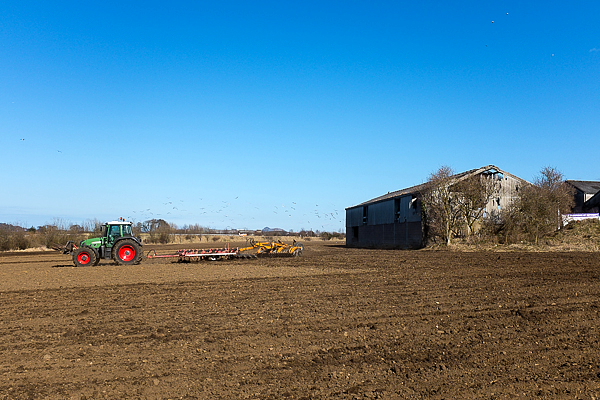
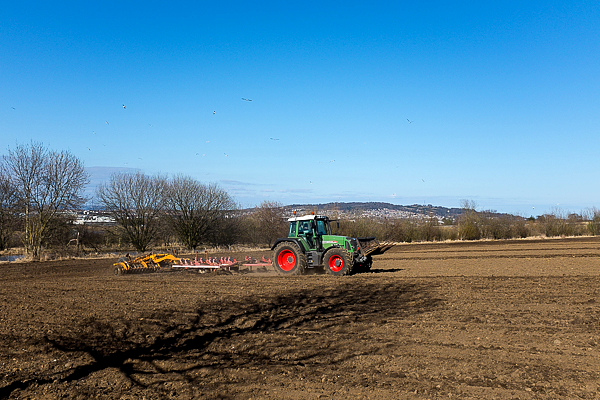
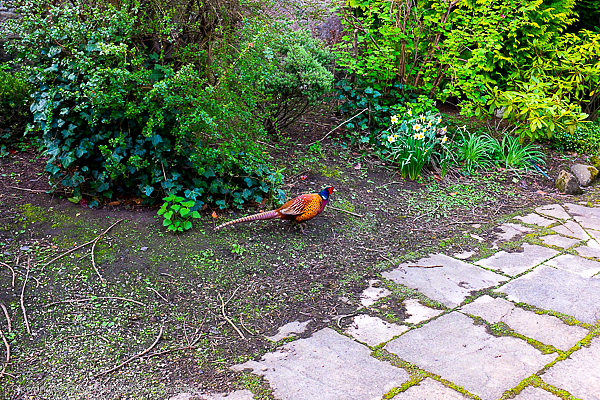
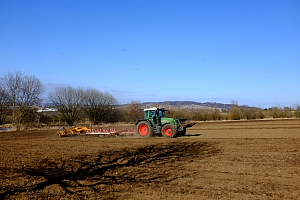
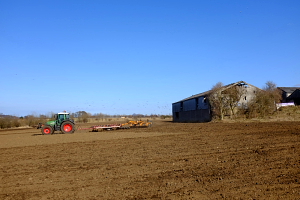
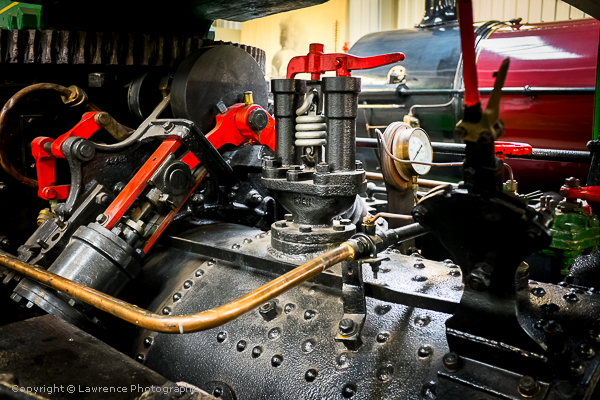
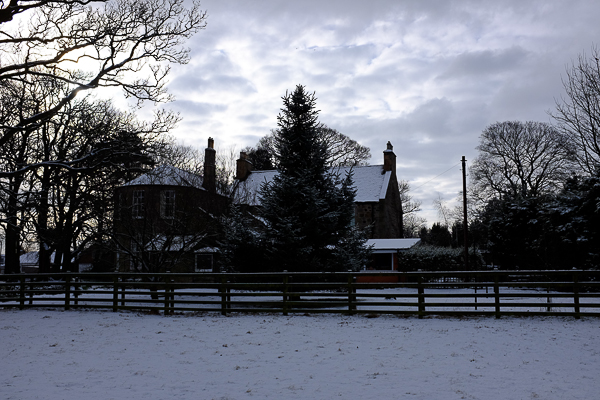
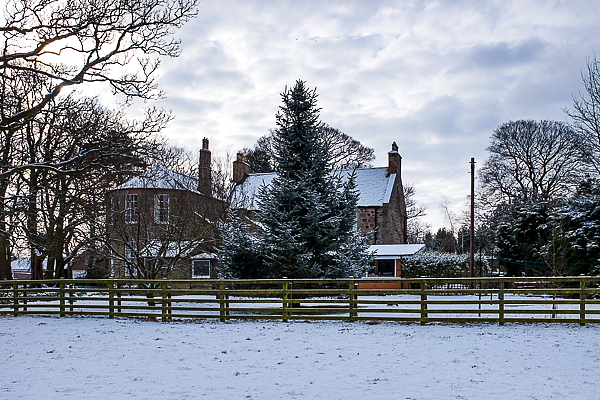
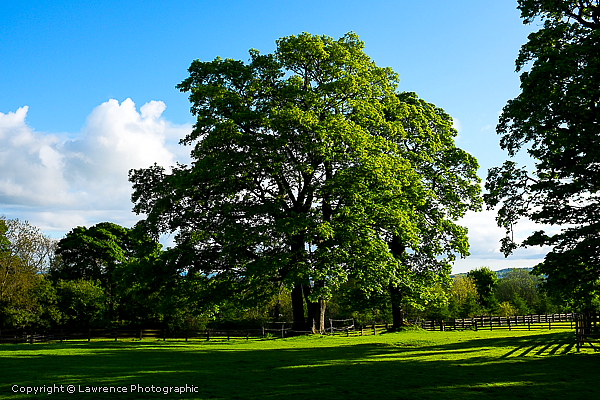
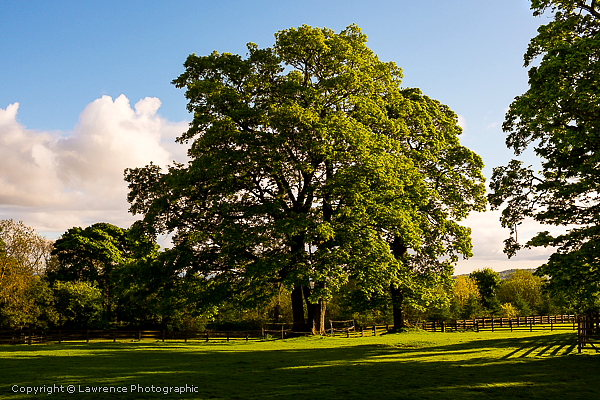
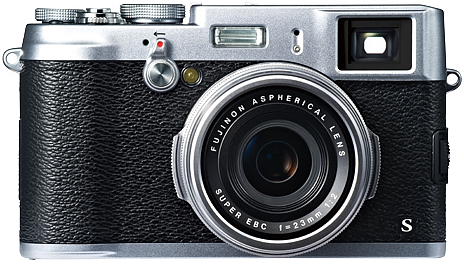
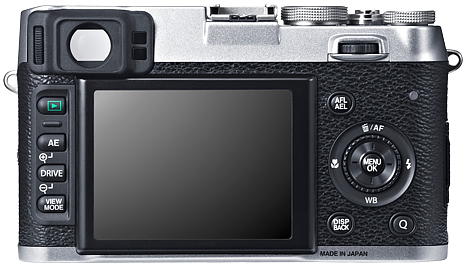

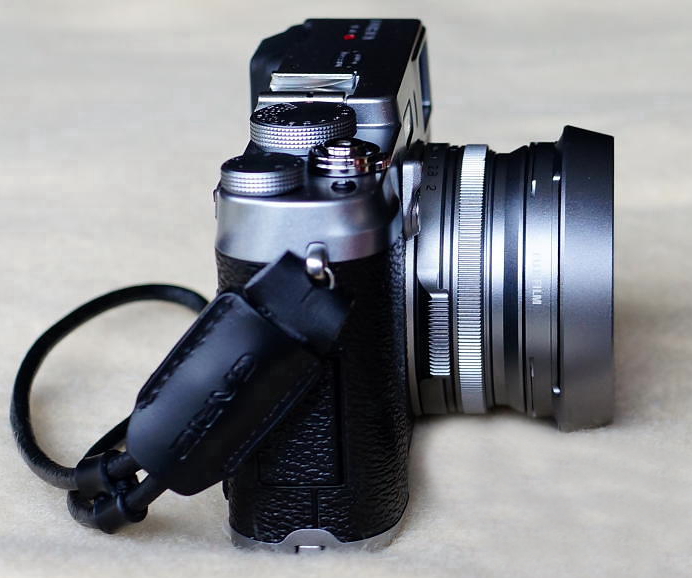 the Fuji filter adapter, B+W
MRC UV 49mm filter and the Fuji lens hood which all compliment
the build of the camera as they are all beautifully
manufactured. I leave the adapter/filter/lens hood permanently
fitted and the camera looks great. I have fitted a Gariz wrist
strap as opposed to the supplied shoulder strap and I like to
carry the camera with my hand cupped around the base and my
thumb between the hood and body.
I have no argument with the manual controls as the buttons are
all perfectly placed and (for my needs) I will very
rarely visit the Q menu. In any case, I do not have a problem
with the menu system on the Fuji X100s, it is well laid out and
relatively easy to use but in reality the camera begs to be used
as befitting its' retro style dials and buttons.
the Fuji filter adapter, B+W
MRC UV 49mm filter and the Fuji lens hood which all compliment
the build of the camera as they are all beautifully
manufactured. I leave the adapter/filter/lens hood permanently
fitted and the camera looks great. I have fitted a Gariz wrist
strap as opposed to the supplied shoulder strap and I like to
carry the camera with my hand cupped around the base and my
thumb between the hood and body.
I have no argument with the manual controls as the buttons are
all perfectly placed and (for my needs) I will very
rarely visit the Q menu. In any case, I do not have a problem
with the menu system on the Fuji X100s, it is well laid out and
relatively easy to use but in reality the camera begs to be used
as befitting its' retro style dials and buttons. 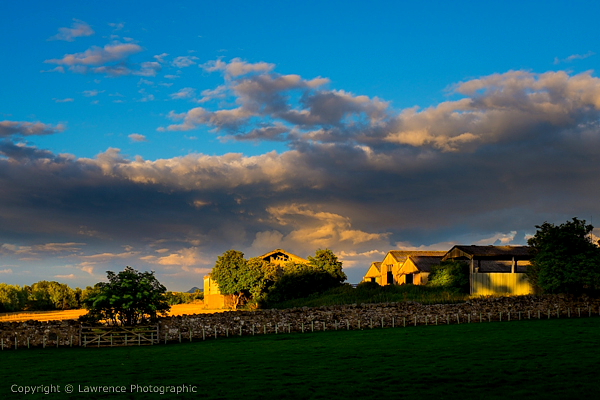
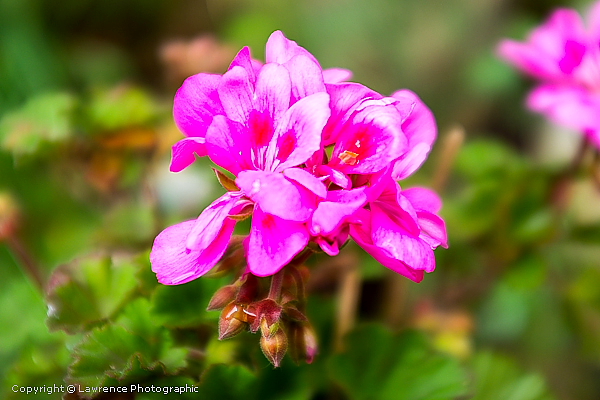
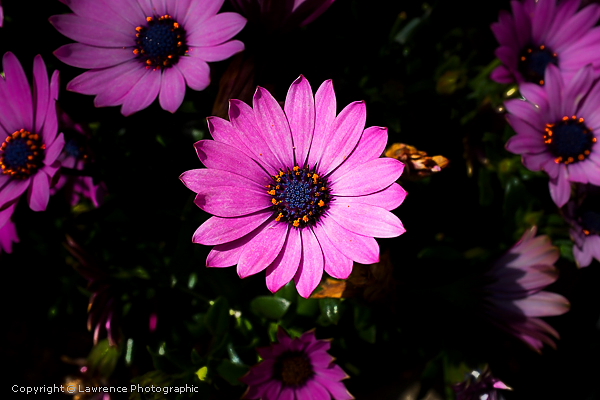
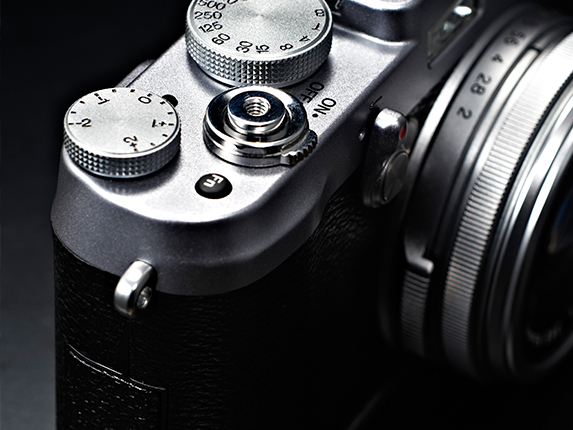 in the resolution of the lens
at certain apertures. The lens centre resolution rises and
peaks at apertures f4, f5.6 and f8 before gradually falling off
at f11 and f16. The borders gradually rise in resolution from
aperture f8 until they almost match the best centre resolution
of the lens at f16 - yes the borders are softer but in
comparison to other lenses, even some of the more expensive
primes, the image quality remains excellent. There is a
crossover in resolution between the centre and the borders and I
reckon the optimum aperture for the best overall image image
quality has to be f8 based on placing the centre performance as
the primary objective. There is no doubt that my lens has some
sort of 'field curvature' weakness which can be seen (some
images) in landscapes shot at infinity. This is seen as a
border resolution weakness and in some cases can only be seen on
one side of the image. This is more apparent if the lens is
positioned to the right (or left) and off centre to the
scene when the shot was taken. The further the landscape
scene is away from the lens the more apparent the border
weakness becomes but more so with infinity focusing. It may well
be lens 'field curvature' and I suspect it is in the design and
build of the 23mm lens (rather than a poor copy). At
aperture f16 with an infinity focus landscape shot, the border
edges display the optimum resolution, however at f16 the lens
centre is at maximum diffraction and
in the resolution of the lens
at certain apertures. The lens centre resolution rises and
peaks at apertures f4, f5.6 and f8 before gradually falling off
at f11 and f16. The borders gradually rise in resolution from
aperture f8 until they almost match the best centre resolution
of the lens at f16 - yes the borders are softer but in
comparison to other lenses, even some of the more expensive
primes, the image quality remains excellent. There is a
crossover in resolution between the centre and the borders and I
reckon the optimum aperture for the best overall image image
quality has to be f8 based on placing the centre performance as
the primary objective. There is no doubt that my lens has some
sort of 'field curvature' weakness which can be seen (some
images) in landscapes shot at infinity. This is seen as a
border resolution weakness and in some cases can only be seen on
one side of the image. This is more apparent if the lens is
positioned to the right (or left) and off centre to the
scene when the shot was taken. The further the landscape
scene is away from the lens the more apparent the border
weakness becomes but more so with infinity focusing. It may well
be lens 'field curvature' and I suspect it is in the design and
build of the 23mm lens (rather than a poor copy). At
aperture f16 with an infinity focus landscape shot, the border
edges display the optimum resolution, however at f16 the lens
centre is at maximum diffraction and
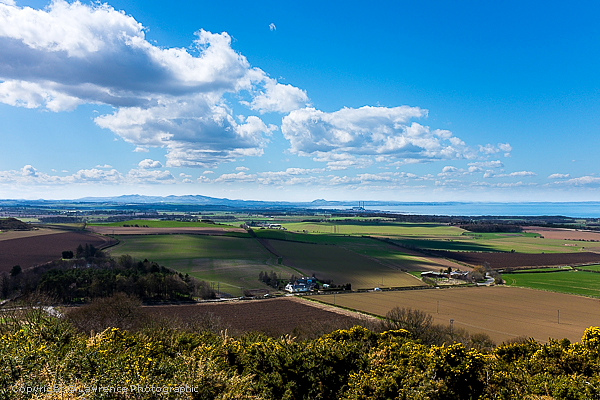
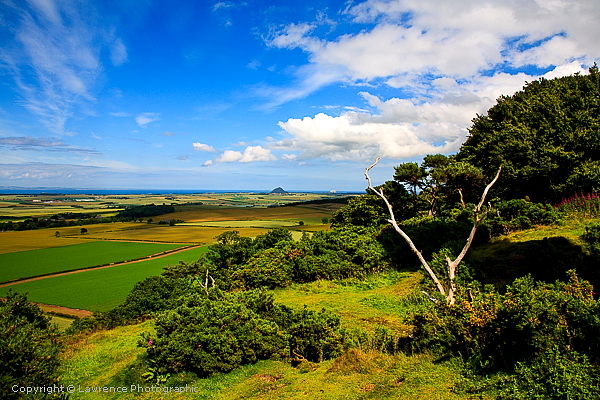
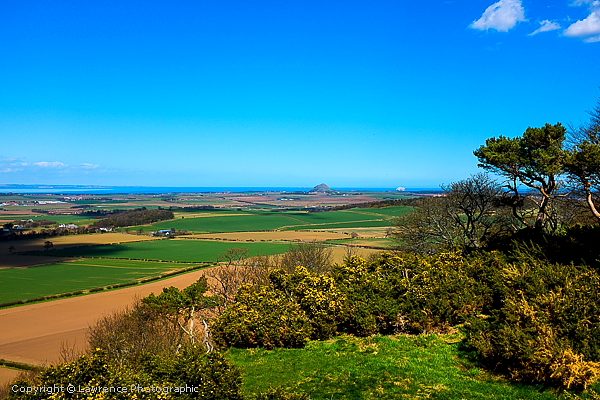
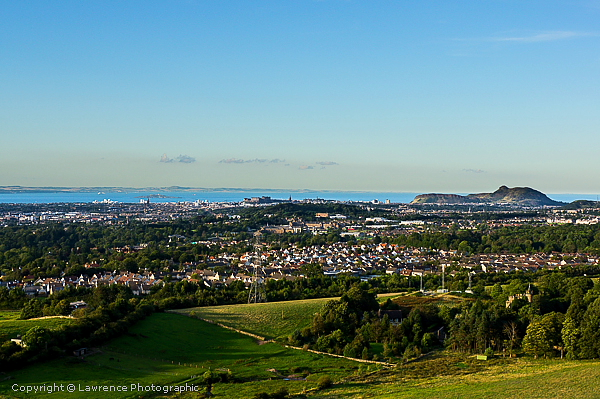

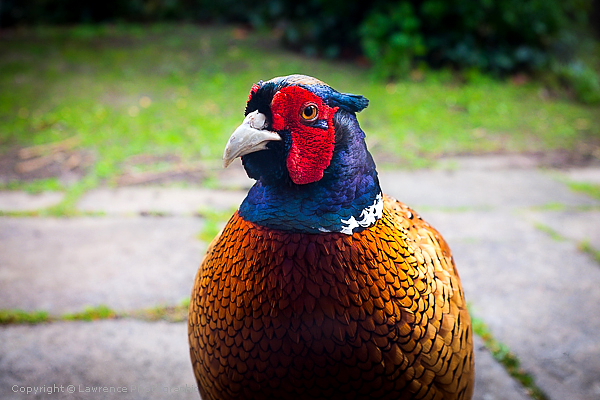
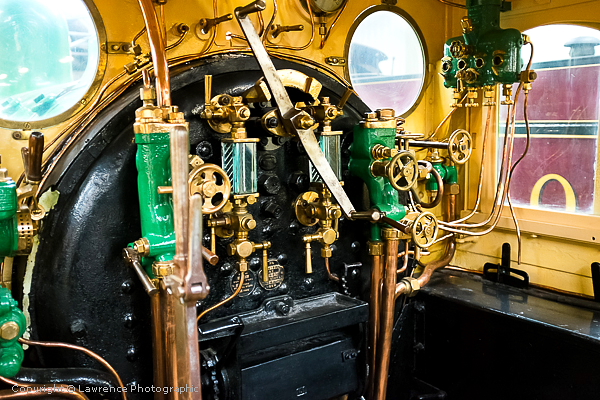
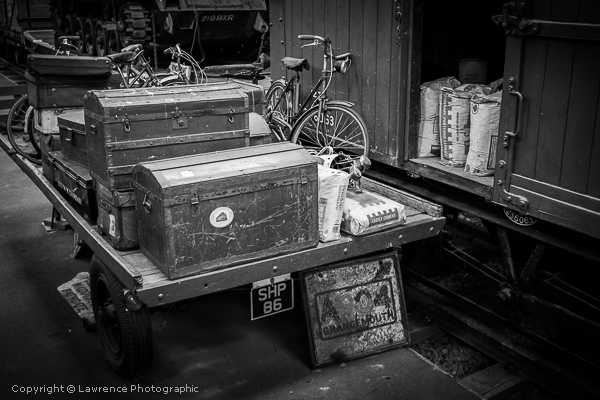
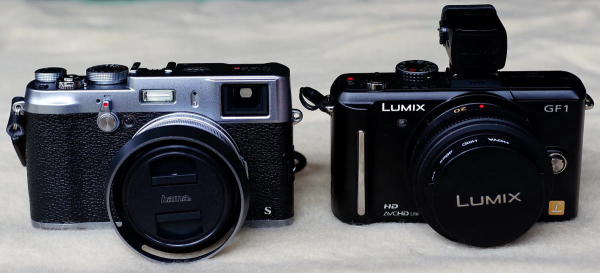
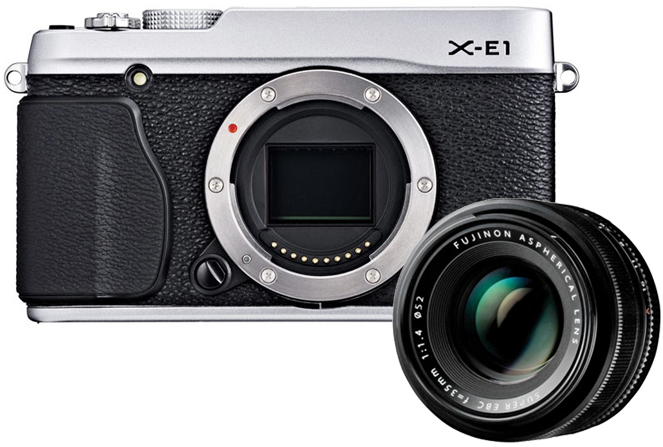 focus peaking (manual focus assist) to put a sugar frosting
coating over the areas in focus will enjoy the extra technology the
X100s offers.
focus peaking (manual focus assist) to put a sugar frosting
coating over the areas in focus will enjoy the extra technology the
X100s offers.
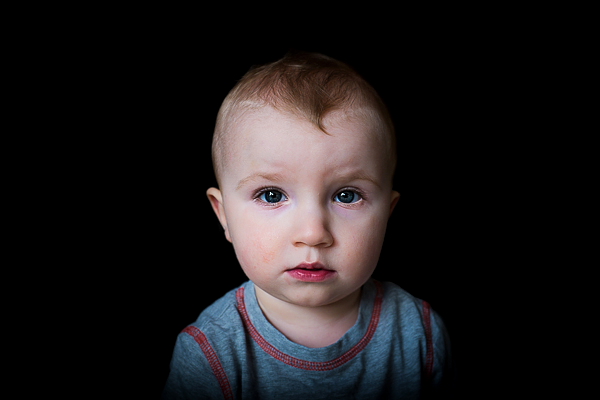
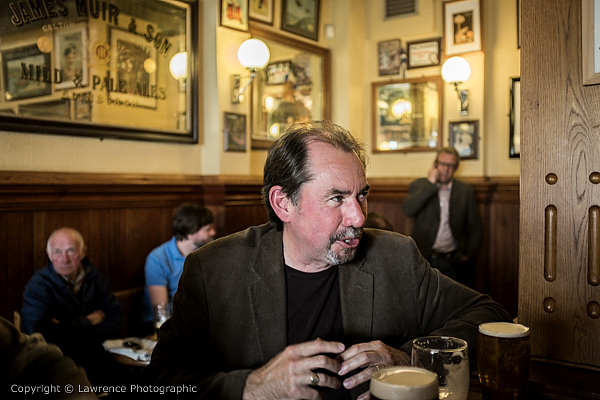
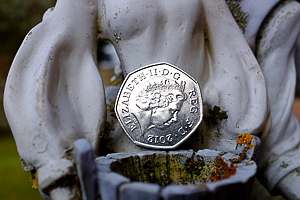
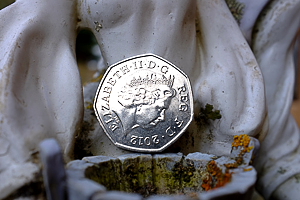
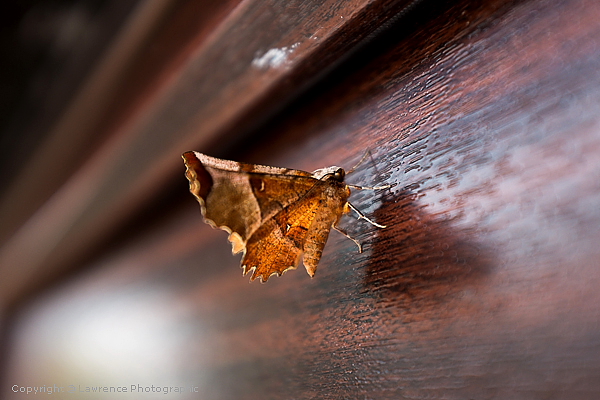
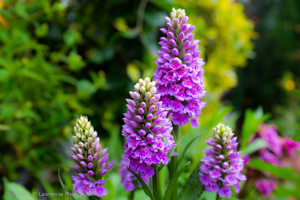
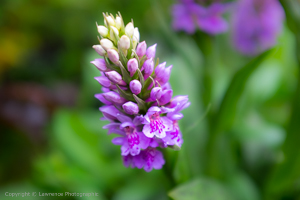
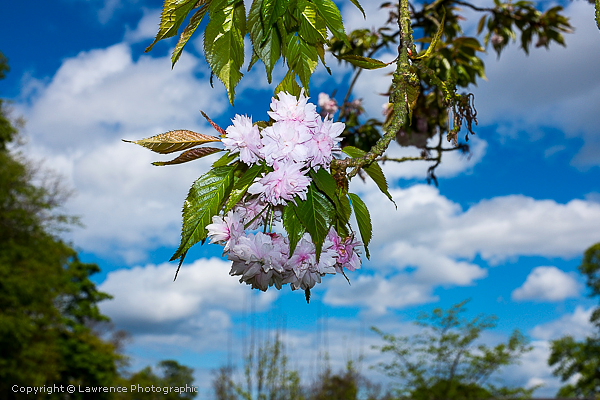
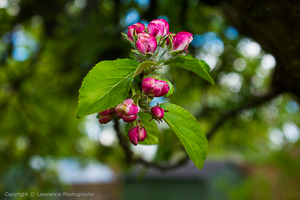
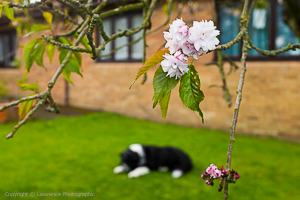
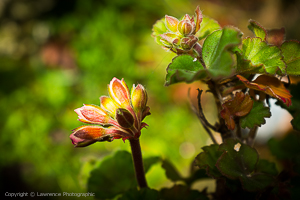
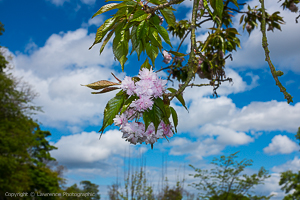
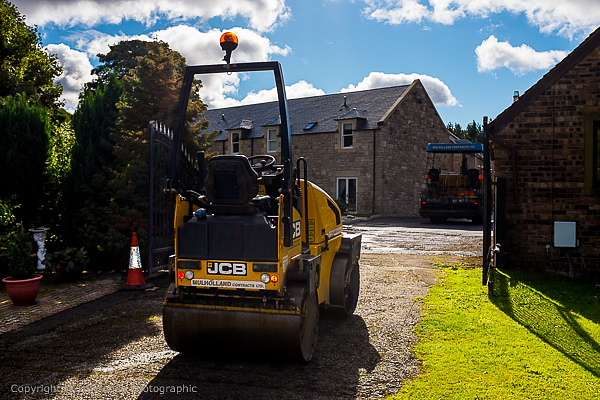
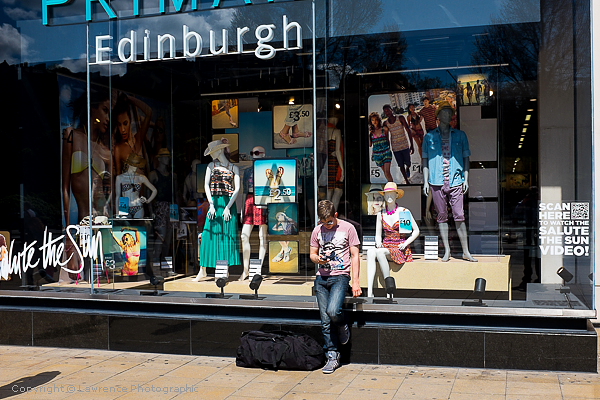
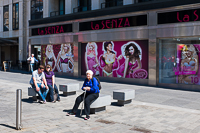
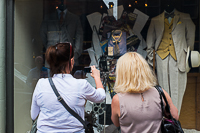
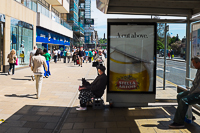

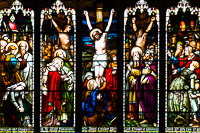
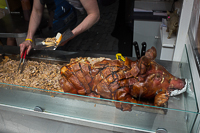
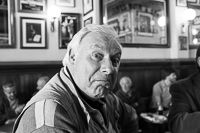
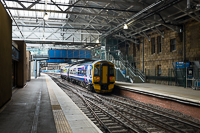
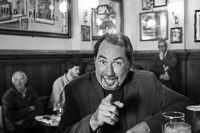
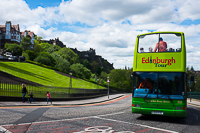
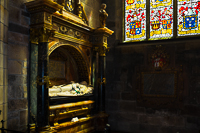
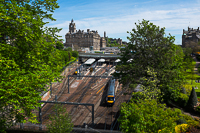
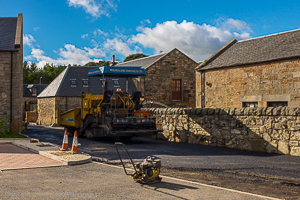
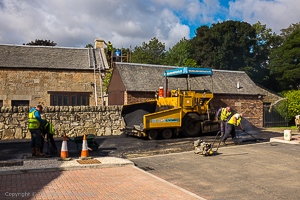
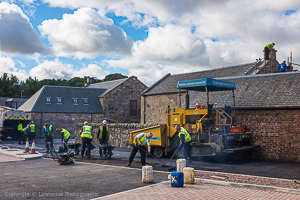
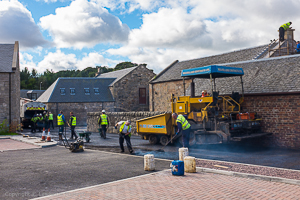
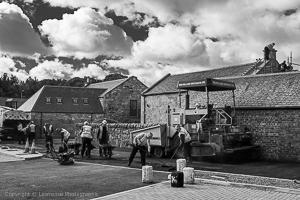
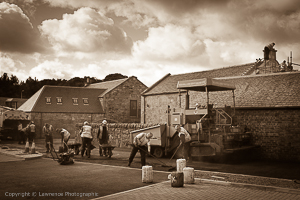
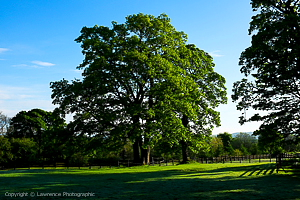
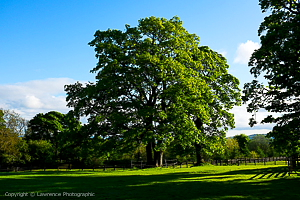
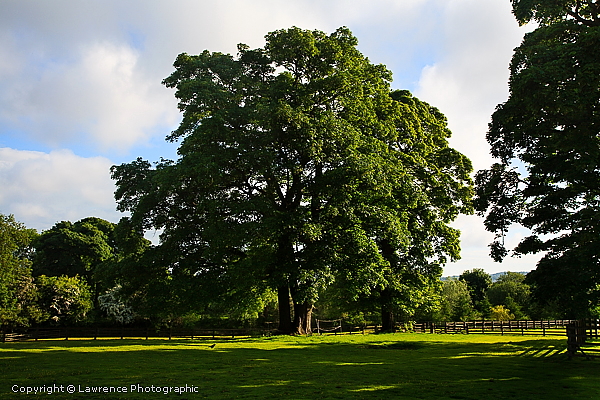
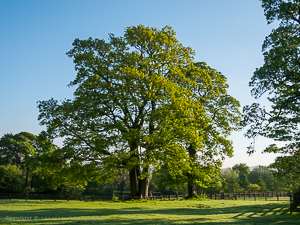
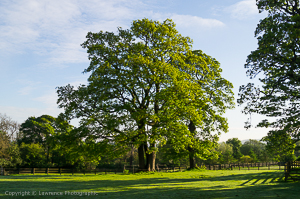
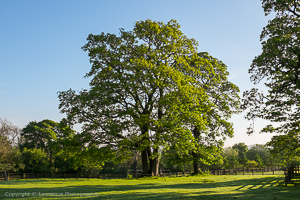
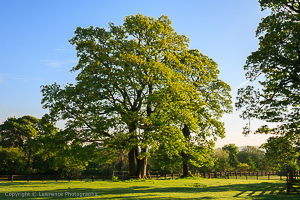
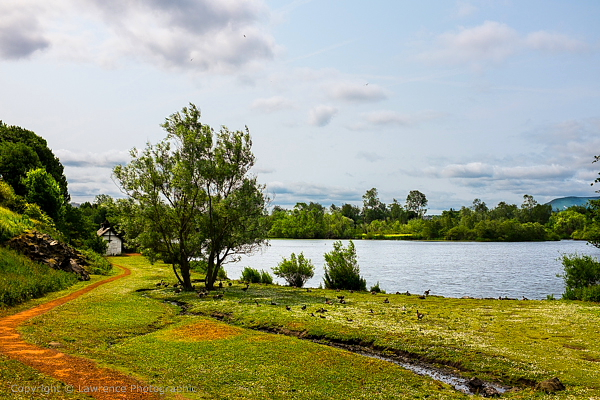

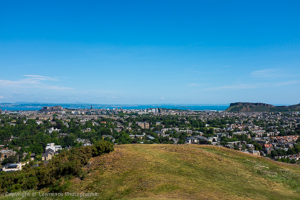

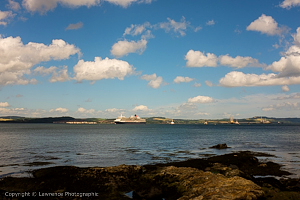
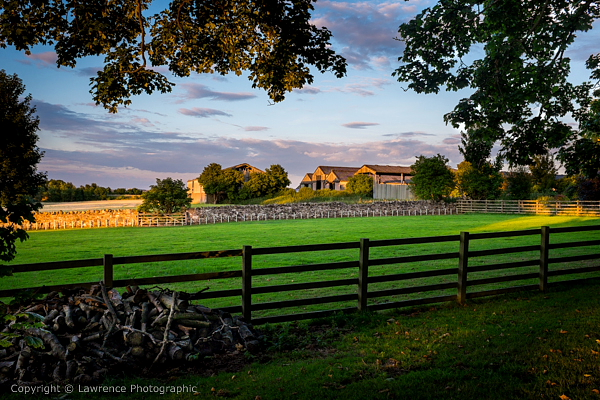
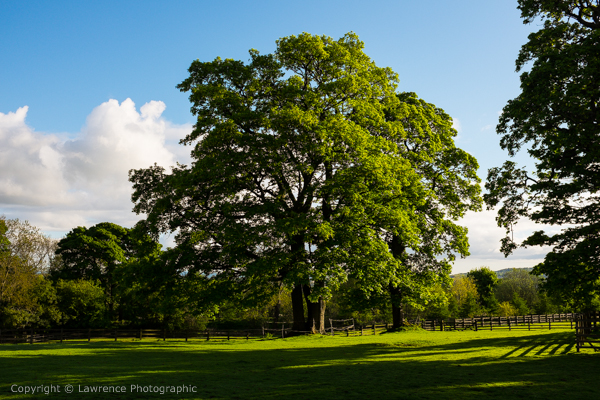
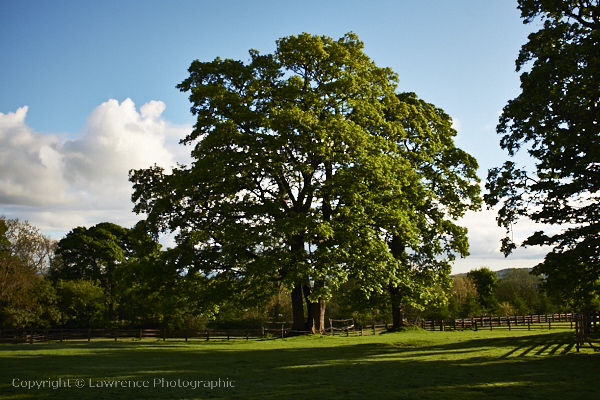

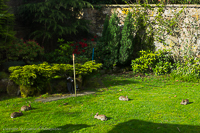
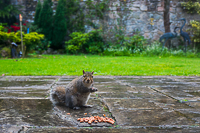
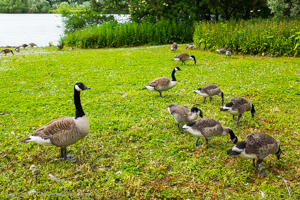
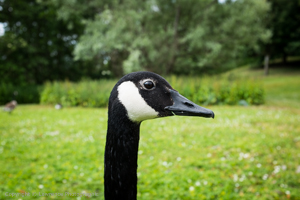
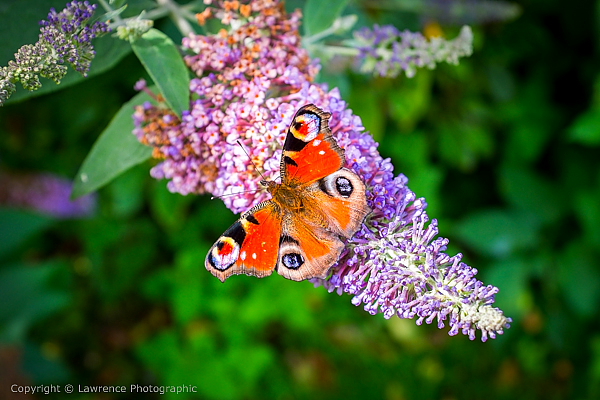
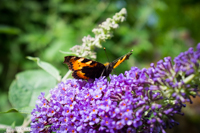


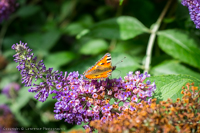

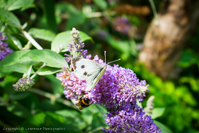

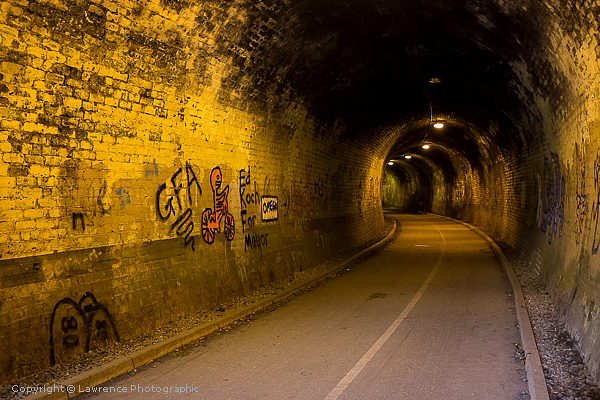
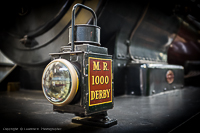

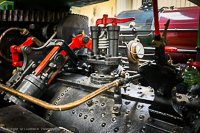
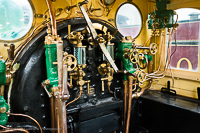
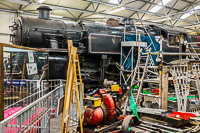


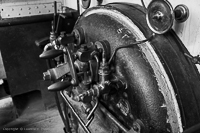

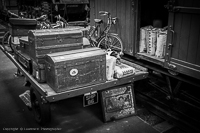

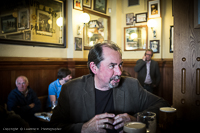

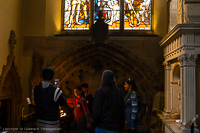
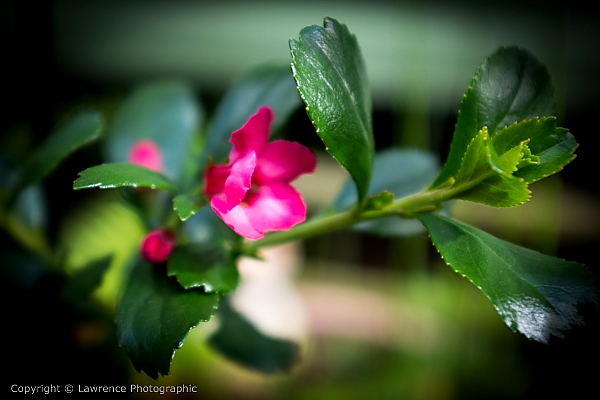
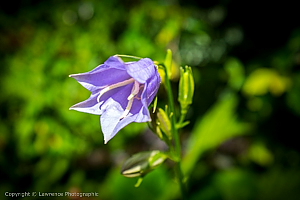
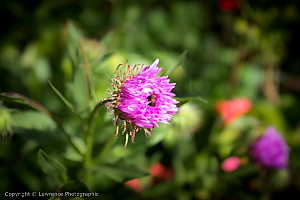
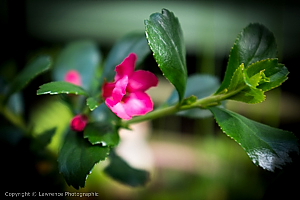

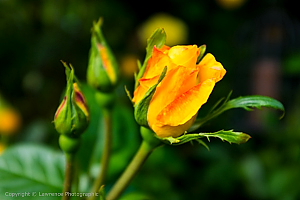
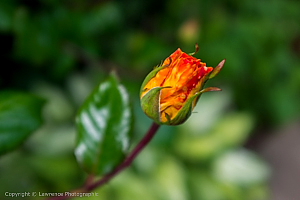
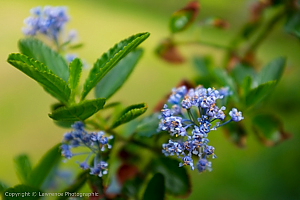
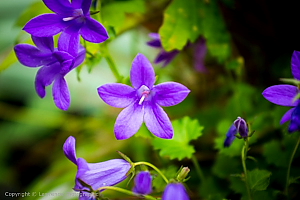
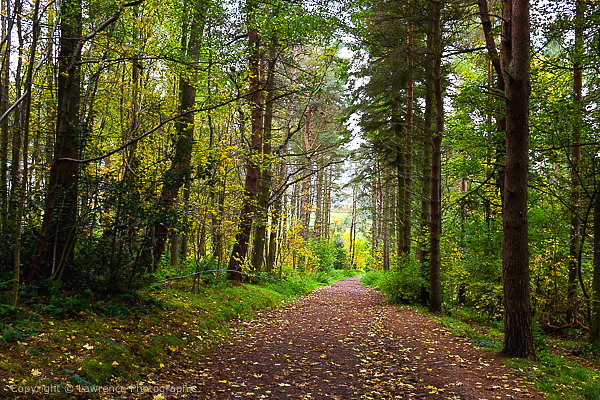
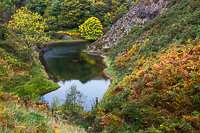
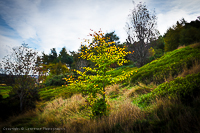
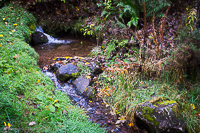
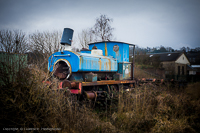


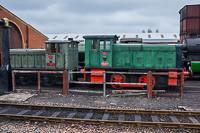


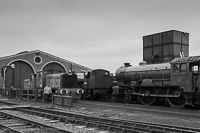
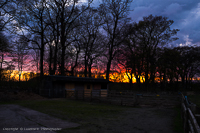
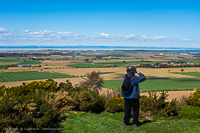

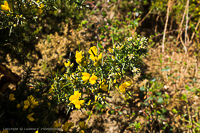
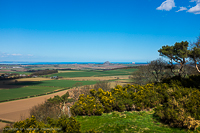


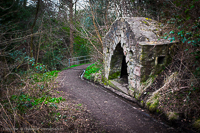
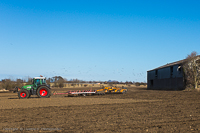

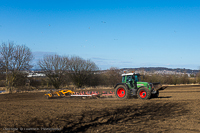

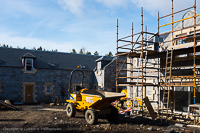
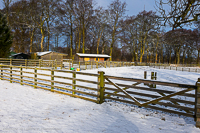

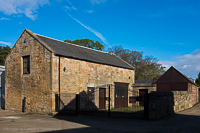
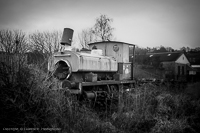
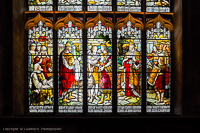

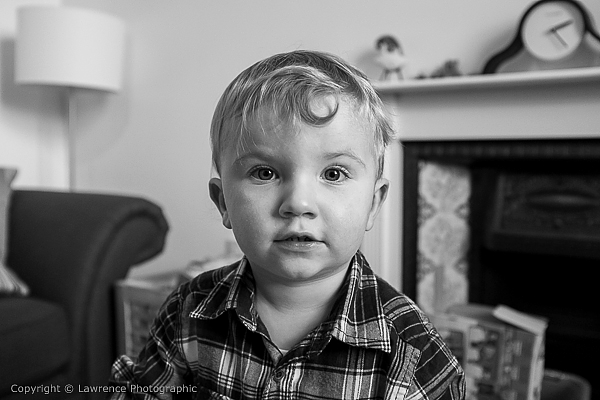
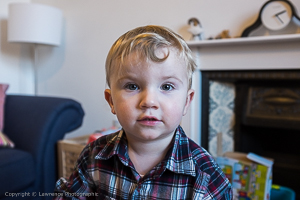
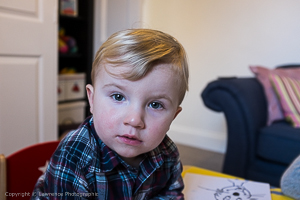
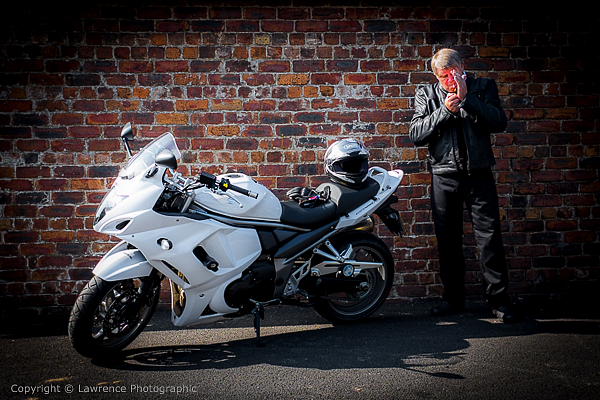
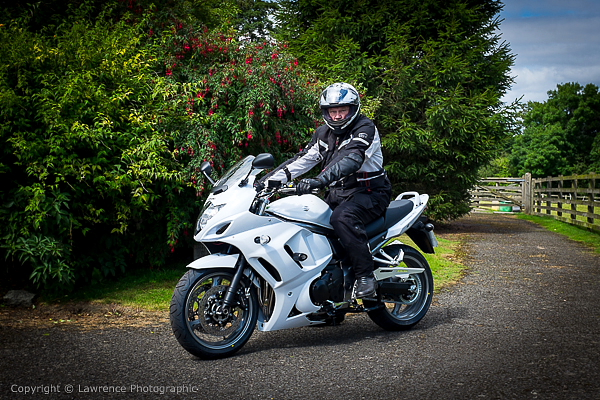
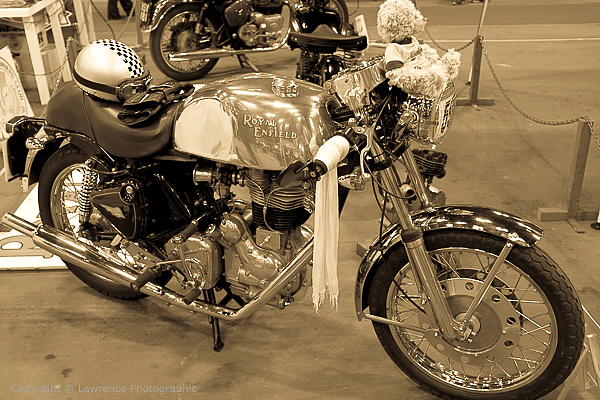
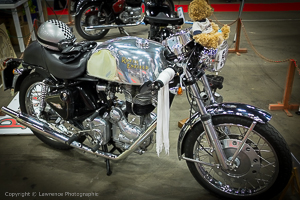

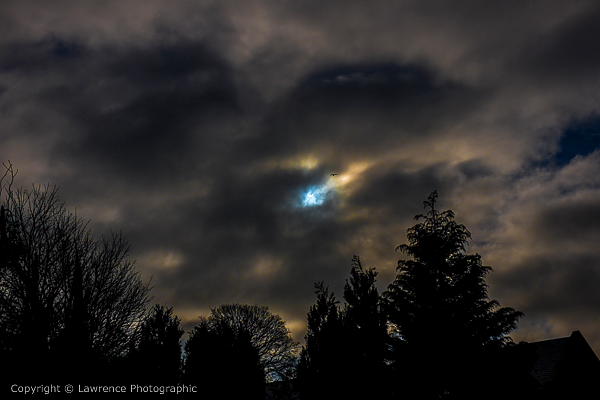
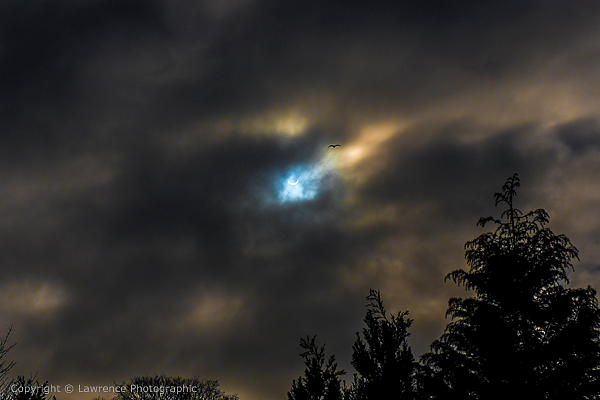
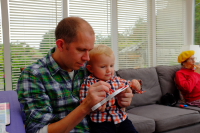


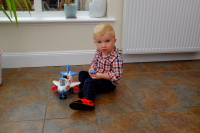
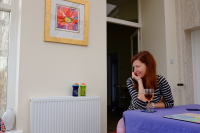
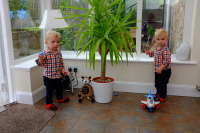


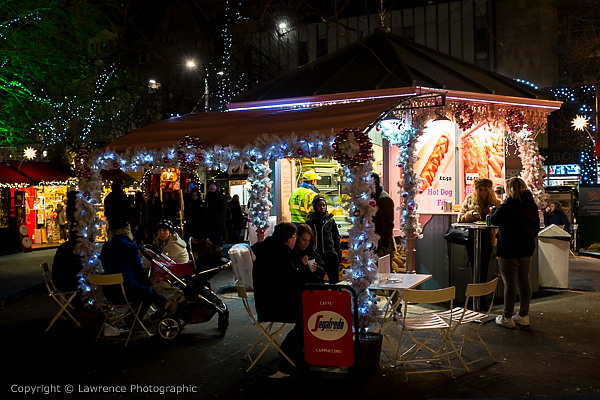
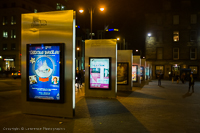


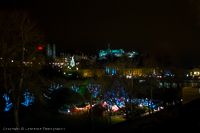


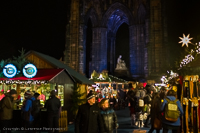

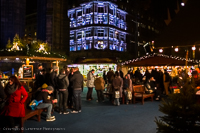
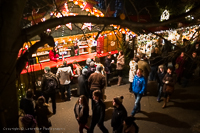
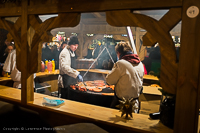
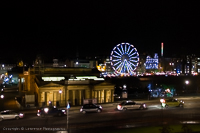
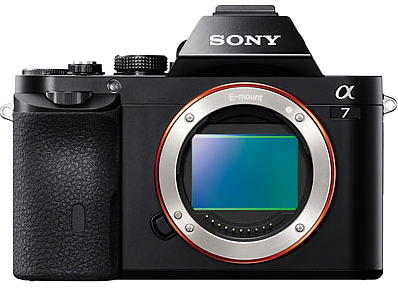 ull
body shots with a decent
scene of activity in the
background. Also, with a
'high resolution' digital
sensor a more distant and
wider scene can later be
cropped into for effect in
computer software post
processing and/or within
some cameras after the shot
is taken. Many street
photographers also like to
shoot in low light and at
night under street lights,
so a decent wide aperture
(f1.4/f1.8/f2) lens is
desirable and one which can
mate to a digital camera and
can produce clean images at
night with a low noise vs
image quality at around
ISO:1600/3200.
ull
body shots with a decent
scene of activity in the
background. Also, with a
'high resolution' digital
sensor a more distant and
wider scene can later be
cropped into for effect in
computer software post
processing and/or within
some cameras after the shot
is taken. Many street
photographers also like to
shoot in low light and at
night under street lights,
so a decent wide aperture
(f1.4/f1.8/f2) lens is
desirable and one which can
mate to a digital camera and
can produce clean images at
night with a low noise vs
image quality at around
ISO:1600/3200.