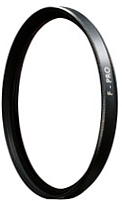
Fitting - I had to remove the existing ring from around
the Fuji X100s camera lens which was no easy feat. To remove the
ring it is best to cup your index finger and thumb around the
outside and without squeezing the ring (which may oblong the
ring on the
lens under pressure) gently turn it anti-clockwise. It is not
necessary to apply compressed pressure but more a gentle
action allowing the roughness of the finger/thumb to turn it.
Once removed, turn the camera on it's back and drop the adapter
onto the lens screw, gently without any downward pressure turn
anti-clockwise until it drops/clicks in and then gently turn it
clockwise to lock, without over tightening. Repeat this
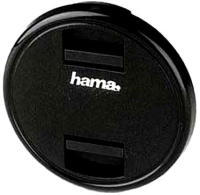
procedure for the filter and finally repeat for the hood fitting
- the hood has no screw, it has slight grooves to lock it in
place.
The Gariz Wrist Strap is made from high quality leather which is soft to ensure maximum carrying comfort and it can be used on the camera or on the Gariz half case which prevents damage to your camera should you drop it when using the strap. The Gariz strap has been made from high quality leather and is manufactured to last. It is packaged in a Gariz clear plastic tube to ensure it reaches you in perfect condition. The rolled design of the leather strap ensures maximum carrying comfort when carrying your mirror-less camera. The design, colour and leather is designed to complement the Gariz half camera range perfectly. When using the wrist strap you can put damaging your camera to the back of your mind. The strap is designed to easily take the weight of your camera so if you should drop it the strap will stop it from hitting the floor. The Gariz wrist strap is suitable for any mirrorless camera. NOTE: When you pull the popper from the end of the plastic container, turn the container on it's end and instead of trying to pull out the leather wrist strap, you will find that the leather flap end may be tight in the tube.........gently squeeze the tube at the flap position to make it wider across the flap and the strap will fall out. Fitting - It is not easy to fit and demands some patience. Use the camera supplied plastic fitting unit to fit the camera supplied metal ring to a camera eyelet. As per the Fuji instruction manual fit the Fuji supplied leather protected cover over the ring but instead of fitting the shoulder strap fit the wrist strap loose end. Now the tricky bit is closing the loose end flap of the wrist strap over the other where the plastic button is situated and pushing through the plastic button and at the same time tucking the outer edge into the fold of the wrist strap bonded section. Once accomplished you can now slide the outer sheath over the bonded section to finally secure the fastened button and streamline the wrist strap for use. The wrist strap once placed on your wrist has a leather draw loop that is pulled back up against your wrist to secure the wrist strap from slipping off. ____________________________________________________ Giottos LCD Screen Protector The Fuji X100s camera has a 'fixed' LCD screen on the  back
which could be scratched with use, especially if the camera is
hanging around your neck and rubbing on a jacket zip or buttons
as you walk. I never purchase a screen protector until I have a
camera in my hands and then I can measure the full extent of the
LCD and determine what protector could fit the screen. back
which could be scratched with use, especially if the camera is
hanging around your neck and rubbing on a jacket zip or buttons
as you walk. I never purchase a screen protector until I have a
camera in my hands and then I can measure the full extent of the
LCD and determine what protector could fit the screen.I know that damaged screens can be replaced but a good quality protector is worth the money and saves a great deal of hassle. I normally purchase Giottos LCD Protectors, I have found them excellent value for money and even after several years, I still have the originals on my cameras. Fitting - The Fuji X100s has a black plastic section around the LCD screen which is slightly beveled to the camera case but it has a substantial flat section prior to the start of the bevel. The 3" universal Giottos screen is a neat fit onto the black flat section. You have to make sure that once you have removed the clear plastic skin of the Giottos protector (the outer/front is the side with the writing the right way up) that you gently drop it evenly onto the flat area of the LCD black plastic section. It is an absolute correct fit so concentrate on ALL the black flat section edges to match the protector positioning. I then gently apply pressure with a cleaning cloth - all around the edges but not on the actual Giottos glass. When cleaning the glass of the Giottos protector, do not apply pressure inwards but more a gentle sweeping action, I invariably breathe on it first, before using a cleaning cloth - I never use any liquid cleaner. Slight Flaw - Since purchasing the camera and the Giottos screen, I have noticed that in the very cold spell that we had here in Scotland and when the camera body was very cold, a tiny bubble appeared in the centre of the screen which I reckon was caused by the back of the Giottos screen slightly touching the LCD screen of the camera. This bubble disappears when the camera body heats up and is not a problem in warm weather. I have never had any problems with Giottos screens on my other cameras but obviously there is tight gap between the two screens on the X100s which is drawn closer at one point when the camera body is very cold. ____________________________________________________ Lowepro Apex 100AW Shoulder Bag This is a shoulder bag that is ideal for rugged work as it has a rubber base and relatively thick padding inside. The bag also has a concealed waterproof cape/cover that can be pulled out (fixed to base of bag) and folded over the top and s  ides of the bag. ides of the bag.It's inside measurements are 5.1" top to bottom, 3" front to back and 3.7" across the front which should be large enough to accommodate the Fuji X100s standing on a narrow end, long ways down inside the bag with the lens facing the bag's side or the front. The lid opens right up, so it should be far easier to to insert and remove the Fuji X100s camera. It's outside measurements are 6.3" top to bottom, 4.5" front to back and 5.1" across the front. From the Lowepro Website -  "Lightweight, rugged and designed to withstand the elements, Apex
AW bags are perfect for even the most discerning adventure
photographer. Their convenient, single-compartment design
includes adjustable padded dividers and inner pockets that
accommodate a pro compact camera, DSLR, or compact system,
mirrorless or micro four-thirds camera--plus key accessories. "Lightweight, rugged and designed to withstand the elements, Apex
AW bags are perfect for even the most discerning adventure
photographer. Their convenient, single-compartment design
includes adjustable padded dividers and inner pockets that
accommodate a pro compact camera, DSLR, or compact system,
mirrorless or micro four-thirds camera--plus key accessories.
A built-in micro fiber cloth protects LCD screens and lenses, the soft, brushed-tricot lining and reverse zippers guard against dust and scratches. Lowepro's patented All Weather Coverô protects gear against bad weather, dust and sand. SlipLockô attachment loops expand carrying capabilities by attaching any SlipLockô -compatible product. The rugged exterior includes a molded rubber bumper and durable, water-resistant fabrics" Fitting - The Lowepro Apex 100 AW shoulder/waist belt bag will accommodate the Fuji X100s camera with the adaptor/filter/lens hood and wrist strap (or shoulder straps) fitted and wrapped up in a large cleaning cloth. ____________________________________________________ Lightweight Hiking Stick/Monopod/Tripod The Fuji X100s camera should deliver the goods for landscapes so for light use and hill walking, I will use my TrekPod Go Pro which I first purchased to use with my Panasonic gear. A monopod/tripod with a locking ball head that can double up as a walking stick, which is very easy to set-up, can make a great deal of difference in steadying the camera combined with a timed shot to deliver the best quality of image, especially at lower ISO settings. When not in use, the TrekPod Go Pro can be broken down and placed in it's (supplied) travel case for taking on an airplane or putting in the boot of the car. When used for hiking the TrekPod Go Pro has a strong magnetic plastic cap that fits over the top of the earth magnet on the ball head - check out this short video - ____________________________________________________ Remote Shutter Activation Cable I like that I can use my old fashioned wire remote 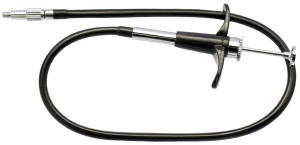 from
my Nikon FM3a Film SLR which can be screwed
into the top of the X100s shutter button. The remote is about 6"
in size and is great for popping in the camera bag, goes well
with my TrekPod GO Pro walking stick/monopod/tripod. from
my Nikon FM3a Film SLR which can be screwed
into the top of the X100s shutter button. The remote is about 6"
in size and is great for popping in the camera bag, goes well
with my TrekPod GO Pro walking stick/monopod/tripod. It is great for tripod work as it has a beautiful plunger that I press down to activate the shutter and take the shot - very retro. You can purchase a modern one (albeit a lot longer - see image) from various suppliers in the UK.
____________________________________________________
If this article has assisted you in any way - please donate to my Charity of Choice - The Sick Kids
Richard Lawrence
|
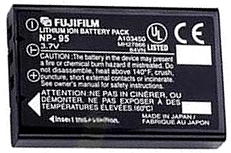 spare battery but I will explain
how to fit the supplied battery that comes with the camera as I
think it is very important. My supplied battery is actually a
cream colour with a large orange stripe down one side and black
continuous arrows on the top above the stripe.
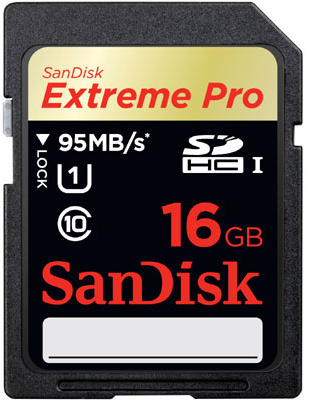 fast
memory with a reasonably capacity so I opted for the SanDisk
16Gb Extreme Pro 95 MB/s SDHC card.
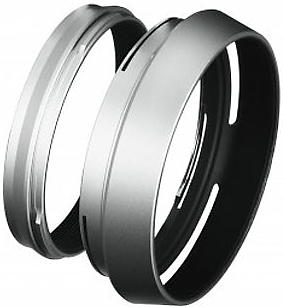
 street
photography.