This
diary article is not a review, it is my own
notes
on my continuing experience using the Sony Alpha A57 SLT camera. Photography
for me is a hobby and a
continual learning curve.
I receive no
remunerations from
any third party
mentioned herein.
However if you have
enjoyed your visit
or any of my
articles have assisted you -
Please
consider donating (the minimum is
£2)
to the
Sick Kids
Friends Foundation
The diary content, started on 17th May 2012, will expand and it will become sharper and more
precise in
each section as I gain experience with the camera and UPDATE
the material. There will be some 'repetition of text' in certain
sections and this is intended to assist as some readers may only read a
particular section and not the entire article.
After this introduction and the video reviews regarding the
camera, there
is an extensive INDEX
with links to the various sections of the diary.
IMPORTANT -
26th February 2014 - The Sony Alpha A57 SLT camera is no longer
available, the model above it
the
Sony Alpha A65 SLT camera body has now come down in
price and is on sale for around £494.99 vat inclusive in the UK. It offers a superior electronic viewfinder, a higher
resolution
digital sensor, similar manual controls and menus to the A57 and the only
downside is that 'marginally' it has slightly more noise in the images at
ISO:3200 and above.
As
I continue to use the Sony A57 for general photography, there
is a massive amount of information in the diary that is growing on a
weekly basis. If you wish to cut through it and read a fast 'snap shot'
of my experience with the camera, please jump to my Conclusions Section.
Hopefully this diary will assist photographers who have
purchased a Sony Alpha A57 camera and those who are considering it as a
step up up from a 'point and shoot' compact. Please do not use my notes
as 'cast in stone' fact as my knowledge of my camera, lenses and
software may be lagging behind other users and may also be out of sync
with any Sony software/firmware upgrades.
This link opens in a window and can be left open to use for further
reference -
Sony SLT A57 Camera Manual
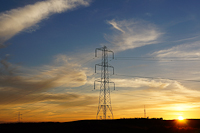
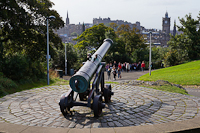
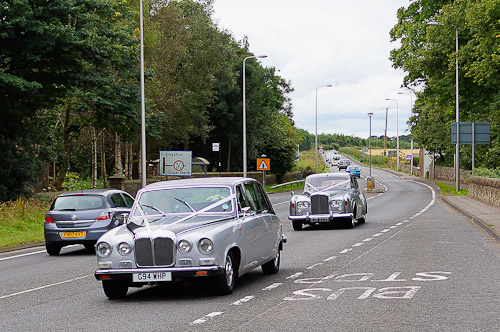
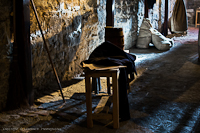
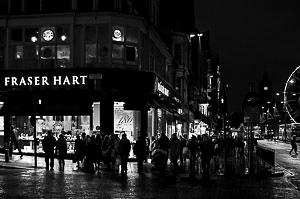
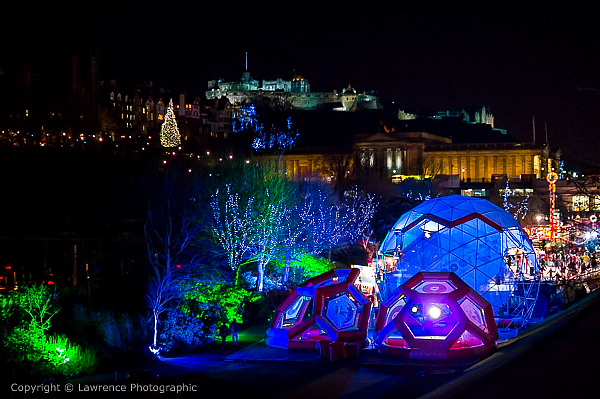
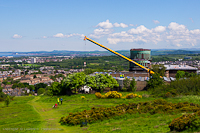
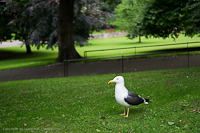
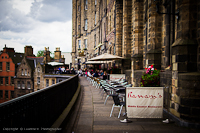
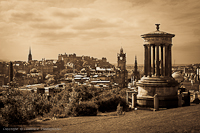
19th November 2013 - I have updated my Sony Alpha A57 SLT Camera
'RAW' conversions web using Adobe Lightroom 5.2 software. The Steadyshot
image stabilisation in the camera body is amazing as this image was shot using the Sony
Alpha A57 SLT camera
and a Sony DT 35mm f1.8 SAM prime lens, hand held, without flash and
at ISO:1600, aperture f2.8 and a shutter speed of only 1/13secs.
Please click on the image below for a 1400 pixel variant -
This Sony Alpha
SLT is a new form of hybrid camera with
translucent mirror technology
which includes a fixed mirror instead of the conventional moving mirror
found in a DSLR camera. The Sony Alpha SLT camera uses an electronic
viewfinder instead of an optical one but it still uses inter-changeable autofocus
lenses. I chose the
Sony A57 camera rather than it's higher specified and 24MPixel sensor
siblings because I felt that the A57 with it's digital 16MPixel
(famed NEX-5N)sensor offered me a
higher image quality at ISO:1600/3200 than the A65/A77 models - sadly
those other Sony A65/77 models have the 'higher end' XGA OLED viewfinder
that I would have preferred.
4th September 2012 - At this date the photographic
equipment covered in this diary article includes -
Sony Alpha SLT A57
Camera
Sony DT 35mm f1.8 SAM
Prime Lens + Hoya
55mm HMC UV Filter
Sony DT 18-55mm
f3.5/f5.6 SAM Zoom Lens
+ Hoya
55mm HMC UV Filter
Tamron SP 70-300mm
f4/f5.6 Di USD Zoom Lens
+ Hoya
62mm Pro 1 Digital UV Filter
Lowepro Rezo 120 AW
Shoulder Bag (Camera + 35mm + 18-55mm Lens)
Kata
Pro-Light Access-14 PL Shoulder Bag (Camera + 70-300mm + 35mm + 18-55mm Lens)
I will concentrate
on the jpeg image files that the camera
produces but there will also be some 'RAW' to jpeg
conversions, especially for images shot in dark conditions in the
ISO:1600/3200/6400 range. I will be using the camera in Aperture Priority
Mode
and shooting 'RAW' + Jpeg image files.
I am very interested in properly comparing the A57's electronic
viewfinder against the performance of the optical ones that I use in my
Canon DSLR cameras. I am under no illusions - every
camera has it's good and bad points.
Check out the following videos -
I decided to limit my first purchase into Sony SLT 'Translucent Mirror
Technology' and because there were no 'body only' models available, I decided to
purchase the Sony SLT A57 camera and kit lens with the bare minimum accessories.
It's very unlikely that I will ever use the free Lowepro backpack but I am
looking forward to putting the camera and lens through it's paces.
16th May 2012 - I ordered the following kit -
Sony Alpha A57 Digital SLT Camera with Sony DT 18-55mm
f3.5/f5.6 Zoom Lens
Lowepro Versapack 200 AW Backpack - Grey (bundled free
with the camera kit)
Hoya 55mm HMC UV
Filter
SanDisk 8GB Extreme Pro
95MB/Sec SDHC Card
Total including delivery
costs - £708.18
My order has arrived (17th May 2012) and I am putting together my first outlines
and drafts in my diary, charging up the
battery and checking out the camera,
lens and accessories. The first thing I have noticed when checking the box
is
that the Sony DT 18-55mm SAM zoom lens hood is an optional extra so I ordered
one up.
The
lens hood arrived after 6 weeks. I was
surprised at just how thin it was when fitted - it added about a 1/2 inch to the
length of the lens.
For a
Shoulder Bag, I use a spare one that I have -
a
Lowepro Rezo 120 AW which is ideal
for the
Sony Alpha A57 camera with the Sony DT 18-55mm f3.5/f5.6 SAM zoom (no lens
hood)or the Sony DT 35mm f1.8 SAM prime lens with it's lens hood
reverse fitted. With either combo in place, there is just enough room at the
side for the other lens. The front pouch has room for spare memory, cleaning kit and a
spare battery.
I still have to test this bag for room when my lens hood for the 18-55mm
arrives?
This shoulder bag is great for using around town or for casual walks when I
leave my Tamron SP 70-300mm f4/f5.6 Di USD zoom lens at home.
The Lowepro Rezo 120AW is designed specifically for digital equipment and is a
lightweight shoulder bag packed with features. This bag offers plenty of
protection with a well padded interior, soft, brushed-tricot lining plus a
memory card pouch that’s integrated right into the reverse-open lid and an All
Weather™. A soft, micro fiber cloth built into the main compartment cleans
delicate LCD screens and protects against scratches from camera straps. Carry
accessories in the roomy front pocket and stretchy side pocket, and use the
SlipLock™ attachment loop for additional accessories.
The depth of the bag has 'just' enough room for the camera and the
(longer) Sony DT 18-55mm SAM zoom lens combo to be dropped into
it with a cleaning cloth wrapped around the camera body. Packing the fitted
camera shoulder strap is a bit of a fiddle but it can be pushed down the right
side at the front of the camera. I always use a Jessops (UK store) blue
cleaning cloth to offer extra protection and it is great for cleaning the
LCD
screen and the front of the (fitted) Hoya HMC UV 55mm filter.
For a Back Pack
I
use my
Lowepro Flipside 300 for carrying my Sony Alpha A57 camera with my three lenses -
Sony DT 35mm f1.8 SAM Prime Lens
Sony DT 18-55mm f3.5/f5.6 SAM Zoom Lens
Tamron SP 70-300mm f4/f5.6 Di USD Zoom
Lens
The 'Flipside 300' is a great backpack and ideal for my hill walking trips.
There is enough room inside for all my Sony camera gear and some sandwiches. The
outer storage 'net' pocket is large enough for carrying a bottle of coke or
water. I like the fact that I can store the camera with any lens fitted
(especially the Tamron) inside the bag, ready to use.
From the Internet - "The Lowepro
Flipside 300 is a compact and lightweight backpack which safely carries your pro
digital SLR and accessories. The Lowepro Flipside 300 features back compartment
entry for easy access when setting up and also providing extra security for your
gear whilst you are wearing the backpack. A tripod holder folds away at the
front of the bag and when in use, distributes the weight evenly to aid carrying
comfort. The Lowepro Flipside 300 also has a detachable waist belt and
adjustable sternum strap for extra support when travelling longer distances or
carrying heavier gear. The outer fabric is made from a water resistant material,
protecting your kit from moisture and abrasion, with no need for an all-weather
cover. An outer storage pocket is useful for digital accessories and personal
items, while a removable compartment inside the bag means leads and other small
items can be kept safe".
Right from the start of working with the jpeg image files produced by
the camera, a problem 'popped' up, not a serious one but I have
explained it below -
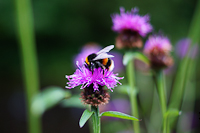
Camera Jpeg Image Re-sized using Sony Image Data Suite Software
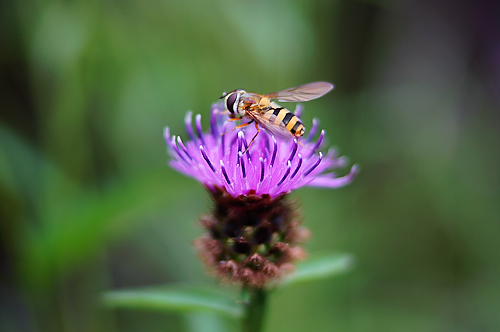
This image is a camera jpeg, shot in the camera's Creative Vivid
Mode
adjusted
for contrast +1, saturation +1, sharpness +2, re-sized to 1,200 pixels
for the web
(NOT re-sharpened
and with no other adjustments) using the
(bundled) Sony Image Data Suite Software. The
grass is about 3 feet behind the flower and the bokeh at aperture f8
shot at 55mm (82.5mm field of view) seems pretty good.
This camera delivers a great jpeg image file (provided it has
been exposed correctly) with very good colours and excellent for
printing, even beyond A2 - great for leaving on the memory card and
popping along to Jessops in the UK to upload for 1 hour printing.
However, when the jpeg file is re-sized to 1,200 pixels for the web
using the Sony Image Data Suite software, the sharpness is dissipated -
the software does not appear to have a re-sharpening tool for jpegs
(it has for RAW image files).
Camera Jpeg Image Re-sized using Adobe Lightroom 4 Software
I also used Adobe Lightroom 4 software to re-size the
same camera jpeg image
to 1,200 pixels but because Lightroom has a sharpening facility,
I sharpened the image and the results are
very
much improved. I did not make any other adjustments to the image.
Unless, I can find a way to sharpen my re-sized jpegs for the web using
the Sony Image Data Suite Software, it looks
like I will have to use Adobe Lightroom 4 software to provide accurate
1,200 pixel jpeg examples of the original 'full size' jpegs that the
camera produced.
Both 1,200 pixel versions can be loaded up and compared in their
windows(full information below each image).
The Lightroom software does offer more editing tools, especially
for re-sizing jpegs from the camera for the web but if you are prepared
to purchase Lightroom for that purpose, then for an even higher
'optimum' image quality from the Sony A57 camera, you would be better to
shoot 'RAW' image files and edit them.
I have checked and double checked the Sony software but I cannot find
any reference to sharpening jpeg file images and the jpeg tool
box does not appear to have a sharpening tool. The 'RAW' image file
developing tool box has a sharpening tool, so for 'RAW' to tiff and/or
jpeg file post processing and conversion, this is not a problem.
___________________________________________________
When I first started to use
the
Sony A57
my camera jpeg images were excellent, the AWB - auto white
balance setting produced pleasing colours and I never thought much about
the white balance - it just worked very well. The viewfinder and the LCD
screen reflected the colours that were produced in the final jpeg image.
I was using the camera in Creative Mode = VIVID, saturation + 1,
contrast +1, sharpness +2.
After a few weeks the weather in Scotland changed to a very hot and
sunny climate, so when I started to notice a pinkish tint appearing in
my images, I immediately put it down to the weather and the inability of
the AWB to select a white balance that suited.
Here are some examples -
Over
the next few days, I shot a whole load of pictures and each time I could
see the pink tint in the viewfinder and sometimes it was glaringly red,
especially in shots where there was no skyline. The immediate solution
was to switch the white balance to daylight setting and sure enough the
pink tint disappeared.
The other alternative was to post process the camera jpegs in Adobe
Lightroom 4 software and tweak the white balance to remove the pink tint
(effectively changing the colour temperature). This is the first
camera that I have concentrated on shooting camera jpeg as I normally
shoot 'RAW' image files and post process in Adobe Lightroom.
Another camera jpeg example -
the larger 1200 Pixel version (click on the image) has the white
balance changed to remove the pink tint using Adobe Lightroom 4 Software
to reduce the colour temperature.
Originally I thought the cause was a firmware glitch and I reset the
defaults of the camera but it has never repeated itself and I now know
the cause was 'human error' on my part.
Warning AWB - If you are
shooting only camera jpeg images and rely on the AWB (auto white
balance)
setting to make colour decisions for you, be careful that you do not
change the AWB colour grid 'defaults' whilst shooting. If your camera
menu is setup to return to the last place you selected it is possible to
accidentally call that up again and change it without realising.
For instance, if
the WB button/menu is left 'highlighting AWB' and later (whilst using
the viewfinder) your right thumb wanders on the back of the camera
whilst searching for a button or strays from the finger rest pad and
puts pressure on the right tilt WB button a couple of times, you will
bring up the AWB color filter grid, effectively changing the AWB
'default' colour setting on the grid to the right, towards red.
This is possible whilst taking a picture and as the eye detects the
change away from the scene in the viewfinder to the menu, the reaction
is often (without thinking)
to half press the shutter button to return the viewfinder to viewing the
scene to be shot. However by half pressing the shutter button the camera
has now accepted the new AWB colour grid setting and (in aperture
priority mode) it will remain changed until you reset it. This is an
area that I will now check from time to time to ensure that the AWB
colour grid co-ordinates are set to zero and the spot is in the centre
of the colour grid crosshairs.
The ability to change the AWB setting from default (especially
accidentally)
is unfortunate, after all if you want to manually change the white
balance - Sony offer so many other options in that WB menu area.
It pays to read the manual carefully, it was only when I decided to
explore the auto white balance menu settings further that I discovered
the sub menu (colour grid) within the AWB (highlight)
setting. In the past
(because I normally shoot RAW file images) I have never paid much
attention to the AWB which is very important for those photographers who
only shoot jpeg images.
I appreciate that people have different tastes in colour and select
their own colour settings - some may prefer to use the white balance in
manual. More about the camera white balance and the pre-set
configurations in my
Sony DT 18-55mm f3.5/f5.6 SAM Zoom Lens - Night
Photography Section.
Powering Up and Power Save
This is a weak spot of the camera,
the power up (power save/power up) is relatively slow by a Canon or Nikon DSLR
standards but it is not a deal breaker, you just have to remember that if you
are waiting for the shot, to keep tapping the shutter button to keep the camera
awake or alternatively set the power save to 5 minutes (instead of 1 minute)
you can also set it for 30 minutes for those users who carry a spare battery.
Menu Setting
I found that with some menu settings, if you are too quick with your
fingers, you will run into and out of the menu settings before you have made
your selection - it does seem to require just a little pause between the button
presses?
Optimum Image Quality &
Presentation Considering that the Sony Alpha A57 SLT camera is an entry level 'consumer'
model that uses relatively in-expensive zoom and prime lenses it manages to
produce very good camera jpegs, in colour or black and white and the optimum apertures for excellent image quality with all three lenses are f5.6
- f8.
In the real world,
the final quality of an image file is
determined by a number of factors which control it's production. There are limits as to the
amount of editing control that the camera can apply to the final camera jpegs
bearing in mind that some users will edit their own settings in the camera menu
(saturation/contrast/noise reduction/sharpness)which may increase
the final camera jpeg image quality but also may decrease it. There is no doubt that post processing 'RAW' image files and 'tweaking' to
suit (resolution/noise/print size/viewing
distance) will deliver greater control and often
produce a more desirable result. Very often camera jpeg images are judged by
their appearance on a digital display (at various sizes) but in reality
they should be judged on their final print on the wall..............read more on
Optimum Image Quality
The camera jpeg image quality delivered
by the sensor will vary depending on the lens that is used, the
CREATIVE
selection and it's settings adjustments. My tests were
conducted, using the kit Sony 18-55mm zoom lens. I started out using the
STANDARD colour mode in the Fn button/menu's CREATIVE
selection. However, after a few tests, I realised that STANDARD produced a
camera jpeg that was excellent but lacking in contrast and saturation. I wanted
the camera to produce (camera)
jpegs that were not over saturated (somewhere in the middle) and not over
sharpened. It is a very difficult call, a difficult balance because you can set
the camera up for excellent landscape images but then when you shoot a portrait
or a building, perhaps the contrast is too much or the colour becomes too
vibrant. Initially I tried VIVID with contrast/saturation/sharpness all set for
+3 - this was great for some landscape shots but the sea shots were too blue and
the portrait skin colour was red. Even worse, in some shots the blacks were
heading towards deep purple.
The CREATIVE(selection) section of the Fn button/menu has
the following pre-sets that can selected and used - these can also be further
adjusted for + - saturation, contrast and sharpness -
Standard
Vivid
Portrait
Landscape
Sunset
B+W
These pre-sets all work with the Aperture Priority
mode and for shooting RAW + Jpeg image files.
NOTE: The camera also has a SCENES mode which can be selected by
turning to it's icon on the
top large main control
wheel dial. The SCENES mode can also set-up various scenes including
macro but it is an automatic camera function which selects it's own ISO
rating, aperture and shutter settings. The SCENES macro mode is simply
the camera in AUTO function selecting the optimum ISO rating with the
widest aperture to the lens zoom position and the fastest shutter speed
to blur the background of the subject - this is similar to what you
might manually set-up in aperture priority mode. The minimum distance to
the subject is the same in either SCENES or APERTURE PRIORITY modes.
Because I normally shoot 'RAW' file images in aperture priority mode and
post process them, I could just shoot in any Fn button/menu
Creative Mode, no problem but for the sake of those who are reading this
and just want to shoot camera jpegs, I am including both routes. I was
amazed at the colour and image quality of the jpeg image
files that the camera delivers (especially with an in-expensive kit
lens) and combined with the accuracy of the
center spot autofocus, the camera and lens were a real treat to use for
jpeg shots.
In the MAIN MENUI now have the High ISO Noise
Reduction set to Normal and in the
Fn button/menu, I have scrolled to the Creative Mode and set it to
VIVID with the contrast set to +1, saturation +1 and sharpness +2.
In this way, because I am shooting RAW + Jpeg image files, I am seeking
the optimum settings for the camera jpegs, knowing that I can alter the
'RAW' file settings in Post Processing Software. It is the best of both
worlds, because you can use the jpegs but for anything special, you can
work on the 'RAW' version. Editing modes in Fn Creative Mode is
great because it provides you with a small window screen of the image in
front of the lens (remove the lens cap and focus first before you
enter the Fn menu) and as you edit, the window screen changes to
match your adjustments. To much contrast and saturation will reduce the
quality of the finer points (like small leaves) in any image.
There is a fine balance between image resolution (especially for
subjects at distances further away from the camera) and vivid colour
displays, everyone's tastes are different -
please also read
My Menu
Settings + Controls(Window)
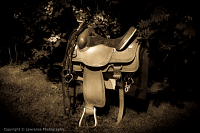
The following test
images are at different ends of the sensors ISO range,
first one is an ISO:6400 and the second
is ISO:200. They were both taken with the Sony A57 camera and the Sony
18-55mm zoom lens. I will be producing ISO:100 rated images at a later
stage but I wanted to test the sensor at ISO:200.
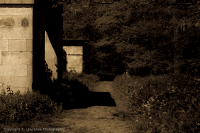
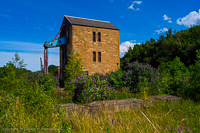
This image of the dog and the house was captured at night time and the
camera was hand held and the camera flash was not used. The camera
sensor and image stabilisation are really being stretched to the limits
here (for a hand held shot)
but it is a great test to push the sensor to extremes that I never
usually go to with my photography. The settings are - 18mm
(27mm field of view) ISO:6400, Aperture f3.5 and shutter 1/13th sec.
The camera was set to AWB - Auto White Balance. The small jpeg
image here is produced by the camera, click on it to open up the
following sequence and then click on each image to return to here -
Camera jpeg image which was re-sized to 1,200 pixel and slightly
sharpened using Adobe Lightoom 4 software (the bundled Sony
software cannot sharpen in re-sizing)
Camera RAW
to jpeg version converted using the Sony Image Raw converter
software
then re-sized to 1,200 pixel and slightly sharpened using the Sony
software (you can sharpen in the Sony RAW to tiff/jpeg converter)
Camera RAW
to jpeg version converted using Adobe Lightroom 4 software
then re-sized to 1,200 pixel and slightly sharpened using the Adobe
software
In the above night
image, I like the Lightroom 4 version and mainly because it has provided me with
the tools to remove more of the noise in the sky whilst retaining detail in the
rest of the image. The grass in front of the dog is also more naturally in the
Lightroom version. It goes without saying that the dark areas, furthest away
from the lights to the right (garden gates) are destroyed by noise and
lack of detail but as long as the image size is kept reasonable it should not
affect the final print. Lightroom performs very well considering it does not
have a camera calibration profile for the Sony A57 - the final size for
(an acceptable) print is around A3. The post processing experience with
Lightroom is superb but the Sony Image Data Suite RAW conversion software has
it's limitations for any RAW work that goes beyond normal tweaking. However for
a person starting out who wants to try out 'RAW' to jpeg or tiff file
conversions, it is more than sufficient.
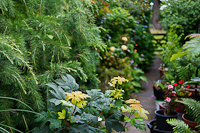
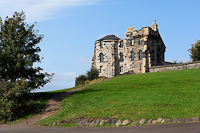
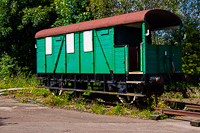
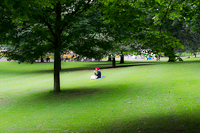
The second image is my garden and it was taken in good light
and I was amazed to see that the camera jpeg is actually very good and the 'full
size' version is reasonably sharp. I have the camera set-up for a (middle
road) colour saturation which is true to the actual scene. The camera
VIVID settings can be increased from contrast +1, saturation +1, sharpness
+2 to all at +3 but bear in mind the pitfalls that I mentioned.
This image of my
garden was captured with the camera hand held. The settings are - 35mm
(52mm field of view) ISO:200, Aperture f8 and shutter 1/400sec.
The camera was set to AWB - Auto White Balance.
The small jpeg image here is produced by the camera, click on it to open up the
following sequence and then click on each image to return to here -
Camera jpeg image which was re-sized to 1,200 pixel and slightly
sharpened using Adobe Lightoom 4 software (the bundled Sony
software cannot sharpen in re-sizing)
Camera RAW
to jpeg version converted using the Sony Image Raw converter
software
then re-sized to 1,200 pixel and slightly sharpened using the Sony
software (you can sharpen in the Sony RAW to tiff/jpeg converter)
Camera RAW
to jpeg version converted using Adobe Lightroom 4 software
then re-sized to 1,200 pixel and slightly sharpened using the Adobe
software
The Build and Shoulder Strap -
The camera body is made out of plastic, the mount for the lens is made of metal
and the body is very lightweight in my hands, even with the Sony 18-55mm zoom
lens fitted. In fact the combo is so light that I am tempted to order up a wrist
strap as I usually like a camera either in my hand or in a shoulder bag. A
shoulder web strap is included which is black in colour with orange edging on
both edges and it is very substantial - the word SONY is emblazoned in white on
one side nearer the camera body. The buttons on the camera body are small but
when pressed, produce a precise click feeling. The rear LCD screen is well made
and flips downwards, it cannot be put to either side of the camera as it is
fixed on the bottom hinge but it can be turned around to be put back into the
body with the LCD inside to protect it. The LCD screen auto-rotates the scene or
previewed image no matter which way the screen is positioned. I like the grip of
the camera and certainly walking around with it held in my right hand by my side
poses no problems.
Battery Compartment and Battery
The battery compartment lid is well sprung, the lid it is
made of reasonably thick plastic and is a secure fit but I am very careful opening
and closing it, although
it seems robust enough. The lid in any case is an area
that every photographer should respect otherwise it could end up being held
together with sticky tape. The camera has a very nice battery capacity screen
display, which has reducing cross lines in an icon of the battery and it also
displays the %
(e.g. 81%) capacity of the power as well - nice feature.
The camera battery is an average size and weight
and is
removed for charging - the camera retains all the data and settings but I
replace the battery as soon as possible. With all my cameras, I usually ensure
that their batteries are regularly topped up, especially when they have been
lying for sometime and especially the one in the camera. I always use 2
batteries per camera and now I have purchased a spare battery, although to date,
I have not required to use it.
I very rarely take a huge amount of shots but for testing the Sony Alpha
A57 for night street photography, I did manage to capture 376 images (188
RAWs + 188 Jpegs) and I started with a 100% charged battery. At the end of
the session the battery meter read 49% left so the battery is probably good for
737 (Raw+Jpeg) images or 368 shutter activations to the nearest decimal
point. I very rarely chimp the focus on scenes, and I used the electronic
viewfinder - on this test I only used the LCD screen twice. I did have the
viewfinder and the LCD screen set-up for eye detection but I have no idea if the
LCD screen lit up when I put the camera down at my side as
the screen is always turned inwards against the body - I use the electronic
viewfinder for previewing my captured images.
Battery Charger + USB Cable
The plastic battery charger is well made and easy to use. It comes with a power
lead (17" unit to plug). The charge light goes on when it is charging and
off when completed. The USB cable is well made and offers precise fitting plug
ends to connect to the camera and to a personal computer for image data transfer
(or firmware upgrades).
Memory Compartment and Memory Card
The memory compartment lid is a real solid 'slide/click' fit with a good spring
return and the
SanDisk 8GB Extreme Pro
95MB/Sec SDHC card
that I bought with the camera required formatting from the main menu, before it
would work with the camera.
The 'Pop Up' Flash Unit
I am not into flash photography but the pop up flash unit opens up relatively
high on the body when it's release button is pressed (it automatically opens
when the exposure setting demands it). It has a reasonably strong mechanism
but like the battery compartment lid, this is another area where I will be
closing the flash unit very carefully, without any rush and with minimum
pressure.
Sockets - Rubber Covers
These rubber covers are substantial, offering excellent protection for the
sockets (remote, DC in, microphone, HDMI mini terminal, USB). They are easy to
open and slip sideways and very easy to re-locate and press/clip home into the
body recess.
Image Stabilisation - Sony
SteadyShot
The camera is fitted with it's own image stabilisation called 'SteadyShot' and
by default in the menu, it is set to ON. I like this feature as I can fit any
Sony lens and any A-Mount third party lens to the camera body and obtain the
extra benefit of shooting where the shutter speed might be too slow to prevent
camera shake blurring the captured image, especially when shooting in low light
conditions. I hope it stands up and I will get around the fully checking this
out at very low shutter speeds but so far it looks good - there is a low
light/night shot Jpeg + RAW example back up the page - under the
Sensor -
Camera Jpeg Image Quality
Section.
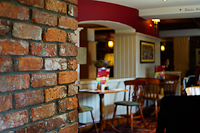
Steady Shot Image Sample - When I was out and about with the camera, I
took the chance to try out the body image stabilisation, and did anextreme
low shutter speed test and this camera jpeg image (re-sized and re-sharpened
in lightroom - with no other adjustments) was taken in a local restaurant of
my dear old mother who is 90 years old in June.
The Sony SLT A57 camera was 'hand held' with no flash used and the
subject was told to sit still - mum was great and the shot was taken at 55mm
(82.5 field of view) ISO:200, aperture f5.6 and shutter 1/13th sec with no
exposure compensation. The camera was set to AWB - Auto White Balance.
The camera has excellent body image stabilisation, bearing in mind the 55mm lens
range. The camera was set to Creative VIVID mode, contrast +1, saturation +1 and
sharpness +2.
I think the camera exposure metering did a fair job considering the light in the
room was subdued and the white balance was set to AUTO which delivered a good
accurate account of the colours and background lights.
Controls - I have no doubt that if this camera is switched to the
green camera icon
(intelligent auto - automatic) on the main round top mode dial, it will
deliver great 'point and shoot' images. For someone starting out from a point
and shoot camera, that might not be a bad way to go and gradually build up the
expertise. As you move the round top mode dial the viewfinder or LCD screen
automatically explains what each mode setting relates to and how it works - this
is a great 'auto help'
function for beginners
and the scene selections mode will also help
enormously.
However, just like any other similar digital camera in
iA Intelligent Auto and the scenes mode, the Sony A57 will have it's
limitations in being able to properly compose all the scenes (especially in
very uneven light conditions) and produce images with the desired effect
required by the photographer as well as great dynamic range and image quality.
To 'achieve the maximum' that the A57 can achieve you are forced to study the
manual side of the camera and in particular using A for Aperture Priority
Mode, ISO, AE Exposure Lock, Shutter Focus Lock, Bracketing and shoot 'RAW'
files as opposed to camera jpegs. The ability to post process 'RAW' files in
software would be an added bonus.
I will be using the camera in aperture priority A mode - fortunately the
Sony A57 has all my main controls buttons in accessible places on the body to
make using the camera relatively straight forward. I intend to cover my control
settings in a separate section -
My Main Controls
+ Menu Settings (Window).
Menu ? Help - For someone moving up from a point and shoot camera,
the
? button on the back
of the camera on the bottom right is a cracker (it toggles the help menu
on/off) for bringing up a tutorial on various sections of photography -
portraits, landscapes, night scenes, macro, motion and provides a multitude of
fantastic hints and tips covering each subject area.
Main Menu - I found the main menu quite pleasant to use, sure there is an
great deal of settings to consider but I found it easy to navigate and
understand although as I mentioned - a lot to wade through to set the camera up.
However, once done, there was very little that requires re-visiting and the
Fn button on the rear of the camera covers the important areas. I intend to
cover my menu settings in a separate section.
Fn Button to Fn Menu
Most of the day to day controls (that do not have dedicated buttons) are
in this section and accessed by pressing the Fn button on the middle/back
of the camera
For a good read and to learn more regarding all the controls and menu options -
Read the
Sony A57 Manual.
___________________________________________________
I use the Exposure Compensation +/- Button
(button
on top of camera behind the power on/off switch)
when I have plenty of time to set-up my scene, typically
landscapes or static subjects. I will also use it on other occasions where the
lighting remains fairly settled, typically for street photography, which leaves
me free to concentrate on the scene composition and focus. Once I have set-up my
exposure settings, I might find that my scene in the viewfinder or LCD
screen is too bright in the sky or perhaps it is too dark in the foreground.
Unlike a DSLR camera the beauty of the Sony A57 is that any adjustment I make to
the exposure will be reflected in the viewfinder and/or the LCD screen.
The top +/- button when pressed
will bring up a (-.....0.....+) dotted line and using the left/right tilt
switches on the rear control pad on the back of the camera, I can
alter the cameras exposure metering by increasing the exposure + or
decreasing - it.I can make those adjustments when my eye is up
at the viewfinder and watch the light in the scene change. Even better after I
take the shot, I can view the 'automatic preview' of my captured image in the
viewfinder and if necessary make further adjustments and shoot again. Once I
have set-up my exposure, I can lock it using the AEL button on the rear
of the camera (star icon appears in the viewfinder) which leaves me free
to concentrate on the focus - the focus lock is a half press hold of the shutter
button until I press it fully home to take the shot. I really like the AEL
button as it remains locked as long as I continue to shoot and only drops the
lock if I move to the playback button or another button/menu area.
I have my camera set-up for the AEL button to be toggled on and off so
that if I am lazy and want to avoid using the exposure compensation button, I
can
just raise/lower the camera
(with the viewfinder at my eye) watch the image darken/lighten to suit my
taste and lock an exposure with a press of the AEL button. If I don't
like the
'automatic preview' of my captured image
in the viewfinder, I just tap the shutter button to clear the view of the
capture, tap the AEL button to unlock it and repeat the process again.
The AEL button is set-up in the main menu for toggle on/off -
My Main Controls
+ Menu Settings (Window).
___________________________________________________
I have noticed a gradual
build up of very small black specks in some of my images and unfortunately the
camera does not appear to automatically clean the APS-C sensor, it has to be
done via the menu routine -
Full charge the battery
Enter the Main Menu using
the MENU BUTTON
Using the rear Main Control
Pad (tilt/switches) scroll along to the CLEANING MODE
(tools-2) section, highlight the CLEANING MODE and activate by
pressing the AF centre button on the
rear Main Control Pad - then follow the short selection menu to the
ENTER choice and press the AF centre button on the
rear Main Control Pad to activate the cleaning process
When the cleaning 'vibrating
movement' process stops - switch off the camera
The camera is now ready to
be switched on for normal use
NOTE: I now perform
this cleaning mode action every time I put a fully charged battery
into the camera battery compartment - this keeps the BUILD UP of
dust specks down to a minimum
In the event that dust
specks remain and these are best seen in images at 100% size, shot with a long
focal length (on the 18-55mm lens this is 55mm) and a stopped down
aperture like f16-f22 - there are 3rd party methods you can use to clean the
digital sensor and each manufacturer supplies their own set of instructions
with their product.
___________________________________________________
I upgraded my firmware
from 1.01 to 1.02. I found it relatively easy but I did make sure that my camera
battery was fully charged before I started. I only had one slight wrinkle - the
computer acknowledged that it had found a hardware device for my camera
(displayed an icon very briefly on the bottom of the PC screen) when it was
connected to it by USB cable and switched on but it never displayed an icon on
the bottom right of the screen to allow a (later) safe disconnection. I
ran the upgrade but ignored any instructions relating to the use of the safe
removal icon and never disconnected my USB cable throughout the entire process -
once the upgrade was acknowledged and finished on the PC, the camera finally
showed on it's LCD screen that the mass storage USB connection was still active
but on checking the PC screen the safe removal icon on the PC was still not
visible. So, I waited a few minutes, switched the camera off and disconnected
the USB cable - When I switched the camera back on, I verified the 1.02 upgrade
in the menu and was pleased to see that all my previous menu settings were
intact.
Link to
Firmware Upgrade(Microsoft Windows XP, Vista and Windows 7)
___________________________________________________
Electronic Viewfinder + LCD Screen
The viewfinder is electronic has high resolution and a dioptre knurled wheel on
the right side (from the back of the camera) which I adjusted for my
eyesight but not very easily as the wheel is tight and small for my fingers.
However, once set, putting the camera in and out of a bag should not change the
setting? The viewfinder, provides an accurate 100% view of the scene to be
captured and it is clear and bright.
The Viewfinder and Lens Perspective
The Sony A57 camera used with the Sony 18-55mm zoom lens delivers the following
(pre-sets marked on the lens barrel) 35mm focal lengths and their related
'field of views' through the viewfinder due to the 1.5x crop sensor -
18mm (27mm)
24mm (36mm)
28mm (42mm)
35mm (52.5mm)
55mm (82.5mm)
The
zoom ring can be turned and set to any focal length between these
pre-sets as desired.
Electronic Viewfinder - 'AWESOME' The Sony Alpha A57 SLT
camera has an awesome electronic viewfinder.
A good OPTICAL viewfinder in a DSLR camera is just like your
eyes, if you lift the optical viewfinder up to your eye and view the
scene, drop the camera down look at the scene with your eyes and quickly
lift the camera up again and you will find that the lighting of the
scenes are exactly the same. The same applies for subjects that are very
bright in a harsh sun or dark in twilight - the caveat is of course
dependent on the ability of the fitted lens to resolve the light and the
subject as the optical viewfinder is looking down the barrel of the lens
via a mirror fitted in front of the sensor. When you adjust the lens for
focus, say a wide aperture to create a pleasant out of focus (bokeh)
behind a subject, it will be be reflected in the optical viewfinder and
in certain DSLRs there is a depth of field preview button that when
pressed displays the focus result. However the optical viewfinder is not
accurate in displaying 'what you see is what you get' in the final
captured image. Although the optical viewfinder performs like your eyes
the digital sensor does not, so in very uneven lighting conditions the
sensor might deliver a blown out bright sky with a very nice foreground
or a nice sky with a very dark foreground. When you check the captured
image in the LCD you see the errors and then compensate the camera's
exposure meter + or - and re-take the shot but your changes are not
reflected in the optical viewfinder, it remains the same with the scene
lighting view unchanged and that is it's weakness.
The Sony SLT A57 ELECTRONIC viewfinder performs the very
same way as the optical one but most importantly because of the Sony
mirror design it reflects any changes you make to the exposure
compensation and effectively the viewed scene is what the digital sensor
delivers - 'what you see is what you get' and when shooting black
and white (Creative Mode=BW) you see black and white scenes in
the viewfinder and in (Creative Mode=VIVID) you see colour and
any modifications to the (Creative Mode)
contrast/saturation/sharpness are also emulated in the viewfinder.
Electronic Viewfinder - Typical Use
I think the electronic viewfinder is great, and I can keep it at my eye
all the time, adjust, preset and AEL(toggle) lock my
exposure, focus the centre spot point on the subject, half press/hold
the shutter button to lock the focus, re-align the scene and press the
shutter button fully home to take the shot. Up pops the auto review of
the shot for 5 seconds in the viewfinder, override the 5 seconds by
pressing the ZOOM button to zoom in and the AEL to zoom
out and when ready for the next shot, just tap the shutter button to
clear the auto review.
Many will argue that an optical viewfinder does not get in the way of
your shooting as it allows you to continually view the scene - that may
be the case with a rangefinder camera like a Leica M8 or M9 but the DSLR
still displays the shutter movement as the image is captured.
Of course, with the Sony SLT A57 camera, if I want to simulate OPTICAL like a normal DSLR
optical viewfinder, I can switch off the auto review of a
captured image (main menu setting) and then my view of the scene
becomes uninterrupted except for the flash of the shutter when the shot
is taken - great for street photography.
I have not switched on the electronic viewfinder EYE-START AUTOFOCUS(in the main menu) for although it is great for instantly
focusing when you put your eye up to the viewfinder what is really
happening is that the viewfinder detects an object appearing at the back
and will instantly autofocus - this means that when the camera is being
carried in front of you on a shoulder strap or down at your side, the
viewfinder detects your
body against the eyepiece and starts to 'chimp'
and autofocus on different subjects as their distances change. This can
only wear down the battery power although I admit if you are shooting
all the time with the camera up at your eye, I can see where it would be
a benefit.
However there are
3 little wrinkles
to live with -
Wrinkle 1
- Very Uneven Light
- If you are shooting a very uneven lighting scene - say a dark
foreground with a very bright skyline,
the viewfinder may see a correct and visible exposure on the foreground
but the sky might be white and blown out. When you make adjustments
using exposure compensation to darken the sky a little, the effect on
the overall image invariably means that the foreground has darkened to
such an extent that you might not be able to see the outlines of objects
in the dark area. Normally in such circumstances a photographer would
use a 2 stop graduated filter fitted to the front of the lens (grey half top and clear bottom area)
to darken the sky by 2 stops and yet leave the foreground visible. I am writing about
extremes here, not everyday shots with normal lit subjects.
There is room for improvement
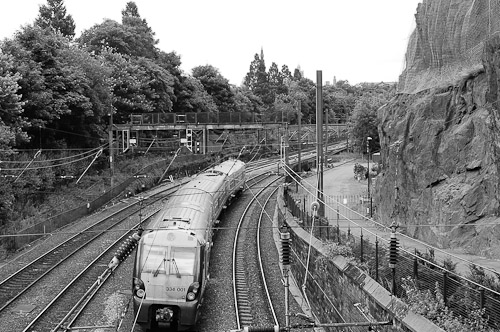
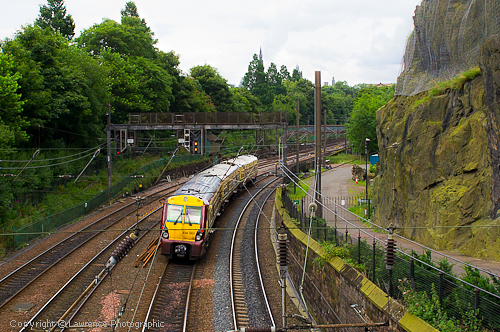
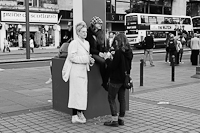
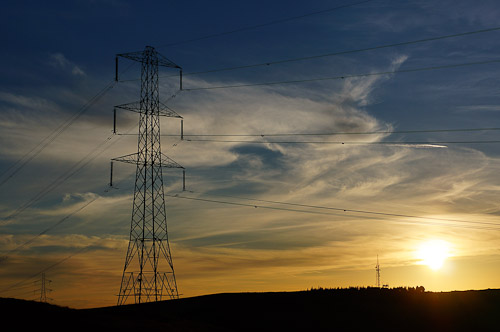
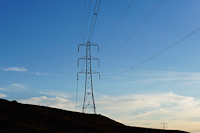
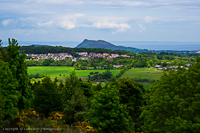
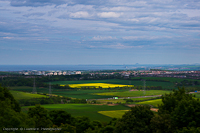
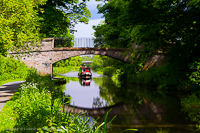
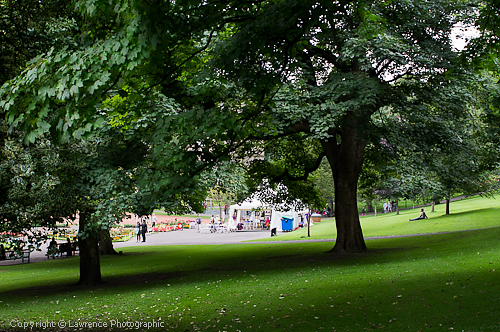
Very Uneven Light -
Camera Jpeg Examples - Here are two examples of camera jpeg
images that were shot on a very sunny day and when the exposure meter
read the scene, the view in the camera electronic viewfinder or the LCD
screen showed a very clear foreground but a white sky between the trees
- the blue colour was bleached out. It was a nice clear view overall but
I had to adjust the sky/foreground balance as I did not have a
graduated filter
but in any case, there was no straight cut across the scene between the
sky and the ground due to the confines of the trees in the skyline - all
a graduated filter would achieve would be to darken the tree tops as
well as the sky. In the end I just halved the light readings of the
ground and the sky, by lifting up the camera to the sky and when the
exposure meter read the correct higher shutter speed to my f8 aperture,
I used the AEL button to lock the new exposure. The AEL is set to toggle
in my menu settings, so the exposure lock would stay on until I switched
the camera off or toggled it off using the AEL button again. When a man
is cycling fast towards you and you want him in the picture, you have to
be quick. The overall balance was now quite reasonable but when I looked
at the scene through the viewfinder again, I could not see any properly
defined outlines of the trees or the canal in the dark foreground areas,
except the cross light on the man's face and path on the left side. I
trusted the centre spot autofocus and pointed it at his face and held
the shutter button half down to lock the focus, re-aligned the scene as
shown and pressed the shutter button fully down. The position of the
focus on the man's face was not quite the 1/3rd up
hyperfocal
distance desired from the bottom of the image but nevertheless the
overall area in focus is pretty good. These actual shots were to be a
test for long distance resolution at 28mm (42mm field of view)
and jpegs shot straight from the camera but they serve this
demonstration very well -
The camera jpeg images come out of the camera with the light balance
between the sky and the foreground optimized by the camera's
D-RANGE OPTIMIZER which is set to AUTO in my menu settings.
The second image foreground is just a shade on the dark side but
nevertheless the reflections of the trees and light are clearly
reflected in the canal water. Interestingly the shutter difference
between the two shots is 1/80sec (both apertures at f8)
but enough to darken the foreground slightly more on image 2. At a later
date, I will be conducting 'exposure bracketing' test shots.
To be fair to the Sony SLT A57 camera, you cannot have it both ways, you
either use a camera with an optical viewfinder which displays a very
clear scene in the shadows as well as the areas in the brighter light
but very often the exposure is wrong and the shot has to be viewed in
playback to note the errors and by the time the exposure is adjusted,
the subject may be unavailable for another shot? I like the Sony A57
camera simply because I have never had so many 'one shot' camera jpeg
images which are correctly exposed, deliver excellent and natural
colours
(dependent on your choice of in camera settings) require no post
processing and are reasonably sharp in the final print, straight of the
memory card.
Wrinkle 2
- Dark Conditions
- When the light diminishes, the view through the viewfinder becomes
darker and more noise spectacled as the resolution starts to break up.
Mind you the light has to get fairly dark, certainly a lot darker than a
cloudy day shooting in darkened conditions or a dark rainy day. However,
as the viewfinder image fades away (it never completely does) the
large LCD screen comes into it's own and is much better for shots in
almost total darkness.
Wrinkle 3
- Auto or Manual Switching between the Viewfinder and the LCD Screen
The viewfinder and the LCD screen by default in the menu are set-up in
AUTO mode to become active depending on which one your eye is over but
this can be changed to MANUAL where you then just use the
manual button on the top of the camera to toggle viewfinder or LCD
screen. However if you manually set the viewfinder using the button, the
viewfinder still waits for your eye before it switches on - a tiny
delay. Of course there will be a saving on battery power if you just use
the manually switched viewfinder and leave the LCD off - I am still of
two minds in how to set this up (AUTO or MANUAL)
bearing in mind that I invariable prefer a viewfinder. I think I will
leave it at AUTO until I see how the battery holds up for my style of
shooting.
Using both the viewfinder and LCD screen in AUTO mode with eye selection
is a real pleasure.
Under Exposure
+ Histograms
I like the viewfinder for visibly demonstrating 'under exposure' in
scenes with even lighting or scenes where I have misjudged the exposure
during exposure compensation. If I am shooting a scene and the colours
appear too dark/rich in the viewfinder, even with apparent brightness,
then the view and the captured image is invariably underexposed. As I
usually maintain my chosen aperture setting, I just drop the camera
slightly to decrease the shutter speed to open up the exposure and I can
see the scene through the viewfinder brighten up and the colours even
out. Once I have the colours in the viewfinder as I want them, I press
the AEL button and lock the exposure - then focus on the primary
area/subject, hold the shutter button, re-compose the scene and press
the shutter button fully home take the shot. The electronic viewfinder
is very accurate in this respect and the entire process is very fast.
When you have more time to capture an image like a landscape, the camera
delivers all the tools for correctly setting up the exposure prior to
taking the shot, including a small
histogram display on the bottom
right of the viewfinder or LCD screen as well as any white balance
correction, exposure compensation adjustment, bracket exposure shots and
manual focus peaking (lens in manual mode)
as the main bonus but not least, the larger LCD screen which completes
the experience. Unfortunately the display with the
histogram does does not include the
horizontal/vertical level indicator on the viewing screen, so you have
to toggle between the two or perhaps use a tripod with a built in spirit
level. When you have time to take multiple shots of a scene, you
can also playback the image and closely examine it using the
colour histogram in the playback
display, then if required, make the necessary exposure adjustments and
take another shot.
Effects of the D-Range Optimizer - I prefer to use the Viewfinder
and the LCD - both set for AUTO in the Main Menu. To my eyes this
setting provides the nearest view of the exposure to the actual captured
image end result. However with D-Range Optimizer set to Auto in the
Fn button menu, which I recommend because it really does optimise
the dynamic range and this is seen in the image when immediately
displayed after capture (in the viewfinder or LCD screen)
appears to be about a 1/3rd stop lighter - however the end result is
pretty good.
LCD Screen Folded Inwards to the Body - To Protect the Screen
I am using the viewfinder
(in AUTO mode) and I have the LCD screen folded inwards against
the body to protect the screen. I will only use the LCD screen for low
or high shots where I cannot get the shot using the viewfinder or in
very dark conditions where the viewfinder is compromised and when I want
to preview a captured image in more detail. When I want to use the LCD
screen, I just flip it down and it is ready to go - when finished, I pop
it up and into the body.
Using the Viewfinder or LCD Screen
for Scene Composition - Choice of Electronic Display When
composing a scene to capture an image, the viewfinder and LCD screen
make for the perfect combination, I have all my camera display settings
pre-set in the camera menu to ACTIVE, so I can toggle the DISP
tilt/switch on the rear control (top of the 4 cluster tilt/switches)
wheel through all the displays and select which one I want to use for
the viewfinder and which one for the LCD. They can be set-up
independently of each other and for the moment, I have them both set-up
as bare as possible - the camera exposure settings along the bottom and
the 'basic grids' and 'the spirit level' in the view and the viewfinder
adds a little extra information along the top of the view. The spirit
level is amazing, I have never used one before but it not only checks
the horizontal but also the vertical 'plane' to the subject and marks it
in red for inaccuracy whilst green for the correct lineup. It the case
of shooting architecture/high buildings (unless you have a tilt/shift
lens or can shoot the scene from halfway up another building) it is
unlikely that the vertical plane will ever show anything other that red.
However, the level and its green/red lights are unobtrusive and do not
spoil the experience.
On the Fly - Inspecting a New Captured Image in the Viewfinder
This is most excellent for using with any lens but especially with my
new Tamron 70-300mm f4/f5.6 SP Di USD zoom lens for wildlife shots - I
love the Sony A57 viewfinder as I have my 'after shot' preview set for 5
seconds, so by pressing the zoom button on the top right/rear of the
camera (whilst the viewfinder at my eye) I can hold the captured
image and zoom into it (or zoom out using the AEL button) to
check the focus and resolution of the feathers or fur. I use the buttons
on the rear tilt pad to move around the enlarged image - tapping the
shutter button clears it and I am ready to go with the next shot.
Viewing/Deleting a Captured Image - Viewfinder or LCD Screen I
have my initial capture 'delay' viewing time set to 5 seconds - which
applies to the viewfinder and the LCD screen.
It is set for a full image display and minimum
data.
In the case where I want to properly preview an
image for more than 5 seconds (right after the shot is taken)
then I will press the PLAYBACK blue arrow button on the
rear/bottom of the camera, flip down the LCD screen (the image
auto-rotates the right way up) press the DISP tilt/switch on
the rear main dial and toggle it to select one of my displays to suit
the preview - I prefer the full preview display which includes,
highlight warnings, histogram and full image capture settings. After I
am finished, I then toggle back to the 'basic minimum display' before
pushing up and back the LCD screen into the body. NOTE: If I
forget to return to the 'basic minimum display' then the next time I
take a shot the 5 second auto review display in the viewfinder (or LCD
screen) will be the previous PLAYBACK preview display.
In the image
PLAYBACK(access by pressing blue arrow button on the
rear/bottom of the camera) you can use the Zoom button to
magnify the preview of the captured image and the AEL button to
zoom out.
To delete a single image, you use the
?
BUTTON next to the preview button and follow the menu. To delete all the
images, you access the main menu using the MENU button, scroll
along until you reach the DELETE text and then press the AF key on the
back of the camera main dial and follow the delete all images routine -
when you exit, the camera returns to a normal single image delete
procedure (if there are no images the main menu DELETE text is grayed
out).
To access all the PLAYBACK image (STILL/AVCHD/MP4) folders, you
press the PLAYBACK
(access by pressing blue arrow button on the
rear/bottom of the camera)then
the AEL BUTTON to display recent images - then the left tilt/switch in
the 4 cluster rear dial to highlight the left menu bar
(orange when highlighted) press the AF BUTTON to display all the folders
and then using the top/bottom
tilt/switches in the 4 cluster rear dial
to highlight the folder of choice and then again AF BUTTON to select and
?
BUTTON to
browse.
___________________________________________________
Shutter
Burst Mode - Capturing Fast Moving Subjects Top Main Control Dial - T12 Mode (Camera Automated)
There is a dedicated setting for this - the T12 MODE on the top
main control dial (top left of the camera from the back) calls up
a Continuous Priority Mode Menu in which you can select your speed to 10
frames or 12 frames per second. There is also a help guide function
display.
12 Frames
- Jpeg Images ONLY
- To get the maximum out of this
T12 and 12 frames setting the FN button/menu is used to set
the autofocus mode to AF-C (Continuous AF) and the camera is now in
effectively an automated control for aperture/shutter burst mode and
continuous autofocus shooting, the camera automatically selects the
widest aperture available on the zoom position - but I can still change
my ISO setting to raise/lower the shutter speed. In the FN
button/menu the shutter mode selection has now been replaced with the
T12 Menu 10/12 frame choice. I can achieve aperture priority control
if I set the FN button/menu - autofocus mode to AF-S (Single AF).
However, using this T12 (12 frame)function and
back in the MAIN MENU, I am unable to select RAW + Jpeg
images, only Jpeg FINE or STANDARD quality at 8.4MPixels as well as the
frame aspect ratio (3.2/16.9).
10 Frames
- RAW + Jpeg Images
- To get the maximum out of this
T12 and 10 frames setting the FN button/menu is used to set
the autofocus mode to AF-C (Continuous AF) and the camera is now in
effectively an automated control for aperture/shutter burst mode and
continuous autofocus shooting, the camera automatically selects the
widest aperture available on the zoom position - but I can still change
my ISO setting to raise/lower the shutter speed. In the FN
button/menu the shutter mode selection has now been replaced with the
T12Menu 10/12 frame choice. I can achieve aperture priority
control if I set the FN button/menu - autofocus mode to AF-S
(Single AF). Now I am able to set-up any image file choice in the
MAIN MENU including RAW + Jpeg images as well as the frame aspect
ratio (3.2/16.9).
T12 Mode NOTES:
If you have A for aperture
priority control mode set-up for shooting RAW + Jpeg files and then
use the camera T1212 frame
automated burst
Jpeg (compulsory) FINE or STANDARD quality at 8.4MPixels
settings, the A control mode will still retain its RAW + Jpeg
setting - however, once you return to A control mode, the one area that that you may wish to
re-set in the FN button/menu is the
autofocus mode, back to AF-S (Single Shot) from AF-C (Continuous
AF).
If you have A for aperture
priority control mode set-up for shooting RAW + Jpeg files and then
use the camera T1210 frame
automated burst
RAW + Jpeg setting, the A control mode will still retain its
RAW + Jpeg setting - however, once you return to A control
mode, the one area that that you
may wish to re-set in the FN button/menu is the
autofocus mode, back to AF-S (Single Shot) from AF-C (Continuous
AF).
Aperture Priority - Shutter Burst Mode
(Top Main Control Dial) Well the conditions were all wrong, the day was dull with overcast
clouds (typical) for trying out the camera's shutter burst mode
in aperture priority, especially with it set-up for shooting both 'RAW
and Jpeg' image files.
In aperture priority mode the shutter burst settings were -
Image Quality in the MAIN MENU -
'RAW & JPEG'
Sony DT 18-55mm SAM Zoom Lens - 35mm (52.5mm field of view but
again cropped in Post Processing)
ISO:800
Aperture f5.6 (the aperture can be
manually adjusted and camera auto adjusted the shutter for
1/1600sec)
Drive Mode - Burst Continuous Shooting
Lo set-up by using the tilt/switch on the left side of the rear
of the large dial set control pad
(Fn button/menu Drive Mode can also be used to set this up)
Fn button/menu Autofocus Mode
set-up for AF-C (Continuous AF)
Fn button/menu AF Area set-up
for Spot
I will
eventually get around to trying out Drive Mode - Burst Continuous
Shooting High(which also works the same way) and it
should be faster?
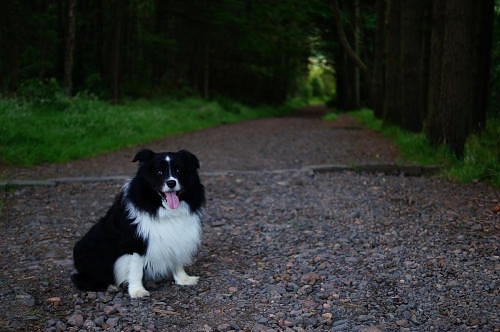
The dogs were at full speed and both are black in
colour (duh) which makes tracking them in the LCD screen using
centre/spot focus harder, so I had to pull the zoom back a bit and use
35mm on the zoom (52.5mm field of view). I could have used the
electronic viewfinder. The dull day was a great test for image quality
at ISO:800. The camera jpeg images were post processed in Adobe
Lightroom 4 software, they have all been cropped, resized to 1,200
pixels, slightly sharpened and the 'field of view' in the final images
is now about 70mm. There were no other adjustments of any kind.
This small 600 pixel (smaller) version is the last image in a
burst set of 4 - keep clicking them to move through them.
Truth be told, I am not into burst photography, this is the first time
that I have properly set up a camera and tried it - I am fairly sure
that my finger lifted of the shutter button between the 3rd and the 4th
(last)
image during this sequence, so perhaps a few shots are missing?
The Sony SLT A57 camera with the Sony 18-55mm zoom kit lens is not bad
when you consider the dogs were really pushing the speed - as you can
see from their expressions and body language in the last image. Don't
worry it was just a game and Brad did not hurt Tasha although he looked
as if he was going to. I reckon in the right hands and with a proper
telephoto 'f2.8 aperture' faster lens, the camera could be used way
beyond the average family 'snaps' of kids and pets running about!
Focus peaking is simple
to use, with the camera set-up as per my menu settings.
When taking a shot and I am unsure of my depth of field or the autofocus
on the camera hunts, I just flick the Sony DT 18-55mm SAM zoom lens
switch from AF to MF and using the manual focus ring of the lens, I
adjust the scene until I get the white outlines highlighted in the areas
of the scene that I want and press the shutter button. Normally I have
already locked my exposure of choice using the camera AEL button
(toggles on/off). If I have problems with a subject (like a
flower) and I want to make sure that the focus is spot on, I can
also use the Focus Magnifier which is the Preview Button on
the front/bottom/base of the camera.
I have tried out the
PEAKINGLEVEL mode which is designed for manual focusing
of the lens with the camera. It can be
switched from OFF to LOW, MID or HIGH in the MAIN MENU
and then you can set up the PEAKING COLOR - WHITE, YELLOW or RED
to outline the areas of the image that are IN FOCUS when using the lens
in manual mode.
I have my PREVIEW button (front/bottom/base) of the camera
body set-up in the MAIN MENU for FOCUS MAGNIFIER and using
this button
(combined with the rear
4 cluster tilt/switches
directional control wheel) to zoom into the subject and combined
with FOCUS PEAKING, I can see very clearly the area in focus and
manually adjust the Sony 18-55mm zoom lens accordingly.
However, the Sony 18-55mm f3.5/f5.6 zoom lens has the manual focus ring
on the front of the lens and when hand holding the combo, I find it very
difficult to keep the camera steady enough and twist the front focus
ring without wavering about on the subject, especially when it is a
close up shot. I think it is an age thing, I just find it very awkward.
In their favour, I can see where the 'Peaking and Focus Magnifier'
controls would both come into their own to offer a very powerful
combination for 'manually focusing' macro shots, or for isolating
'primary subject' shots with the camera sitting on a tripod and the lens
switched to manual mode. I have decided to leave PEAKING LEVEL
switched to HIGH(for my old eyes) and left the
PEAKING COLOR
as WHITE.
NOTE: The images in this article are all shot in autofocus mode
and if I take any manually focused images using FOCUS PEAKING, I will
state so in the image settings.
___________________________________________________
The Sony Alpha A57 SLT camera's
object tracking system is used for tracking a subject which is moving within the viewing frame.
View the scene and press the AF button in the middle of the rear control
pad
and a white rectangle appears in the middle of the scene. Line this
white rectangle up on the subject and press the AF button again - the
rectangle now has a double white outline and begins tracking the moving
subject which must remain in view within the frame - press the shutter
button to take the shot
or press the AFbutton again to cancel the operation.
___________________________________________________
For raising the 'audio'
bar on the quality of your videos an external microphone is desirable.
The camera without an external microphone and using the body 'built in
microphone' will pick up the autofocus clicking of the lens as it
automatically adjusts. Obviously this will be a distraction although the
Sony A57 can also be used in manual focus mode which removes AF
background noise.
The video tests were
conducted using the Sony DT 18-55mm f3.5/f5.6 SAM Zoom Lens. In all
video modes, whilst recording, either in dedicated video or in A
aperture priority mode, there are certain functions (e.g. ISO, White
Balance) that you can adjust - you can see the areas that can be
adjusted whilst recording and my video MAIN MENU settings at
My Main Controls + Menu Settings (Window)
Aperture
Priority - A Mode (Using Video)
I use aperture priority mode and the lens set to autofocus for virtually
all of my 'stills' photography and whilst in this mode, you can use the
video
RED
mode button (on the rear of the camera at the top) to start video
recording.
This short video was recorded whilst in aperture priority mode
(shooting stills) and pressing the
RED
button - the video settings in the main menu were -
File Format
-AVCHD
Record Setting -
50i 17M (FH)
Audio Recording -
ON
Wind Noise
Reduction - ON
SteadyShot - ON
This video was rendered to H.264 AVC format, using Cyberlink
PowerDirector Ultra 10 Software -
I wanted to create a video overview of my new motorcycle and I don't own a Go-Pro Hero 3+ or a Drift Ghost S video camera so I used
my Sony Alpha A57
SLT camera with a Sony 18-55mm f3.5/f5.6 MK I zoom lens set to 18mm
(27mm field of view) and the lens to manual. I used focus
peaking to set up the focus area, strapped the camera to my chest and
set off, looking a right dork. The settings were the same as above but
the lens was switched to manual - so no autofocus clicking noise.
However the video is reasonable for a first attempt and I think it
provides a decent overview of the bike and the capability of the camera
and lens.
This video was rendered to H.264 AVC format, using Cyberlink
PowerDirector Ultra 10 Software.
There is a contents page at the beginning of the video -
please view the video in full screen and set the quality to 1080p HD for
maximum resolution -
With regards to using the video
RED
button from the 'Stills' Aperture Priority A Mode - I have listed
the following remarks -
With the lens in AF mode on the barrel switch and the camera body
switch set to AF, the video records in continuous autofocus,
irrespective of what setting you have the autofocus mode
(AF-S/AF-C/AF-M) set to beforehand. Unfortunately,
with the lens and camera body
in
autofocus mode, the camera will record the sound of the autofocus of
the lens as it makes a light click noise as it adjusts the optics
during recording.
The zoom lens 'field of view' in video
recording is narrower than in 'stills' photography mode.
The ZOOM BUTTON on the rear/top/right of the
camera body can be used along with the 4 cluster tilt/switch control
pad on the back of the camera and the centre AF BUTTON to zoom into
and also crop your video recording. However, the image quality will
deteriorate as you digitally zoom further in.
You cannot change the aperture setting during
recording.
It is irrelevant what aperture you set the
camera to before video recording as the camera will automatically
set the lens aperture at the widest setting possible (f3.5 at
18mm and to f5.6 at 55mm) and match the shutter speed to it
depending on the ISO rating you have chosen. To increase the shutter
speed you raise to ISO and to lower the shutter speed you lower the
ISO. When the camera is set to ISO = AUTO it maintains the widest
aperture principle but lowers the ISO to the lowest possible rating
and likewise the shutter speed.
If the shutter speed and aperture settings
fall below a level that will facilitate proper video recording then
they will both flash on the screen - raise the ISO level until they
stop (until you reach the limit of ISO:3200) and if they
continue to flash - you are at the limit of the camera's ability to
expose/record the scene. The same occurs when ISO is set to AUTO.
You can press the AEL button (mine is set
to toggle exposure lock) to lock the shutter speed which is
matched to the aperture setting - press again to toggle to unlock.
This works in autofocus and manual focus modes and is ideal for
balancing a bright sky against a dark foreground during recording.
During video recording, the lens can be used in MANUAL MODE by
switching the lens barrel AF to MF (the camera body can be left
at AF as MF is only used when the AF lens does not have a manual
switch) and then manually focusing on the scene using FOCUS
PEAKING to display the areas in focus - this stops any clicking from
the autofocus. In this mode - it
is irrelevant what aperture you set the camera to before video
recording as the camera will automatically set the lens aperture at
the widest setting possible (f3.5 at 18mm and to f5.6 at 55mm)
and match the shutter speed to it depending on the ISO rating you
have chosen. To increase the shutter speed you raise to ISO and to
lower the shutter speed you lower the ISO. When the camera is set to
ISO = AUTO it maintains the widest aperture principle but lowers the
ISO to the lowest possible rating and likewise the shutter speed.
When the lens is switched to MF (Manual Focus) mode on the
barrel and the camera body switch set to AF,
the video records with MF focus, irrespective of what setting you
have the autofocus mode (AF-S/AF-C/AF-M) set to beforehand.
Dedicated
Video Control Modes
The dedicated video control is chosen by selecting the VIDEO ICON on the
main top control wheel on the left. This brings up 4 settings and you
can select your chosen setting by scrolling down using the rear
tilt/switches on the rear control pad and pressing the AF button. When
you finish in dedicated video mode the setting is maintained until you
again change it. I have listed the dedicated video choices below -
Dedicated Video - Program Auto Mode - Lens Autofocus
This is the automatic mode and
I have listed the following remarks -
With the lens in AF mode on the barrel switch and the camera body
switch set to AF,
the video records with continuous autofocus, irrespective of what
setting you have the
autofocus
mode (AF-S/AF-C/AF-M) set to beforehand. Unfortunately,
with
the lens and camera body in
autofocus mode, the camera will record the sound of the autofocus of
the lens as it makes a light click noise as it adjusts the optics
during recording.
The zoom lens 'field of
view' in video recording is narrower than in 'stills' photography
mode.
The ZOOM BUTTON on the
rear/top/right of the camera body can be used along with the 4
cluster tilt/switch control pad on the back of the camera and the
centre AF BUTTON to zoom into and also crop your video recording.
However, the image quality will deteriorate as you zoom further in.
You cannot change the
aperture setting during recording.
It is irrelevant what
aperture you set the camera to before video recording as the camera
will automatically set the lens aperture at the widest setting
possible (f3.5 at 18mm and to f5.6 at 55mm) and match the
shutter speed to it depending on the ISO rating you have chosen. To
increase the shutter speed you raise to ISO and to lower the shutter
speed you lower the ISO. When the camera is set to ISO = AUTO it
maintains the widest aperture principle but lowers the ISO to the
lowest possible rating and likewise the shutter speed.
If the shutter speed
and aperture settings fall below a level that will facilitate proper
video recording then they will both flash on the screen - raise the
ISO level until they stop (until you reach the limit of ISO:3200)
and if they continue to flash - you are at the limit of the camera's
ability to expose/record the scene. The same occurs when ISO is set
to AUTO.
You can press the AEL
button (mine is set to toggle exposure lock) to lock the
shutter speed which is matched to the aperture setting - press again
to toggle to unlock. This works in autofocus and manual focus modes
and is ideal for balancing a bright sky against a dark foreground
during recording.
I tried putting the lens in MANUAL MODE by switching the lens barrel
AF to MF but all the aperture values fluctuated at f10 -f22, so I do
not think Manual Focusing can be used in Program Auto Mode?
Dedicated Video
- Aperture Priority Mode - Manual Mode
This is the aperture priority manual mode and
I have listed the following remarks -
The 18-55mm zoom lens is used in MANUAL MODE by switching the lens
barrel AF to MF (the camera body can be left at AF as MF is only
used when the AF lens does not have a manual switch) and then
manually focusing on the scene using FOCUS PEAKING to display the
areas in focus. You can adjust the aperture setting to any f# stop
within the limits of the zoom (f3.5 widest at 18mm and f5.6
widest at 55mm) using the
recessed front knurled wheel.
The
camera will automatically match the shutter speed to the aperture
depending on the ISO rating you have chosen. To increase the shutter
speed you either open up the f# stop (towards f3.5 when possible)
or raise the ISO rating and to lower the shutter speed you stop down
the f# stop (towards f36 when possible) or lower the ISO
rating. When the camera is set to ISO = AUTO it maintains the widest
aperture principle but lowers the ISO to the lowest possible rating
and likewise the shutter speed.
When the lens is switched to MF (Manual Focus) mode on the
barrel and the camera body switch set to AF,
the video records with MF focus, irrespective of what setting you
have the
autofocus
mode (AF-S/AF-C/AF-M) set to beforehand.
You CAN change the
aperture setting during recording but the sound of the wheel
clicking during the change is also recorded in the video.
The zoom lens 'field of
view' in video recording is narrower than in 'stills' photography
mode.
The ZOOM BUTTON on the
rear/top/right of the camera body can be used along with the 4
cluster tilt/switch control pad on the back of the camera and the
centre AF BUTTON to zoom into and also crop your video recording.
However, the image quality will deteriorate as you zoom further in.
If the shutter speed
and aperture settings fall below a level that will facilitate proper
video recording then they will both flash on the screen - either
open up the f# stop
(towards f3.5 when possible) or raise the ISO level until they
stop (until you reach the limit of ISO:3200) and if they
continue to flash - you are at the limit of the camera's ability to
expose/record the scene. The same occurs when ISO is set to AUTO.
You can press the AEL
button (mine is set to toggle exposure lock) to lock the
shutter speed which is matched to the aperture setting - press again
to toggle to unlock. This is ideal for balancing a bright sky
against a dark foreground during recording.
Dedicated Video
- Shutter Priority Mode
- Manual Mode
This is the shutter priority manual mode and
I have listed the following remarks -
The 18-55mm zoom lens is used in MANUAL MODE by switching the lens
barrel AF to MF (the camera body can be left at AF as MF is only
used when the AF lens does not have a manual switch) and then
manually focusing on the scene using FOCUS PEAKING to display the
areas in focus. I expected to be able to use the the front recessed
knurled wheel to adjust the shutter speed and the aperture would
automatically change to suit but although it did change, the
exposure also changed either brighter or darker depending on the
shutter speed direction. No matter what ISO rating I used, it made
no difference, the shutter and aperture were not synchronised
properly. However when I set the ISO rating to AUTO, the camera
automatically set
the lens aperture at
the widest setting possible (f3.5 at 18mm and to f5.6 at 55mm)
and matched the correct shutter speed to the aperture and the ISO
that the camera had chosen - now when I changed the shutter speed,
using the front recessed knurled wheel, the widest aperture possible
was maintained (f3.5 at 18mm and
to f5.6 at 55mm) and the ISO changed to maintain the correct
exposure balance - only when the ISO rating reached it's limit of
ISO:100 at a very slow shutter speed (in good light)
did the f3.5 at 18mm or f5.6 at 55mm start to move to f8 and
continue to stop down. I don't think there is a fault with the
camera as aperture priority mode works correctly in maintaining a
balanced exposure without having to use AUTO ISO.
When the lens is switched to MF (Manual Focus) mode on the
barrel and the camera body switch set to AF,
the video records with MF focus, irrespective of what setting you
have the
autofocus
mode (AF-S/AF-C/AF-M) set to beforehand.
You CAN change the
shutter setting during recording but the sound of the wheel clicking
during the change is also recorded in the video.
The zoom lens 'field of
view' in video recording is narrower than in 'stills' photography
mode.
The ZOOM BUTTON on the
rear/top/right of the camera body can be used along with the 4
cluster tilt/switch control pad on the back of the camera and the
centre AF BUTTON to zoom into and also crop your video recording.
However, the image quality will deteriorate as you zoom further in.
If the shutter speed
and aperture settings fall below a level that will facilitate proper
video recording then the aperture setting will flash on the screen -
I interpret this that ISO set to AUTO has reached the exposure limit
(ISO:100 or 3200) and you are at the limit of the camera's
ability to expose/record the scene.
You can press the AEL
button (mine is set to toggle exposure lock) to lock the
shutter speed which is matched to the aperture setting - press again
to toggle to unlock. This is ideal for balancing a bright sky
against a dark foreground during recording.
Dedicated Video
- Fully Manual EXPOSURE Mode
This is the manual exposure mode and
I have listed the following remarks -
The 18-55mm zoom lens is used in MANUAL MODE by switching the lens
barrel AF to MF (the camera body can be left at AF as MF is only
used when the AF lens does not have a manual switch) and then
manually focusing on the scene using FOCUS PEAKING to display the
areas in focus. You adjust the shutter setting by turning the
recessed front knurled wheel and to adjust the aperture you
press/hold the AEL button down and again use the recessed
front knurled wheel to select your aperture setting. The camera will
'flash' display any exposure +/- anomalies to allow you to select
your desired shutter or aperture and adjust the other to match. To
raise a faster shutter you either open up the aperture to the widest
setting possible and/or raise the ISO rating to the maximum of
ISO:3200 for video shooting. The AUTO ISO function does not work in
this video mode.
When the lens is switched to MF (Manual Focus) mode on the
barrel and the camera body switch set to AF,
the video records with MF focus, irrespective of what setting you
have the
autofocus
mode (AF-S/AF-C/AF-M) set to beforehand.
You CAN change the
shutter setting or aperture setting during recording but the sound
of the wheel clicking during the change is also recorded in the
video.
The zoom lens 'field of
view' in video recording is narrower than in 'stills' photography
mode.
The ZOOM BUTTON on the
rear/top/right of the camera body can be used along with the 4
cluster tilt/switch control pad on the back of the camera and the
centre AF BUTTON to zoom into and also crop your video recording.
However, the image quality will deteriorate as you zoom further in.
If the shutter speed
and aperture settings fall below a level that will facilitate proper
video recording then the aperture setting will flash on the screen -
I interpret this that ISO set to AUTO has reached the exposure limit
(ISO:100 or 3200) and you are at the limit of the camera's
ability to expose/record the scene.
The AEL button is used
for aperture setting and cannot be used for locking the exposure.
The
Sony DT 18-55mm f3.5/f5.6 SAM zoom is an entry level lens and is more than
capable of delivering 'family' videos in the AUTO mode and with some experience,
manual control in (dedicated video program) aperture priority mode but
for someone who is into a higher standard of video for movies then the lens is
very limited for any form of special effects.
___________________________________________________ Sony
DT 18-55mm f3.5 - f5.6 SAM Zoom Lens
Technical Details The lens is designed for using with Sony APS-C sensor SLT cameras -
it will not work on a Sony 35mm 'Full Frame' SLT camera - the exception
(12th September 2012) being the new full frame Sony
Alpha A99.
The Lens Build + Zoom Operation -
The zoom lens is made out of plastic and is fitted with a plastic
mount to fit it to
the camera body and the 55mm filter thread is also plastic. The lens has
a AF/Manual switch located on the left side from the back of the camera.
The ridged zoom ring is ridged and very smooth to operate and the manual
focus ring is narrow and located on the front end of the lens. The inner
part of the lens tube does slightly wobble but (at this stage)
only if I move it with my hand. The lens also has very slight play on
it's mount to the camera
(at this stage) but again only if I move it with my hand. There
is no lens hood in the box as that is optional and extra but the lens
does appear to have the grooved fitting to allow it (?) to fit
backwards (the Hoya filter is a flush fit to the lens so it should
not pose a problem) onto the lens for storage. The inner front part
of the lens is fully retracted into the lens body at 35mm (70mm field
of view) on the scale and when you turn the zoom ring
(clockwise from the back of the camera) the inner part of the
lens extends to 55mm (82.5mm field of view). Again from the 35mm
scale position when you turn the zoom ring (anti-clockwise from the
back of the camera) the inner part of the lens extends to 18mm
(27mm field of view).
The
lens hood
for the Sony 18-55mm f3.5/f5.6 zoom lens is an optional extra and I
eventually ordered one in the UK which arrived after 6
weeks. I was surprised at just how thin it was when fitted - it added about a
1/2 inch to the length of the lens.
The Lens, Hoya Filter, Lens Cap + Camera Overall Size
- I fitted the lens to the camera by matching up the orange dot on the
camera body and the lens body and very gently put the lens mount into
the camera and turned the lens clockwise until it clicked home. I then
fitted the 55mm Hoya UV filter to the front of the lens, by letting it
gently drop in perfectly flat against the lens front, gently turned it
slightly anti-clockwise until the start of the screw met and gave that
reassuring click feeling and then very gently and carefully turned it
clockwise and did not over tighten it. The plastic lens cap can be
fitted to the front of the Hoya filter by squeezing the two outer clips
or the two inner recessed clips of the cap. The lens itself is fully
shortened when the zoom range marker is set at 35mm (70mm field of
view) midway between 18mm and 55mm on the scale and with the Hoya
filter and lens cap fitted, it measures 155mm (6.1")
from the furthest curve of the viewfinder on the back of the camera
(the backs most outer point) to the front of the lens cap. When
fully extended at 18mm, the lens with the Hoya filter and the lens cap
fitted, measures 166mm (6.5") from the furthest curve of the
viewfinder on the back of the camera
(the backs most outer point) to the front of the lens cap. The
lens on it's own (retracted) with it's mount cap fitted, the Hoya
filter and the lens cap fitted - measures 94mm in length (3.7") by 69mm
(2.7").
The Viewfinder and Lens Perspective The Sony
A57 camera used with the Sony 18-55mm zoom lens delivers the following
(pre-sets marked on the lens barrel) 35mm focal lengths and their
related 'field of views' due to the 1.5x crop sensor -
18mm (27mm)
24mm (36mm)
28mm (42mm)
35mm (52.5mm)
55mm (82.5mm)
The
zoom ring can be set to any focal length between these pre-sets as desired.
Apertures for Optimum Image Quality
From the camera jpeg images that I have examined so far, my results are very
similar to those in the photozone review/tests of the
Sony 18-55mm f3.5/f5.6 Zoom Lens. I tend to
leave the camera set-up for ISO:100 and aperture f8 for my general (casual)
photography - this provides me with a reasonable depth of field, especially at
35mm (52.5mm field of view) and 55mm (82.5mm field of view). I use
the aperture priority (A MODE) for all my photography, so it is relatively
simple to change my aperture to suit the type of shot I want (especially for
low light and close subject shots) - the shutter speed automatically adjusts
and if I require a faster shutter, I raise the ISO upwards
200/400/800/1600/3200. For wide aperture (shallower depth of field/in focus
area) shots, I would prefer to use f4 or as near to it as possible,
depending on the zoom position restrictions, for example at 55mm (82.5mm
field of view) the widest aperture permissible is f5.6. For stopped down
(shallower depth of field/in focus area) shots, I will not go beyond
aperture f11 for fear of
diffraction limitations.
My favourite button is the AEL button on the top/back of the camera. I
like to lock my multi-segment metered exposure settings - viewed as 'what you
see is invariable what you get' in the electronic viewfinder or the LCD screen
and then use the shutter half press/hold to lock my center/spot focus on the
area/subject in the scene, re-align the viewed scene and press the shutter
button fully home. I have the AEL button set-up in the MAIN MENU for
toggled (press to lock and then press again to unlock) a star icon appears in
the viewfinder/LCD to signify the exposure is locked. I also have my image
preview at the point of capture set-up for 5 seconds (or until I tap the
shutter button) so that I can get a good view/analysis of the captured image
in the viewfinder/LCD - just in case I want to take another shot.
The Sony 18-55mm f3.5/f5.6 zoom lens does produce excellent results at all zoom
ranges and I must admit it has taken me by surprise as usually a kit lens sold
with a camera, is way below par for image quality and most photographers end up
purchasing a more expensive lens at a later stage. Even although the Sony SLT
A57 camera body has image stabilisation built into it - one should bear in mind
that for certain distant shots and close shots, the shutter speed is important
to avoid the tiniest movement which can make the difference between an image
with high resolution and one that blurs out as you increase the digital viewing
and/or print size. Sometimes ISO:200 and even 400 can produce better results
(due to the higher shutter speeds) than ISO:100. Another area to consider is
that the lens does display a very narrow depth of field (even at f8) when
shooting very close subjects, so to assist the autofocus (I use
spot/centre for close ups) and to avoid the slightest chance of back/front
focus which is invariably caused through my old eyesight or handling error, I
tend to stick to aperture f8 where ISO and shutter speeds allow.
Lens Depth of Field (Area in Focus)
The Sony APS-C digital sensor is much larger than a point and shoot compact
camera and even larger than a Micro 4/3rds digital sensor. For someone coming
from a P&S compact and starting to use the Sony SLT A57 camera and Sony 18-55mm
zoom lens, the shallower depth of field even at aperture f8 can prove a little
daunting.
The Sony zoom lens does not have a 'depth
of field' scale so for scenes similar to landscapes, I tend to
use the centre/spot autofocus point to focus on a part of my chosen depth of
field from a particular aperture setting. I could use the 'wide' 15 point
autofocus but I find the centre/spot more accurate for my
type
of photography. Based on the
hyperfocal principle the optimum point of
focus is 1/3rd into the scene from the bottom to deliver a good depth of field
(area in focus) from the front to infinity. With the Sony APS-C digital
sensor and the Sony 18-55mm lens even at 18mm (27mm field of view) the
chosen aperture setting has to be stopped down quite a bit, at least f5.6,
better f8 and if pushed, aperture f11.
Overall 'optimum' focus is sometimes never actually achieved in real terms
because although a small size digital image or print is seen to be in overall
excellent focus with good resolution, a larger version may start to display
weaker focus/resolution at the front and/or back edges of the depth of field.
The human eye has great difficulty in detecting those focus/resolution
weaknesses in a normal size print or even in the viewfinder/LCD when taking the
shot.
The above camera jpeg was re-sized and sharpened in Adobe Lightroom 4 software.
The centre spot autofocus point was on the far end of the pond (centre of
image not 1/3rd up where it should have been)
and the area in focus on the 'full size' image, leans more towards the back of
the image where the wall is in excellent resolution, whilst the grass section at
the front is much weaker. This is a ISO:400 shot taken on a dull day at aperture
setting f8, the shutter at 1/125sec and the weaker focus on the foreground
grass, is not so apparent on the 1,200 pixels size.
The camera was set to AWB - Auto White Balance.
Close Shots - Camera Jpegs
With the camera using my aperture priority control settings (not a Scene
macro setting) the following images were captured. They were all taken at
aperture f8 and the full settings are on each image plate when opened up by
clicking on the smaller image. The first image is 18mm (27mm field of view), the
second at 35mm (52.5mm field of view) and the last at 55mm (82.5mm field of
view).
The depth of field at f8 (area in focus) is a bit of a conundrum because
in all the images, even the one at 18mm it is hair thick. The 2 pence coin
was not flat, it was slightly sloped, with the top to the back, the bottom
further to the front and the left side was slightly tilted outwards, even more
than the bottom. It was not intentional, but the way it was lying revealed a
great deal about the lens. If you check out the last image at 55mm, you will see
the line of focus on the coin and also on the same plane on the figures. Take
the top of the coin (the spot autofocus was dead centre on the coin) and
it is in focus as is every part of the same plane on the figures which also
happens to be in line with the area immediately behind the left/bottom of the
coin but the coin itself on the left/bottom, which is tilted slightly forward is
moving out of focus - that is seriously a narrow band of focus at f8, even at
55mm - the other 2 images display the same narrow focus area, although not as
apparent.
I found the autofocus at this range to be
accurate but I learned not to attempt to get to close because when you push to
the limit you will get 50% blurred shots - better to get in close but just pull
back a little, stay off the limit of the autofocus confirmation green box/ping.
To my eye, there is
(slightly) more depth of field to the rear from the center of the coin
(spot focus point) than to the front and this I will take into account when
shooting close up images of flowers - I have included some flower shots below.
Some more close shot images - The
second image, the flower in front of the brick wall was shot at 18mm (27mm
field of view) aperture f8 and the depth of field (area in focus) is
narrow for 27mm.
Distance 'Hand Held' Shots - Camera Jpegs The Sony 18-55mm zoom lens is surprisingly
good for resolution, considering it is a kit lens and relatively inexpensive.
Here are some distance shots taken of the Forth Rail Bridge at Queensferry,
Scotland - 18mm, 35mm and 55mm (27mm, 52.5mm and 82.5mm fields of view).
These images are straight from the camera and resized/sharpened using Adobe
Lightroom 4 software. These images were captured with the camera 'hand held' and
the settings are on the larger 1,200 pixel versions -
Various 'Hand Held' Shots -
Camera Jpegs
These are various jpeg images straight from the Sony SLT
A57 camera and the Sony DT 18-55mm SAM zoom lens
(hand held/no flash)
and resized/sharpened using Adobe Lightroom 4
Software, some have been slightly cropped for effect. I have made no other
adjustments to the saturation, colours, brightness or anything else in Lightroom
and the
camera was set to AWB - Auto White Balance.
The Sony Image Date Suite
Software (bundled with camera purchase) does not appear to have a method of
re-sharpening the images after they have been resized.
Extreme Crop Example - Camera RAW
Image File Converted in Adobe Lightroom 4 Software
There is
no
doubt in my mind that the Sony SLR A57 camera digital sensor and the
Sony 18-55mm f3.5/f5.6 zoom lens are capable of delivering excellent
images. The following image is an extreme example of pushing the lens
and sensor to the maximum. It was taken through thick glass and the
camera/lens were 'hand held' about 12" from the inside of the glass as
any nearer and (from previous experience) the woodpecker would
have noticed me and immediately flown off.
The zoom lens focal range was set for 55mm (82.5mm field of view)
and the camera was set for ISO:3200 to get the shutter speed up to a
reasonably fast speed of 1/800sec at aperture f5.6 which is the widest
aperture that the combo will allow at 55mm. The red leaves on the left
and the green leaves on the right are approximately 4 feet in front of
the blue feeder. The stone wall is approximately 2 feet behind the
feeder and the tree.
This camera 'RAW' image was post processed and heavily cropped in Adobe
Lightroom 4 software. The small version is the original scene and the
larger version is the cropped example. I chose to post process in
Lightroom to obtain the maximum resolution that I could achieve but
wildlife photographers would normally use a 200mm or a 300mm telephoto
lens (as a minimum) to capture such an image. Based on this test,
I am considering purchasing a
Tamron 70-300mm f4/f5.6 SP Di USD Zoom Lens
to use with the Sony SLT A57 camera for wildlife shots. You can now see
(18th July) an ISO:1600 (similar image of a woodpecker)
shot with the Tamron 70-300mm lens on the Sony A57 camera further down
this page in the Tamron section.
This is a camera jpeg example
shot taken at ISO:100, aperture f8 and shutter 1/250sec.
The lens was set for 55mm (82.5mm
field of view)
and the combo was 'hand held'.
The jpeg was
heavily cropped, re-sized and sharpened
in Adobe Lightroom 4 software but I have left all the other settings,
including the auto white balance as it was shot. The small version is
the original scene and the larger version is the cropped example.
Considering this is a camera jpeg which has not been adjusted in any way
(other than cropping/re-sizing/sharpening) the image resolution
again holds up very well.
However, I was using the AWB - Auto White Balance setting and this
image has more of a pink look compared to my other images.
Originally I thought the colour anomaly was a firmware glitch and I
reset the defaults of the camera but it has never repeated itself and I
now know the cause was 'human error' on my part.
This image was captured with the Sony A57 camera and the
Sony DT 18-55mm f3.5 - f5.6 SAM zoom lens 'hand held' and the
shot settings are 55mm (82.5mm field of view) ISO:100, f5.6,
1/800sec. This camera produced jpeg image is 600 pixel, click to open to a larger 1200 pixels, click to
open a software cropped version at 1200 pixel and click again to return to here -
'RAW'
Image Shots
- Camera Jpeg + Sony Image Data Suite + Adobe Lightroom
4 Software The following camera
jpeg image
of Port Seton Harbour, East Lothian, Scotland, was captured (hand held/no flash)
with the Sony SLT A57 camera and Sony 18-55mm zoom
lens. The image settings are -
24mm (36mm field of view)
ISO:100, Aperture f5.6 and shutter 1/800sec and the shot was taken on a
very bright day with reasonable even light.
I could see very clearly, everything in the viewfinder, although it
would have been nicer with a little more resolution and magnification to
bring up more detail on the boats to my eye.
The small jpeg image here is produced by the camera and
resized for the web using Sony Image Data Suite software but not
sharpened,
click on it to open up the following sequence of larger images and then
click on each image -
Camera jpeg image which was re-sized to 1,200 pixel and slightly
sharpened using Adobe Lightoom 4 software (the bundled Sony
software cannot sharpen in re-sizing)
Camera RAW
to jpeg version converted using the Sony Image Raw converter
software
then re-sized to 1,200 pixel and slightly sharpened using the Sony
software
(you can sharpen in the Sony RAW to tiff/jpeg converter)
Camera RAW
to jpeg version converted using Adobe Lightroom 4 software
then re-sized to 1,200 pixel and slightly sharpened using the Adobe
software
In the harbour jpeg
image, the camera auto corrects the chromatic aberration which is present down
the lines of the two chimney stacks on the left of the image. This camera
correction is also picked up by the Sony Image Data Suite software in the camera
'RAW' file image version and maintained in the conversion to jpeg.
At this time, there are no tools in my Sony Image Data Suite software
(version is 4.0.01.09151)
to correct chromatic aberrations in camera produced jpegs but in the case of
post processing 'RAW' image files, there is a limited function (recent
download upgrade) in the 'Highlight Color Distortion Reduction Section' but
it could not remove the purple fringing in some of my images. In Adobe Lightroom 4 software, the chromatic aberrations are not
auto corrected in the 'RAW' camera image file and have to be manually corrected as Lightroom does not have any Sony SLT A57 camera calibration or Sony 18-55mm zoom
lens profiles, however Lightroom is very effective for 'manually' correcting
chromatic aberrations (and lens distortions) in camera jpegs and 'RAW'
image files - easily adjusting faults that the Sony software could not fix.
As regards the 'harbour' image, I like the Lightroom 'RAW' conversion to Jpeg
1,200 pixel version the best and it develops the colours very well considering
the software does not have a camera calibration profile for the Sony SLT A57
camera. The post processing experience with Lightroom is superb but the Sony
Image Data Suite RAW conversion software has it's limitations for any RAW work
that goes beyond normal tweaking. I was disappointed that I could not get more
sharpness out of the 'RAW' to Jpeg 1,200 pixel version but then I am a sharpness
freak and not everyone has the same tastes as me. However for a person starting
out who wants to try out 'RAW' to jpeg or tiff file conversions, the Sony
(bundled) software is more than sufficient.
The following image
of the sun coming up over my home at Hermiston, Edinburgh, Scotland was captured (hand held/no flash)
with the
Sony SLT A57 camera and Sony 18-55mm zoom
lens. The image settings are - 55mm (82.5mm field of view)
ISO:100, Aperture f8 and shutter 1/250sec and the shot was taken on a very
bright morning.
I wanted to get the round shape and the colour of the sun which through the
electronic viewfinder had disappeared into the glare of the sky and the
foreground was also bright overall. To get the shot, I desired, I would have to
increase the shutter speed against the f8 aperture and risk losing the clarity
of the foreground - it was a fine balance of exposure and again I have not
purchased a
graduated filter that would have helped. I
lifted up the camera to the sun, grabbed the exposure (remember I am on
aperture priority mode at f8)
and I locked it in using the AEL exposure lock button which would stay locked
until I either pressed it again to toggle it off or switched the camera off.
Looking through the electronic viewfinder at the overall scene, all I could see
was the bright round sun - well exactly the same as in this small image above.
The foreground outline had gone and I had great difficulty focusing on the sun,
so I eventually used the tree outline below the sun with the camera centre spot
focus and locked it by holding the shutter button (half pressed), then
re-aligning the shot, I pressed the shutter fully home.
The small jpeg image here is produced by the camera and
resized for the web using Sony Image Data Suite software but not
sharpened,
click on it to open up the following sequence of larger images and then click on
each image -
Camera jpeg image which was re-sized to 1,200 pixel and slightly
sharpened using Adobe Lightoom 4 software (the bundled Sony
software cannot sharpen in re-sizing)
Camera RAW
to jpeg version converted using the Sony Image Raw converter
software
then re-sized to 1,200 pixel and slightly sharpened using the Sony
software
(you can sharpen in the Sony RAW to tiff/jpeg converter)
Camera RAW
to jpeg version converted using Adobe Lightroom 4 software
then re-sized to 1,200 pixel and slightly sharpened using the Adobe
software
As regards the sun
image, I like the Lightroom 1,200 pixel version the best as using the LR
graduation tool, I was able to lift the foreground brightness and contrast. I
have probably sharpened it too much but at least you can see how far the 'RAW'
can be pushed and it can always be softened back to suit the tastes of others.
This is what I love about Lightroom, you can re-visit the RAW file in the
catalogue, edit it without altering the original (camera) file and
convert another jpeg in seconds, with minimum effort.
The Sony Image Data Suite software does provide a very nice (camera bundled)
solution for anyway who wants to improve the family snaps and/or experiment with
'RAW' to jpeg and tiff file conversions but to get the maximum flexibility out
of the Sony SLT A57 camera image files you would have to consider an investment
in Adobe Lightroom 4 software or a similar package and work with the Sony 'RAW'
image files.
Examples of 'RAW' to Jpeg Conversions - Adobe Lightroom 5.2 Software
I
have post processed some
'RAW' image files using the latest (11th October 2013)
Adobe Lightroom 5.2
Software. This image has had the
saturation and contrast
slightly lifted in Lightroom
and the converted jpegs
re-sharpened
(no
re-sharpening for the full
size jpeg) using Canon's
DPP software.
The image is of the
Forth
Rail Bridge
which was built in 1890
spanning the Firth of Forth
between North and
South
Queensferry
in Scotland. The Hawes Inn
is based in South
Queensferry and overlooks
the estuary. Great place to
visit and I stayed there
overnight in
Robert
Louis Stevenson's
old room but he never
appeared - I was hoping he
could give me some tips on
story writing.
1400 Pixel Size
2000 Pixel Size
Full Size
Old World Antique Gold Style
1400 Pixel Size
___________________________________________________ Night Photography Sony DT 18-55mm f3.5/f5.6 SAM Zoom Lens
I am using my Sony SLT
A57 camera for casual photography so it was worth checking out it's capabilities
with regards to capturing images at night as well as through the day. Before I
go on, these 'night photography' tests are pushing the
camera and the Sony DT
18-55mm f3.5/f5.6 SAM zoom lens to the ultimate limit, probably way beyond what
you would normally attempt with this lens without using a tripod.
The camera with the Sony DT 18-55mm f3.5/f5.6 SAM zoom lens is capable of
delivering images captured 'hand held' in low light but because (for casual
use) I am not using a tripod, there are obvious 'image quality' limitations,
especially if you want to enlarge them for prints. The lens maximum aperture
wide open is f3.5 but this limits the lens zoom to around 18mm (27mm field of
view), which is also a good focal range for 'hand holding' the combo at
lower shutter speeds. I have tried out the camera for 'hand held' night shots
with mixed success and you can see some examples of extreme low shutter speeds
with apertures from f3.5 to f5.6.
The LCD screen makes an great job of setting up the exposure and 'what you see
is what you get'. I was shooting in 'RAW' plus Jpeg mode, aperture priority and
using the exposure compensation button/menu to set-up my exposure and leaving
the camera in AWB (auto white balance). There is no doubt that post
processing the 'RAW' file variant in Adobe Lightroom 4.1 software provides an
converted jpeg image that the camera jpeg version is unlikely to equal. The
dynamic range can be opened up in post processing, although I have to admit the
camera jpeg variants are very good.
Auto White Balance
Although I normally use the AWB
(auto white balance setting) the Sony A57 camera offers 'probably' the most
extensive pre-sets and manual adjustments of white balance that I have
experienced in a camera. Each pre-set below, (except Custom Set) includes
a 'pop up' color filter grid by highlighting the pre-set in the menu,
press the WB button again to bring up color temp/color filter grid and then
up/down/left/right to change color temp/color filter - finally
press AF button to set.
Warning AWB - If you are
shooting only camera jpeg images and rely on the AWB (auto white balance)
setting to make colour decisions for you, be careful that you do not change the
AWB colour grid 'defaults' whilst shooting. If your camera menu is setup to
return to the last place you selected it is possible to accidentally call that
up again and change it without realising. For instance, if
the WB button/menu is left 'highlighting AWB' and later (whilst using the
viewfinder) your right thumb wanders on the back of the camera whilst
searching for a button or strays from the finger rest pad and puts pressure on
the right tilt WB button a couple of times, you will bring up the AWB color
filter grid, effectively changing the AWB 'default' colour setting on the grid
to the right, towards red. This is possible whilst taking a picture and as
the eye detects the change away from the scene in the viewfinder to the menu,
the reaction is often (without thinking)
to half press the shutter button to return the viewfinder to viewing the scene
to be shot. However by half pressing the shutter button the camera has now
accepted the new AWB colour grid setting and (in aperture priority mode)
it will remain changed until you reset it. This is an area that I will now check
from time to time to ensure that the AWB colour grid co-ordinates are set to
zero and the spot is in the centre of the colour grid crosshairs.
The ability to change the AWB setting from default (especially accidentally)
is unfortunate, after all if you want to manually change the white balance -
Sony offer so many other options in that WB menu area.
It pays to read the manual carefully, it was only when I decided to
explore the auto white balance menu settings further that I discovered the sub
menu (colour grid) within the AWB (highlight) setting. In the past
(because I normally shoot RAW file images) I have never paid much
attention to the AWB which is very important for those photographers who only
shoot jpeg images.
The white balance pre-sets include -
AWB
Daylight
Shade
Cloudy
Incandescent
Fluor
Warm White
Fluor
Cool White
Fluor
Day White
Fluor
Daylight
Flash
Color
Temp/Filter - Highlight in menu and press WB again and then up/down
to change color white balance temperature -
press WB again to bring up color filter grid
and then up/down/left/right to change color filter
- finally press AF button to set
Custom
- Use the Custom Set (below) in the menu to select the color
temp of a scene then
highlight Custom in menu and press WB again to bring up color
temp/color filter grid and then up/down/left/right to change color
temp/color filter
- finally press AF button to set
Custom
Set - uses
the camera AF spot focus to calibrate a white setting by aiming at a
subject and pressing the shutter button - this automatically changes
the color temp in the Custom pre-set above
The Sony DT 18-55mm
f3.5/f5.6 SAM zoom lens does experience flare in extreme lighting
conditions
where a very bright point of light is in directly in front of the lens
(dependent on the angle) and unfortunately bright lights like street lamps
(at certain angles) display light flare or coma. Normally this is more
predominant in 'fast' lenses at f1.4 wide open but I have seen it in images
captured with the Sony DT 18-55mm
f3.5/f5.6 SAM zoom
at a stopped down
aperture of f5.6 - the image below of the boats in the harbour is an example. To
be absolutely fair to the Sony 18-55mm lens, I have seen the very same thing in
expensive professional lenses, even my Canon L zoom lenses (on occasion)
have suffered from this when shooting street lighting.
Set
the lens to 18mm (27mm field of view) giving me the entire
bridge in the scene
Set
the aperture for f3.5 wide open (helps to keep up the shutter
speed on a lower ISO rating for better image quality)
Set
the ISO rating to as low as I can get and yet have a reasonable
shutter speed of around 1/30secs to match the f3.5 widest aperture
Set
the white balance to suit, either through using the camera AWB
(auto white balance) or selecting an option from the above menu
pre-sets - the LCD screen/viewfinder are excellent in this
respect as both display the colour adjustments. I usually just shoot
RAW images, so I tend to leave the camera set to AWB and process any
changes using Adobe Lightroom 4.1 software
I just
lower/raise the camera on the scene until I obtain an exposure that
I like and press the AEL (exposure lock toggle)
button to lock the exposure - checking that the shutter speed is at
least 1/30sec
I press the shutter button halfway down to focus the AF centre spot
point on the bridge - check for the sound of the beep (the focus
indicator turns a steady green for go) then press the shutter
button fully down.
NOTE: There are occasions where it can prove difficult to
autofocus on a subject - I just switch the lens to MF on the barrel
switch and manually use the lens focus ring and FOCUS PEAKING to
outline in white the areas in focus and then press the shutter
button (with MF there is no need for the shutter half press/hold)
This 'Forth Road Bridge' image is a 'RAW' file post processed in Adobe
Lightroom 5.2 software and converted to a jpeg (click the image to open up to 1200 pixel size).
To compare the camera jpeg version click
camera jpeg version.
Some of the other night images in my 'RAW' and Jpeg sample
galleries on this page (ranging
from ISO:400/800/1600 and 3200)were taken with
shutter speeds as slow as 1/4sec and are fairly reasonable.
The following images were converted
from 'RAW' files post processed in Adobe Lightroom 4.1 software and they
share a common ISO rating of ISO:3200. When using the Sony SLT A57 and
the
Sony DT 18-55mm f3.5/f5.6 SAM zoom lens 'hand held' for night
photography (due to very dark light conditions) I am invariably
driven to using ISO:3200 to raise the shutter speed to as high as I can
get it to avoid camera shake (even with the camera body built in
image stabilisation). The best images are achieved when the light is
reasonably well spread and the 'primary' subject matter is not to
distant from the lens. NOTE: When the scene is relatively
well lit, and you
can use a lower ISO rating, remember a
higher ISO rating may still be desirable to increase the shutter speed
to reduce the chance of people/cars/animal movement in the scene.
There are
factors to consider when shooting 'night photography' with the combo
'hand held' at ISO:3200, especially if the image will be printed at
around A3 for hanging on the wall or around A3 for digital display. For
normal pocket/wallet sized prints/digital displays, noise vs image
quality at ISO:3200 does not appear to be an issue. When the image is
printed larger or digitally displayed at A3 size, it is normal to stand
back to view it and naturally any noise in the image at that size and
distance is less noticeable. The camera jpegs are very reasonable in
controlling noise vs image quality, bearing in mind that I have the
noise reduction set for normal. There is no doubt that when post
processing a 'RAW' image file variant you can 'fine tweak' the noise
reduction (even in selected areas of the image) to deliver the
'optimum' image quality possible for the final print/digital display
size. In this respect, Adobe Lightroom 4.1 is my software of choice
because it opens up the dynamic range and provides a smoother noise
reduction whilst retaining very good resolution. The camera digital
sensor has a lot to do with just how much you detail you can retain
during noise reduction, either in camera or in software post processing
- the Sony SLT A57 with it's 16MP sensor (even with the 18-55mm kit lens) delivers a good level of
detail.
The
Sony DT 18-55mm
f3.5/f5.6 SAM zoom is a very nice lens and good value for the money
considering it costs around £70.00 vat inclusive in the UK (July
2012). I am sure the Sony SLT A57 camera is capable of delivering
'optimum' night (land/seascape) images when fitted
on a tripod with
remote and/or timer facility with
the camera set
at ISO:100 and the aperture stopped further down to f8 or even f11.
For 'hand held' night street photography - I would prefer a fast
f1.4 or even f2 aperture 'prime' lens so that I could achieve a
reasonably low ISO rating with a higher shutter speed to capture
people/cars/animals moving in the night scene.
For more Night Photography - please check out my Sony Alpha A57
SLT camera and Sony 35mm f1.8 SAM prime lens section on
Night Street Photography - 'RAW' to Jpeg
Conversions
and there is also a 116 night images (58 monochrome + 58 colour)
web link.
___________________________________________________ Black & White
Photography
Sony DT 18-55mm f3.5/f5.6 SAM Zoom Lens
Switching the camera using the
Fn button/CREATIVE MODE from VIVID colour to shoot BW
black and white camera jpeg images is relatively simple.
I am shooting 'RAW' plus
Jpeg images in APERTURE PRIORITY MODE and all I have to do is press the
Fn button to bring up the Fn Menu - scroll left/right/up/down
using the tilt button pad on the back of the camera to highlight CREATIVE
MODE, press the AF button to enter sub menu,
scroll up/down using the
tilt button pad on the back of the camera to highlight BW then press the
right tilt WB button on the tilt button pad to enter the
Contrast/Saturation/Sharpness sub menu and after using the tilt button pad to
change my settings to Contrast +2, Saturation 0, and Sharpness +2, I reverse out of this menu using the left
button on the tilt button pad and finally with the BW highlighted - press
the AF button to set and return the camera to shooting mode. Now that my
contrast/saturation/sharpness have been set-up in BW, all I have to do is
use the Fn button and CREATIVE MODE to switch between BW
and VIVID when I like.
The camera will now shoot black and white 'RAW's and
black and white camera
Jpegs. Even better, in the viewfinder or the LCD screen it will also display in
black and white and 'what you see is what you get' in the final image.
The 'RAW' file images will remain as black and white when imported into the Sony
Image Data Suite Software where they can be post processed and if required they
can be changed to colour by changing the CREATIVE MODE in the software.
Unfortunately because Adobe Lightroom 4.1 software (as yet) does not
include a Sony SLT A57 camera calibration profile the 'RAW' image file when
imported, immediately changes to a colour version and you then have to use
Lightroom to convert it to black and white.
This is a 'RAW' color image
converted to a black and white jpeg - it was shot 'hand held' without
flash, using the electronic viewfinder. I used Adobe Lightroom 4.4
software to post process it - please
click on the
600Pixel image to open up a 1200Pixel then a 2000Pixel variant -
This
is a camera produced black and white jpeg image of Brad (my dog). The camera was set to AWB(auto
white balance)the camera was
'hand held and the flash was not used - please click
on it to open up -
The above camera jpeg image was taken with the Sony SLT A57 camera and 18-55mm
zoom with the lens set at 28mm (42mm field of view).
I love the accuracy of the 'what you see is what you get' in the viewfinder
(or the LCD screen). The centre spot AF was aimed at the forehead of Brad
and because it was a windy day and the long grass was blowing slightly, I used
ISO:400 to raise the shutter speed to 1/250sec to match the aperture which was
f11 as I wanted to increase the depth of field to get everything in focus. A
black and white dog is extremely difficult to photograph - the really black
parts (like the head)
tend to blend and lose the 'optimum' resolution in the hairlines and the very
bright white parts (like the chest) also tend to lose the hair outlines.
These problematic areas are not so obvious in a colour version.
The camera black and white jpegs are very good but to obtain the 'optimum'
performance, especially for 'Fine Art' work, you really do require to shoot
'RAW' image files and post process them using a software package such as
NIK Silver Efex Pro
or
Adobe Creative Suite 6
with it's ability to mask and layer sections of the image and facilitate
dodging and burning.
With camera jpeg images there is very little room for error but the Sony SLT A57
camera handles the exposure metering very well and as long as you have enough
time you can use the viewfinder or the LCD screen to carefully check the scene
and make your adjustments before taking the shot. I still prefer to adjust my
exposure, lock it using the AEL
(toggle on/off) button and I find that my 'keeper rate' rises using this
method. I think the camera and the Sony DT 18-55mm SAM zoom lens slightly
underexposes and although this seems to work well for bright skylines (within
limits)
by offering a more balanced skyline to foreground exposure it tends to reduce
the exposure (slightly) in a scene where there are no bright areas - this
is when the necessity for exposure adjustment/locking comes into it's own.
This is the same image but the camera 'RAW'
version, post processed in Adobe Lightroom 4.1 software and converted to a jpeg.
Remember in Lightroom a black and white camera 'RAW' is imported in and
automatically reverts to a 'Adobe' colour variant as there is no Sony camera
calibration file to match the profile to. I have tweaked the saturation,
contrast and sharpness a little. Please note that the very centre of Brad's
chest does have hair outlines in the 'RAW' variant but to display them would
mean that the remainder of the image, including Brad would be much darker and
the whiteness of his coat would become quite dull. Even if I left the image
exposure as shown and used the Lightroom adjustment brush on the white chest to
reduce the exposure to bring up the resolution in the hair outlines the white
would become light grey.
Various 'Hand Held' Shots -
Camera Black & White Jpegs
These are various black and white jpeg images straight
from the
(hand held/no flash) camera, shot in Fn button/menu -
CREATIVE MODE=BW,
Contrast
+2, Saturation 0, and Sharpness +2.
The camera electronic viewfinder and/or the LCD screen displays the
scene as black and white and produces a black and white camera jpeg.
They have been resized/sharpened using Adobe Lightroom 4 Software, some
have been slightly cropped for effect. I have made no other adjustments
in Lightroom and the
camera was set to AWB - Auto White Balance.
The Sony Image Date Suite
Software (bundled with camera purchase) does not appear to have a
method of re-sharpening the images after they have been resized.
The Sony A57 camera's tilt LCD screen is great for those shots where you
have to lift the camera up to avoid heads, fencing and other obstructions
that would impact on the scene. These images were captured at the
Preston Grange Industrial Heritage Museum
at Prestonpans, East Lothian, Scotland. The shot of a loading port
(part of the brick kiln) was taken by holding the camera over the
high metal (safety) fence and likewise the shot of the
beam engine house.
Way back in the early 1950s, my dad (who worked as a lorry driver)
would park his lorry outside one of the ports of the
brick kiln
which had a conveyor belt coming out of the front.
We always arrived in the early morning to get in front of all the
lorries queuing up nose to tail on the ramp and the drivers waiting
their turn to
load the bricks for the building sites.
I would put a piece of rubber across the palm of each hand held on by
string and go inside the kiln port and help my dad load the hot bricks
onto the conveyor. I was stripped to the waist, sweat pouring and the
heat was like being inside a sauna.
I would keep chucking the bricks on the conveyor and watch as they were
carried upwards out of the kiln and dropped into the lorry tipper.
Afterwards, I always had
a mug of hot tea and a buttered roll
at the brickwork canteen, just over the (old main) road which is
now the heritage site parking area. My primary school holidays in those
days were out and about with my dad in the
Bedford S and
often I would get to drive (sitting between his legs) using
the steering wheel. The winter time was the best - lying flat out on a
sledge, steering it with my feet in the snow, whilst being pulled along
behind the lorry on the back roads in the country.
Because I am shooting camera jpegs and 'RAW' file
images, there are 'RAW' to Adobe Lightroom 4.1 software converted jpeg
variants of these 'Preston Grange' images in the
Adobe Lightroom 4.1 Software 'RAW' Conversion to
Jpeg Section. When imported into Lightroom the 'RAW'
variants have no Lightroom camera calibration profile, so the software
displays them as Adobe colour versions ready for post processing. Any
distortions, and lens weaknesses have to be manually corrected in post
processing.
Using the Sony A57
camera and the Sony DT 18-55mm SAM zoom lens for street photography is most
enjoyable. The combo is relatively lightweight and very easy to
manually control and the grip is great for holding the combo down by your side
until required. I was using the shoulder strap wrapped around my wrist, lest I
dropped the camera but a wrist strap would be an excellent alternative.
For an in-expensive lens the Sony DT
18-55mm is outstanding and sharp enough throughout the zoom range for the camera
to deliver excellent colour or black and white jpegs. Recently I visited the
Edinburgh Jazz and Blues Festival (Mardi Gras) which was held in
the
Grassmarket,
in Edinburgh, Scotland and
I used the combo (hand held/no flash) in APERTURE PRIORITY mode to
shoot 'RAW' and Jpeg file colour images. The Fn button/menu - CREATIVE
MODE was set to
VIVID contrast +1, saturation +1 and sharpness +2. The exposure metering
was set as multi-segment and I used centre (spot) point autofocus.
Camera Jpegs - Image Quality
This 'hand held' camera produced jpeg (no flash) is very good and ready
to print from the memory card at up to around 36" in size. It could be printed
larger at full size but 36" (for me) produces the optimum image quality
and bearing in mind that the camera jpeg engine is set for normal noise
reduction.
Considering that the Sony Alpha A57 SLT camera is an entry level 'consumer'
model that uses relatively in-expensive zoom and prime lenses it manages to
produce very good camera jpegs, in colour or black and white and the optimum apertures for excellent image quality with all three lenses are f5.6
- f8.
In the real world,
the final quality of an image file is
determined by a number of factors which control it's production. There are limits as to the
amount of editing control that the camera can apply to the final camera jpegs
bearing in mind that some users will edit their own settings in the camera menu
(saturation/contrast/noise reduction/sharpness)which may increase
the final camera jpeg image quality but also may decrease it. There is no doubt that post processing 'RAW' image files and 'tweaking' to
suit (resolution/noise/print size/viewing
distance) will deliver greater control and often
produce a more desirable result. Very often camera jpeg images are judged by
their appearance on a digital display (at various sizes) but in reality
they should be judged on their final print on the wall.............read
more on
Optimum Image Quality
Please click on the 500 pixel version below to open up the 1200 pixel
size and again to open up the full size version and again to return to here. You
can save the full size version (I renamed it in Microsoft Windows 7 - no
editing) down to your computer for further examination -
There is no doubt that 'tweaking' the RAW file variant of the above image in
Adobe Lightroom 4.1 software and converting it to a full size tiff format would
produce the 'optimum' image quality for a very large print but I think the
camera produced jpeg is very reasonable. There is now a 'RAW' conversion to jpeg
variant of this image in the Adobe Lightroom 4.1 Software 'RAW' Conversion to Jpeg Section.
I prefer to use the electronic viewfinder but the LCD screen swivel/tilt is
great for shooting over the crowd and also for using the camera at waist height
for those wider shots of people sitting around. I am not into pavement
(sidewalk) photography, I find the entire interaction with the public
difficult, I think you require good social skills to mingle at the 35mm - 50mm
focal range. However an event such as the
Mardi Gras does make the experience easier, people are more relaxed and you are
just one
of
many photographers, some with
even larger cameras, poking their lenses amongst the crowd and
at the artists who are entertaining everyone.
The event began at 1pm and the afternoon
started out very sunny and bright but the sun disappeared and re-appeared very
infrequently. Some of my first shots were taken at ISO:100 but as the sun kept
disappearing, I decided on ISO:200 for reasonable shutter speeds, aperture f5.6
for a reasonable depth of field around any primary subject and yet at 55mm
(82.5mm field of view)
on the zoom, I could achieve some nice bokeh effect as you can see in the image
above. The Sony A57 does behave very much like a film camera and there is a
certain degree of flexibility of exposure in the digital images, even to within
1/2 of a stop in error. Street photography is relatively fast and very often you
do not have the time to set-up the exposure at the time of the shot. However,
after setting the camera up in this way, it is really just about working the
zoom in the knowledge that the camera shutter speed will handle most subject
situations, especially as the crowd is tightly packed and in constant movement,
which makes some wider shots difficult as people keep crossing the lens.
I think the electronic viewfinder is great, and I can keep it at my eye
all the time, preset and AEL(toggle) lock my exposure, focus the
centre spot point on the subject, half press/hold the shutter button to lock the
focus, re-align the scene and press the shutter button fully home to take the
shot. Up pops the auto review of the shot for 5 seconds in the viewfinder,
override the 5 seconds by pressing the ZOOM button to zoom in and the
AEL to zoom out and when ready for the next shot, just tap the shutter
button to clear the auto review.
Of course, if I want to simulate OPTICAL like a normal DSLR
optical viewfinder, I can switch off the auto review of a
captured image (main menu setting) and then my view of the scene
in the viewfinder becomes uninterrupted except for the flash of the shutter when the shot
is taken - great for street photography.
I have not switched on the electronic viewfinder EYE-START AUTOFOCUS
(in the main menu) for although it is great for instantly focusing when you
put your eye up to the viewfinder what is really happening is that the
viewfinder detects an object appearing at the back and will instantly autofocus
- this means that when the camera is being carried in front of you on a shoulder
strap or down at your side, the viewfinder detects your body movement and starts
to 'chimp'
and autofocus on different subjects as their distances change. This can only
wear down the battery power although I admit if you are shooting all the time
with the camera up at your eye, I can see where it would be a benefit.
In lesser crowded environments with a slower pace of subject or where the light
conditions are very uneven in the scene, I can be more selective with my ISO and
aperture settings and I can adjust the final exposure by
using the exposure compensation +/- button and menu - although I prefer
lowering the camera (to brighten) or raising (to darken)
and lock the exposure using the AEL (toggle on/off) button.
There is some distortion in some of the wider images, even up to 30mm
but the camera lens auto correction does a fair job in correcting it,
although it cannot correct the impossible, especially the 18mm shots
which have high buildings at either side of the frame. The image above
(bottom left)
requires very close examination as the buildings on the right of the
frame (in reality) actually fold in against each other and that
curve on the left of the frame is the way the terrace runs. The
buildings in the background actually suffer from either subsidence or
poor building controls (at the time of the build) but add to the
ambience of the
Grassmarket,
one of the oldest parts of Edinburgh.
The Sony SLT A57 camera system using the (AWB) auto white balance
mode with the (AWB sub menu) colour grid in the (zero)
neutral position delivers camera jpegs that display natural colours and
yet do not appear over saturated. Anyone in the images with tanned
colour skin is either tanned or wearing makeup for the show. Sharpness
is a personal taste and there is no doubt that a number of photographers
will use the camera with the sharpness stepped down from +2 in the
CREATIVE MODE=VIVID(sub menu) adjustment.
I could use the Sony A57
(even with the kit lens)
to just shoot camera produced jpegs as the rendering and the final
output for print is so good.
More Sony SLT A57 camera jpeg images in the
Mardi Gras Web
___________________________________________________
I have been quite taken with my Sony A57 camera with it's
'translucent mirror technology' so I invested further and
ordered up a Tamron 70-300mm SP Di USD zoom lens in the UK.
The Tamron (A - Mount Version) can be used with the Sony APS-C and also
the Sony 35mm 'Full Frame' digital sensor format.
I made a cracking deal on the lens so I also ordered up
(17th July 2012) a spare Sony battery for the camera -
* Tamron 70-300mm SP Di USD zoom lens - £303.00
*
Hoya 62mm Pro 1 Digital UV Filter - £37.95
*
Sony NP-FM500H Battery - £68.00
Total with delivery next day:
£413.94 vat inclusive.
The lens is excellent value for money and it delivers good image quality across
the zoom. It is a
relatively in-expensive route to get into wildlife photography,
especially if you mount it on a APS-C crop digital sensor camera with a good
autofocus system.
The Tamron is manufactured for Canon, Nikon and Sony A-mount
SLT cameras, the version for the Sony A-mount does not have the VC (image
stabilisation) as the Sony camera body has 'SteadyShot'
(image stabilisation)
built in.
Canon, Nikon and Sony all have their own variants of a 70-300mm
zoom lens, especially Canon with it's 70-300L lens which delivers phenomenal
image quality but the Tamron, although virtually a 1/4 of the price of the Canon
comes fairly close...............please read reviews for the
Canon 70-300L Lens and the
Tamron 70-300mm SP VC USD
Lens
at photozone.
The Tamron lens has arrived and I removed the pinch
(inside/outside finger pinch) lens cap and fitted the Hoya 62mm Pro1 Digital
UV filter by gently dropping it into the front metal screw of the lens (lens
standing upright) and slowly (without any downward pressure) turned
the filter anti-clockwise until it clicked/dropped into the groove and then
turned it slowly clockwise until it tightened and no more. It is easy to
re-tighten a filter rather than damaging the lens thread by over tightening or
finding the filter difficult to remove. I fitted the lens via it's metal mount
onto the Sony camera and the filter does not turn when the lens is being
focused. The lens hood fits on very easily but requires a little clockwise
(extra) turning pressure to fit it home with a reassuring click.
The Sony A57 and Tamron 70-300mm lens combo with the hood (reversed fitted)
on the lens and the lens cap fitted to the filter on the front, in the compacted
70mm zoom position - measures 232mm (9.13") from the rear of the
viewfinder to the tip of the lens cap. In the 300mm zoom 'fully' extended
position it measures 282mm (11.1"). The lens hood adds an extra
90mm (3.54") when fitted.
The Tamron 70-300mm SP Di USD zoom lens is extremely well made, the zoom ring is
smooth although slightly heavy (at this new stage) to turn and move the
lens barrel out and in but the extended barrel at 300mm has no wobbleand
altogether it is a very impressive and substantial 'chunky' lens. I like the
position of the zoom ring and it seems to be in a natural position for using the
lens in autofocus mode. The lens is great for using with the Sony FOCUS
PEAKING - just flick the switch on the barrel to MF and the lens is ready to
manually focus. I did find it slightly awkward to move the left hand back from
the zoom to the manual focus ring or even from the front of the camera onto it -
there is no doubt that I will get used to it but I have to remember that my
other lens, the Sony DT 18-55mm SAM zoom has the manual focus ring, right on the
front near the filter.
The Sony/Tamron combo is beautiful to behold, quite a change from a Canon white
L lens and very pleasing to use. Sure it is relatively heavy but a lot lighter
than my Canon 70-200mm f2.8 IS L zoom lens which (on it's own) weighs in
at 1570g and bearing in mind that the Canon 70-300mm IS L zoom lens (on it's
own) weighs in at 1050g. I can live with the extra weight of the lens which
at 756g is not bad considering the fantastic view you get when you look through
the viewfinder and down through the optics in the lens barrel. The colours are
so rich, full of contrast and the detail of the subject (bird/animal) is
excellent.
For a
Shoulder Bag,
I use my Kata 14PLfor the Sony Alpha A57
System and the following is from the
Kata Website - "The Pro-Light Access-14
PL is a
multi-featured
professional holster designed to provide the best carrying, storage and working
solutions. Lightweight and Protective it will cater to the smallest detail of a
professionals working needs. In true holster fashion the Access provides rapid
''pull to shoot'' opening to a main compartment that holds a small to medium
DSLR with a 16-35 lens attached.
Large and small side pockets enjoy a low profile/high capacity design and will
hold additional lenses, flash or other accessories by simply utilizing the
internal space left on both sides of the main camera and lens set-up. Access
your camera quick and clean by using the quick access flap. Carry across your
shoulder using the provided shoulder strap or comfortably on your belt with the
rear belt loops.
When needed the bag can be elongated by unzipping a bottom extension for
carrying your lens with sun hood attached when shooting. (Please note that the
extension is not padded and extra caution is advised when this is in use). The
bag comes with a double-sided Elements Cover for protection in all weather and
environment conditions - use the back side for rain and dust protection, the
silver side to deflect heat in sunny situations"
The Kata 14PL can accommodate the following gear -
Sony A57 SLT and a Tamron 70-300mm SP Di USD Zoom Lens with hood reversed fitted in main central holster section on top of a piece of bubble wrap.
Sony DT 18-55mm f3.5/f5.6 SAM Zoom Lens with no lens hood
(or
similar diameter size lens - 35mm prime)
stored in large side pouch
with the rain cover, room for spare battery. If there is no 3rd lens then the lens hood can be stored in the smaller pouch.
Sony DT 35mm f1.8 SAM Prime Lens
with no lens hood
stored in smaller side pouch with cleaning kit.
The Sony 18-55mm and 35mm lens hoods are relatively large in diameter and therefore (ideally) if you want to use a Sony hood, the bag can take one of those lenses in the large side pouch with it's hood in the smaller side pouch. Alternatively, you could purchase rubber collapsible hoods to use with both lenses in the bag
The Tamron 70-300mm SP Di USD Zoom Lens
cannot be stored separately in the large side pouch - it must be
kept in the main central holster section whilst another lens is
being used on the camera
For a
Back Pack
I
use
my
Lowepro Flipside 300 for carrying my Sony Alpha A57 camera with my three lenses -
Sony DT 35mm f1.8 SAM Prime Lens
Sony DT 18-55mm f3.5/f5.6 SAM Zoom Lens
Tamron SP 70-300mm f4/f5.6 Di USD Zoom
Lens
The 'Flipside 300' is a great backpack and ideal for my hill walking trips.
There is enough room inside for all my Sony camera gear and some sandwiches. The
outer storage 'net' pocket is large enough for carrying a bottle of coke or
water. I like the fact that I can store the camera with any lens fitted
(especially the Tamron) inside the bag, ready to use.
From the Internet - "The Lowepro
Flipside 300 is a compact and lightweight backpack which safely carries your pro
digital SLR and accessories. The Lowepro Flipside 300 features back compartment
entry for easy access when setting up and also providing extra security for your
gear whilst you are wearing the backpack. A tripod holder folds away at the
front of the bag and when in use, distributes the weight evenly to aid carrying
comfort. The Lowepro Flipside 300 also has a detachable waist belt and
adjustable sternum strap for extra support when travelling longer distances or
carrying heavier gear. The outer fabric is made from a water resistant material,
protecting your kit from moisture and abrasion, with no need for an all-weather
cover. An outer storage pocket is useful for digital accessories and personal
items, while a removable compartment inside the bag means leads and other small
items can be kept safe".
There are times when a new lens
and camera combo just feels right and this was my first impression when I picked
up the Sony A57 camera and the Tamron 70-300mm SP Di USD zoom lens. I could not
wait to get a few shots in but outside it was pouring with rain, the sky was
dark and the area with the wildlife was immediately between the high garden wall
and the house - the worse of conditions but ideal for some higher ISO tests.
These camera jpegs were shot 'hand held' with the zoom of the lens fully
extended at 300mm (450mm field of view) and taken through the thick glass
of the patio doors and out into the garden - they vary from ISO:3200 to ISO:800.
The jpeg images straight from the camera have excellent contrast
(even through glass) and the
centre/spot autofocus was spot on
(if you will excuse the pun) and very impressive. The rabbit was actually
repeatedly punching the air with his paws when I grabbed a single shot and froze
him in motion.
I have not post processed the camera jpegs in any way other than to resize and
sharpen them using Adobe Lightroom 4.1 software - the finch is the only cropped
image with about 1/3rd of the original image removed.
I have not applied any form of noise reduction in post processing and
the camera jpeg noise reduction was set to normal - the 'RAW' image files from
the Tamron should have more potential for 'tweaking' the image quality.
Tamron Lens - Limitations After using the Tamron a few times it performed in a similar fashion
to other 300mm lenses that I have used. I have some trouble holding the lens
steady at 300mm (zoom fully extended) and the green centre/spot autofocus
square in the viewfinder drifts (slightly) from side to side on the
primary subject. This is an age thing and I doubt very much that a younger
person will experience the same trouble.
To counter this 'hand held' combo movement at the 300mm focal length, I use the
following guide rules -
The primary
subject should be at least a 1/3rd of the size of the scene in the
viewfinder
There is enough
light on the subject to reveal it's main details in the viewfinder
(whiskers, feather, fur, eyes, nose, beak, etc) - this usually
means cross light or light from behind the camera
The aperture at
300mm (maximum possible widest setting) is f5.6 but it is
preferable to use f8 if possible
The camera
'SteadyShot' image stabilisation is great for assisting camera shake
but to capture the feather details of flighty birds like finches,
the shutter speed should be relatively high at around 1/1250sec.
Common sense dictates that I should be aiming for as low an ISO
rating as possible at f5.6 or f8 matching as high a shutter speed as
possible.
I use the AEL
exposure (toggle) lock button to pre-set the exposure leaving
all the concentration on the autofocus and the shutter button to
take the shot
Using the Tamron lens
(widest aperture f5.6 at 300mm) in Scotland with it's changing
weather patterns means that the ISO rating is very rarely below ISO:800
to achieve f5.6 at 1/1250sec and in most cases will be up around
ISO:1600/3200. This poor light in Scotland has been compounded over the
last few years due to heavy rain in the summer months. It means lower
shutter speeds to keep the ISO rating down and less keepers but the
Tamron costs a great deal less than a 300mm 'prime' lens with a faster
f2.8 aperture.
I have my viewfinder
set-up for the spirit level display and the rule of 3rds grid lines, so
it is relatively easy to make sure that my primary subject is the size
(at least) of the middle rectangle in the grid lines. Using the
above methods, I achieve a larger number of keepers.
The following camera jpeg image of a woodpecker is the 'full scene' 600 pixel sample and
if you click on it you will see the cropped version in the larger 1200
pixel sample. It has not been edited in any other way but it has been
re-sized and sharpened for the web using Adobe Lightroom 4.1 Software.
It was taken 'hand held' again
through thick glass (about 4 feet from the inside of the glass)
and the settings are ISO:400, aperture f5.6 and shutter 1/125sec. Under
normal conditions where the subject is less nervous, I would go up to
the glass and using the lens hood to press against it, try and avoid any
back/room reflections from the glass hitting the lens and spoiling the
shot.
This little guy is the proud father of a couple of babies who regularly
visit the feeder with their mother. He is a difficult shot as he darts
from the front to the back very quickly as he likes to hide behind the
feeder from the sparrow hawk who regularly dive bombs the patio.
However, I have planted a lot of bushes and trees on the banking near
the feeder so the hawk has a hard time catching anything. It is a reasonable 1/125sec shutter image with a fair deal of
detail (even when cropped) but the only reason it displays
excellent resolution on the feathers is that the bird was 'stock still'
at the moment of pressing the shutter button. I love the Sony A57
viewfinder as I have my 'after shot' preview set for 5 seconds, so by
pressing the zoom button on the top right/rear of the camera (whilst
the viewfinder at my eye) I can hold the captured image and zoom
into it (or zoom out using the AEL button) to check the focus and
resolution of the feathers. I use the buttons on the rear tilt pad to
move around the enlarged image - tapping the shutter button clears it
and I am ready to go with the next shot.
I have many 'free
loaders' in my garden over the winter period and they come to my
back patio door to get fed. The pheasant visits every year in the
knowledge that he will get food from me and this image of him on the
wall was taken on a wet and dull day as he settled down to preen
himself. The image was captured with the
Sony SLT
A57 camera and the Tamron 70-300mm SP Di USD lens combo 'hand held'
against
thick glass with the lens hood
pressed against it to avoid any
back/room reflections from the glass hitting the lens and spoiling the
shot. The first image is the camera produced jpeg and the second is a
'RAW' image file converted to a jpeg. The settings are ISO:800, aperture
f5.6 and shutter 1/125sec.
This image of the squirrel is a
camera produced jpeg and the settings are 300mm (450mm FOV),
ISO:800, aperture f5.6 and shutter 1/320sec. It was shot through glass
'hand held' with the Tamron lens hood pressed up against the glass to
cut down the possibility of reflection coming back from the glass onto
the lens.
These images of the Tree
Creeper and the Robin are jpegs converted from 'RAW' image files.
Both were shot 'hand held' and the Tree Creeper settings are 300mm,
ISO:1600, aperture f5.6 and shutter speed 1/500secs. The
Robin's settings are 280mm, ISO:400, aperture f5.6 and shutter speed
1/500secs. The images have been heavily cropped and post processed using Adobe Lightroom 4.4 software.
The Tree Creeper is a type of finch with huge claw feet and it flies to
the bottom of a tree and creeps
upwards on the bark with little jumps before flying down to the
foot of the next tree to repeat the exercise. It lives of grubs and
insects which are found under the tree bark lips. It was a very
difficult shot as the Tree Creeper is very fast moving and I only had
time for a couple of attempts before it flew away.
These
images are jpegs converted from 'RAW' image files. They were shot 'hand held'
through glass and the settings are on the 1200 Pixel variants, The image
of the pheasant was shot through thicker glass on a very dull, dark day
and it had just been fed and was settling down under the cover of the
bushes. The quality of the image is not bad considering it was shot at
ISO:1600, aperture f5.6 and a 1/40 sec shutter speed -
The swallows always fly into Hermiston around
the 1st May every year. Hermiston has the right conditions, plenty of
midges, bushes, trees and flat grasslands. The canal runs at the foot of
the property so the midges have the necessary water and the swallows
often fly along the top of the water allowing their beaks to dip into it
causing furrows and ripples to appear. Around the end of June the babies
fledge and follow their parents whilst learning to fly. Feeding time can be on
the wing but more often that not the babies rest on a fence and call on
the parents to fly in and feed them. The speed of flight during feeding
is very fast but even in single shot mode the Sony Alpha A57 camera and
the Tamron 70-300mm zoom lens can catch the moment. I have included
all the images and you can see that 1/1000 second shutter speed or above
is best for any fast movement. The white specks in the images are
midges flying around.
The shots of the swallows were stretching the distance limitations of
the Tamron lens but I have included this (non cropped) 1650Pixel
(click to open) version to provide an idea of what I actually saw
through the viewfinder. There is a cropped (1650Pixel) version in
the series below -
These cropped images are jpegs converted from 'RAW' image files,
using Adobe Lightroom 5 software - the image settings can be found on
the plates. All the images have been cropped by about 1/3rd as it is
very difficult to get close to the birds using the combo 'hand held'
whilst walking about the field.
These are some camera jpegs
taken at the recent Edinburgh Jazz and Blues Festival (Mardi Gras)
which was held in the Grassmarket, in Edinburgh, Scotland. The Sony SLT
A57 camera and the Tamron 70-300mm SP Di USD lens are not exactly small
in size (zoomed to 300mm) when used in a densely populated social
gathering. However, to avoid any confrontation, I did not point the lens
in the direction of the crowd but instead on the artists that were
performing on the stage and in the street. The combo is terrific for
pulling in and isolating performers through a packed audience and
although I did not purchase the lens for this type of photography it
proved an interesting test.
I found that the combo was fast to autofocus using the spot/centre AF
point, although at 300mm using the widest aperture possible
at aperture f5.6 (to keep the ISO down and the shutter speed up)
there is very little room for error as the depth of field (area in
focus) is very narrow. These images are all shot 'hand held' at the
300mm (450mm field of view) zoom limit of the Tamron lens.
Whilst at the Mardi Gras I
completed a basic video test using the Sony/Tamron combo 'hand held' and
the lens zoom ring was used, not the camera digital zoom -
Aperture
Priority - A Mode (Using Video)
I use aperture priority mode and the lens set to autofocus for virtually
all of my 'stills' photography and whilst in this mode, you can use the
video
RED
mode button (on the rear of the camera at the top) to start video
recording.
This short video was recorded whilst in aperture priority mode
(shooting stills) and pressing the
RED
button - the video settings in the main menu were -
File Format -AVCHD
Record Setting -
50i 17M (FH)
Audio Recording -
ON
Wind Noise
Reduction - ON
SteadyShot - ON
The video was rendered to H.264 AVC format, using Cyberlink
PowerDirector Ultra 10 Software -
Dedicated
Video Control Modes
The dedicated video control is chosen by selecting the VIDEO ICON on the
main top control wheel on the left. This brings up 4 settings and you
can select your chosen setting by scrolling down using the rear
tilt/switches on the rear control pad and pressing the AF button. When
you finish in dedicated video mode the setting is maintained until you
again change it. I have listed the dedicated video choices below -
Dedicated Video
- Aperture Priority Mode - Manual Focus Mode
This is the aperture priority manual mode and
I have listed the following remarks -
The 18-55mm zoom lens is used in MANUAL MODE by switching the lens
barrel AF to MF (the camera body can be left at AF as MF is only
used when the AF lens does not have a manual switch) and then
manually focusing on the scene using FOCUS PEAKING to display the
areas in focus. You can adjust the aperture setting to any f# stop
within the limits of the zoom (f3.5 widest at 18mm and f5.6
widest at 55mm) using the
recessed front knurled wheel.
The
camera will automatically match the shutter speed to the aperture
depending on the ISO rating you have chosen. To increase the shutter
speed you either open up the f# stop (towards f3.5 when possible)
or raise the ISO rating and to lower the shutter speed you stop down
the f# stop (towards f36 when possible) or lower the ISO
rating. When the camera is set to ISO = AUTO it maintains the widest
aperture principle but lowers the ISO to the lowest possible rating
and likewise the shutter speed.
When the lens is switched to MF (Manual Focus) mode on the
barrel and the camera body switch set to AF,
the video records with MF focus, irrespective of what setting you
have the
autofocus
mode (AF-S/AF-C/AF-M) set to beforehand.
You CAN change the
aperture setting during recording but the sound of the wheel
clicking during the change is also recorded in the video.
The zoom lens 'field of
view' in video recording is narrower than in 'stills' photography
mode.
The ZOOM BUTTON on the
rear/top/right of the camera body can be used along with the 4
cluster tilt/switch control pad on the back of the camera and the
centre AF BUTTON to zoom into and also crop your video recording.
However, the image quality will deteriorate as you zoom further in.
If the shutter speed
and aperture settings fall below a level that will facilitate proper
video recording then they will both flash on the screen - either
open up the f# stop
(towards f3.5 when possible) or raise the ISO level until they
stop (until you reach the limit of ISO:3200) and if they
continue to flash - you are at the limit of the camera's ability to
expose/record the scene. The same occurs when ISO is set to AUTO.
You can press the AEL
button (mine is set to toggle exposure lock) to lock the
shutter speed which is matched to the aperture setting - press again
to toggle to unlock. This is ideal for balancing a bright sky
against a dark foreground during recording.
Using the
Dedicated Video = Aperture Priority
Mode (Manual Focus Mode) I shot a video of the 'Hermiston Gang' using my
Sony SLT A57 Digital Camera and Tamron 70-300mm f4/f5.6 SP
Di USD zoom lens - the combo was 'tripod mounted' and set-up for
AVCHD 1920 x 1080/50i, aperture priority video mode, ISO:400,
Aperture f5.6. Using the LCD screen, the focus was manually set on the centre fence
post in the video, by turning the lens focus ring and the
camera's FOCUS PEAKING outlined the post (in focus)
with a white sugar frosting.
This H.264 AVC format video was produced using Cyberlink
PowerDirector Ultra 10 Software.
The crows saw the camera on the tripod which was about thirty feet
away and they figured it was
pointing at the centre of the crumbs - so they became very
nervous of that zone as you can see in the video. The two
scraggy crows are (2012) youngsters, chasing their parents
for food.
This camera jpeg
image was heavily cropped(about 50% of the overall original
size) and still manages to deliver a reasonable resolution and image
size, bearing in mind the 1200 pixel jpeg size (click on the 500
pixel image to open) has been reduced in quality for the web.
The Tamron SP 70-300mm Di USD zoom lens has limitations at the long end
and if you push it's 300mm reach, the resolution will start to
dissipate, especially if you then crop in to enlarge the subject. These
monkeys are probably beyond the 300mm limit and in the viewfinder (at
the time of the 300mm shot) they measured about a quarter
(1/25th) of the frame in size. For printing this cropped image is
good for 14" on the long side and thereafter the quality of the
resolution starts to blend into a gentle water colour effect. Ideally
the monkeys size in ratio to the framing in the viewfinder (at least 1/3rd at the time of the shot being taken) should have been similar to
the image below.
The Tamron SP 70-300mm
Di USD zoom lens at 300mm (450mm field of view) has a fairly
narrow depth of field at aperture f5.6, especially if the subject is
very close. Due to the weather in Scotland, it is difficult to use the lens at aperture f8 to
obtain 'optimum' image quality with a reasonable depth of field and yet
keep the ISO rating low and the shutter speed up.
It is always tempting to lower the ISO to obtain the best image quality
(e.g. the picture of the basking seal) and unfortunately I very
often succumb to that temptation. Of course the penalty is that the
shutter speed drops and the aperture (especially at 300mm) tends
to get wider at f5.6. The end result can often prove spectacular for
resolution, especially with a subject large in the frame but more often
than not, the animal moves and the fur and eyes are not so sharp.
The Tamron SP 70-300mm Di USD zoom lens is very accurate when used with
the Sony SLT A57 camera, even at 300mm (450mm field of view)
but creatures will often move very fast and a lot faster than the human
eye (or the camera shutter) so it does pay to keep the shutter
speed high (when possible) as it makes the difference between a
blurred eye or dissipated resolution in the fur/feathers when printing a
larger picture.
Landscapes
The Tamron SP 70-300mm Di USD zoom lens should prove ideal for pulling
in distance landscapes or for using to crop the primary subject matter
out of a wider landscape which will provide a higher image
resolution than cropping in post processing software.
Landscapes tend not to move (in windless days) so the ISO rating
can be lowered to achieve 'optimum' image quality and in any case most
landscape photographers tend to use a tripod.As landscapes are invariably shot in the early morning or early
evening, the chance of haze and heat distortion is greatly reduced with
those 300mm (450mm field of view) shots.
These are (hand held/no flash) camera jpeg examples resized and
re-sharpened for the web using Adobe Lightroom 4.1 software. The first
larger image was taken using the Sony DT 35mm f1.8 SAM prime lens to
provide a 52mm perspective of the scene and the others were captured
using the Tamron SP 70-300mm Di USD lens using the 300mm end of the zoom
to cut into the scene. The 300mm (450mm field of view) images
provide a good example of how - as the subject distance from the camera
lens increases,
the contrast and the resolution of the image dissipates. The Tamron is
not a £4K lens but it's resolution at 300mm (even in those longer
distances) holds up reasonably well.
In the 52mm perspective image, the 300mm image of the tower is
down on the right, the communication masts are slightly to the left
above the tower, the red lorries are slightly to the left above the
masts nearly halfway up the frame. The castle is on the horizon near the middle, the island is
higher to the left of the castle and finally the large hill is on the
horizon to the extreme right.
The bottom row of the above landscape images could be improved by either
using the bundled Sony Data Image Suite or Adobe Lightroom 4.1 software to post process the contrast in the
camera jpegs or better still, by post processing my 'RAW' image file
variants.
This 600 pixel camera jpeg
image was captured with the Sony Alpha A57 camera and the Sony DT
35mm f1.8 SAM lens and it is a view of the Forth Road Bridge from South
Queensferry, Scotland. It was shot 'hand held with a 52.5mm 'field of
view' at ISO:100, aperture f5.6, shutter 1/500sec and re-sized using
Adobe Lightroom 4.1 software. This 600 pixel version opens up to a 1200
pixel version and serves to
demonstrate the 'native eye' view for the next (Tamron 70-300mm lens) image.
The following image was captured from the same spot using the Sony Alpha
A57 camera and the Tamron
SP 70-300mm Di USD
zoom lens and the above scene can be turned into something a little different by zooming
in at 300mm (450mm field of view)
under the bridge.
The reason there is so much water in front of the image is because I
kept the shot low to avoid catching the span of the bridge. The images were taken within moments of each other and this is a
camera jpeg captured
at ISO:400, aperture f5.6 and shutter 1/1600sec. The high
shutter speed (ISO:400) was intentional as the lens was moving
about a lot as I tried to steady it (hand held) on the distant
scene. The image was re-sized and sharpened for the web
using Adobe Lightroom 4.1 software.
This monochrome jpeg image, was converted
from the 'RAW' variant of the above camera jpeg which was taken at the
same time with
a slight antique gold tint added and custom cropped for effect -
this 600 pixel version (below) can be opened up to a 1500 pixel version which
has been reduced in quality by 50% to save web space.
There was a heavy mist on the hills down to the tree line and although
noise reduction has been applied, the
full size tiff variant is good for printing up to approximately 24" x
10" in size for a relatively close viewing position. The image print size
can be increased up to 36" x 15" for an
'art effect' on the wall with a more distant viewing position. It serves as a reasonable example of what
the Sony Alpha A57 camera and the
Tamron
SP 70-300mm Di USD
zoom lens can 'pull out' from a very distant scene. There is a great deal of
activity in the picture, one of the main cranes on the left is actually
mounted on an island in the middle of the estuary and whilst there is hard
work going on there are yachts on the left side
and I think a police motor launch at the front?
Tamron SP 70-300mm f4/f5.6 Di USD Zoom Lens - Various Camera Jpeg Images
These are various jpeg images straight from the Sony SLT
A57 camera and the Tamron SP 70-300mm Di USD zoom lens
(hand held/no flash)
and resized/sharpened using Adobe Lightroom 4
Software, some have been slightly cropped for effect. I have made no other
adjustments to the saturation, colours, brightness or anything else in Lightroom
and the
camera was set to AWB - Auto White Balance.
The Sony Image Date Suite
Software (bundled with camera purchase) does not appear to have a method of
re-sharpening the images after they have been resized.
The Sony 35mm
f1.8
DT SAM is an excellent lens designed for the Sony Alpha A mount
(APS-C sensor dedicated) cameras delivering great image
quality at a low price
- the lens (as of 12th September 2012) will work with the new
full frame
Sony Alpha A99 camera.
From
photozone - "It may surprise you but regarding the sum
of its
optical qualities it is actually a better choice than the
"mighty" (albeit outdated) Sony 35mm f/1.4 G - Sony's
professional grade full format 35mm lens. The AF performance of
the new SAM drive is pretty decent and we didn't really
experience any issues with AF accuracy during our field testing"
I purchased my lens from Jessops in Edinburgh along with a Hoya HMC 55mm
UV filter both costing me £149.98 (with the £30.00 cash back) vat
inclusive.
The Sony DT 35mm f1.8 SAM lens
is a steal at that price and on a Sony APS-C sensor camera it produces a 52.5mm
field of view plus it can be used in low light for 'hand held' shots when used
with a Sony Alpha camera body with 'Steadyshot' image stabilisation.
It makes
for a excellent lightweight and relatively compact Sony Alpha camera system when
combined with my Sony SLT A57 camera and the Sony DT 18-55mm (27mm-82.5mm
FOV) f3.5/f5.6 SAM zoom lens.
However, a note of caution, if you are thinking of stepping up at a later stage
to a Sony Alpha FF System the lens cannot be transferred to the 35mm 'Full
Frame' digital sensor format -
the exception (as of 12th September 2012) the lens will work with
the new full frame
Sony Alpha A99
camera.
For a shoulder bag, I use my
Lowepro Rezo 120 AW
which
is ideal for the
Sony Alpha A57 camera with the Sony DT 18-55mm f3.5/f5.6 SAM zoom (no lens
hood)or the Sony DT 35mm f1.8 SAM prime lens with it's lens
hood reverse fitted. With either combo in place, there is just enough
room at the side for the other lens. The front pouch has room for spare memory, cleaning kit and a
spare battery.
I still have to test this bag for room when my lens hood for the 18-55mm
arrives?
The Lowepro Rezo 120AW is designed specifically for digital equipment and is a
lightweight shoulder bag packed with features. This bag offers plenty of
protection with a well padded interior, soft, brushed-tricot lining plus a
memory card pouch that’s integrated right into the reverse-open lid and an All
Weather™. A soft, micro fiber cloth built into the main compartment cleans
delicate LCD screens and protects against scratches from camera straps. Carry
accessories in the roomy front pocket and stretchy side pocket, and use the
SlipLock™ attachment loop for additional accessories.
The Sony DT 35mm f1.8 SAM lens is quite impressive, the inner barrel extends
slightly when focusing and the retracted size with the lens off the
camera - the mount cap fitted, the lens hood (reversed) fitted,
the filter screwed on and the lens cap fitted is Length = 70.5mm
(2.77") Diameter = 80mm (3.14"). When the lens is close
focused, the inner barrel extends by another 10mm (0.39") and
when the camera is switched off the inner barrel automatically retracts.
Note that when the camera powers itself down the lens does not retract.
The lens is very compact, lightweight and the plastic build, including
the plastic mount, appears relatively strong and resilient. The hidden
strength of modern plastic material of course
works very well in keeping the weight down and the Lowepro Rezo 120AW
shoulder bag with the 2 lenses and accessories can be carried around all
day without any back, shoulder or neck strain. When you compare the Sony
SLT A57 camera to it's A65/A77 siblings, it does not appear to be very
different in size but in actual fact it is smaller and lighter, perhaps
not that much on paper but certainly when you compare them in a store,
the weight difference is apparent.
The lens fit to the camera is okay with a very slight play but no
more than my metal mounted Tamron lens and certainly there is no wobble,
you would have to grip and twist the lens (not advisable) to make
it play on the mount. Likewise when the lens inner barrel extends there
is a very slight play, if you force it (not advisable) but there
is no wobble and it extends and retracts very efficiently. The lens cap
is a double pinch type and you can use the outside rim pinch or the
inside one to fit it on the Hoya filter.
The lens hood that came with the Sony DT 35mm f1.8 SAM lens is very neat
and can be reverse fitted for storage. When fitted for use, you must
take turn it until it makes a resounding click and it is very secure on
the lens, this is one hood that will not get lost. The same when you
reverse fit it, turn it clockwise until your hear and feel that loud
click.
I found that the AUTOFOCUS was fast enough, especially when
very close focusing and then moving to infinity which is the longest
travel + time of the lens in AF mode and vice versa. The manual focus
ring is immediately behind the lens hood (when fitted for use)
and it is not grooved. The ring is smooth and also has the lens range
markings printed on it. Switching to MANUAL FOCUSING with
FOCUS PEAKING was a breeze to use, flick the AF to MF on the lens
barrel and I found MF very responsive. The lens range is fairly well
spread out on the throw (as expected) but the throw distance is
next to nothing between 3 metres (10 feet) to infinity.
The Sony SLT A57 camera and the Sony DT 35mm f1.8 SAM lens (lens
hood fitted) make a compact, lightweight combo with excellent
handling. You could carry it around in your hand all day, using just the
grip and a wrist strap for backup.
Street Photography
The 52.5mm field of view is ideal for all sorts of photography,
including landscapes, portraits and especially if you want to do a Henri
Cartier-Bresson. I prefer to use the viewfinder
and the camera in aperture
priority mode with centre spot autofocus and the combo can be used (even to auto review the last
captured image) without taking the camera away from my
eye. It is extremely enjoyable to auto review my freshly captured image
(right after the shot) and watch the camera adjust the dynamic range
and any lens corrections to my camera jpeg image file.
When shooting black and white (Creative Mode=BW) you see a black
and white scene in the viewfinder and the final camera jpeg image is in
black and white.
I think the electronic viewfinder is great, and I can keep it at my eye
all the time, preset and AEL(toggle) lock my exposure,
focus the centre spot point on the subject, half press/hold the shutter
button to lock the focus, re-align the scene and press the shutter
button fully home to take the shot. Up pops the auto review of the shot
for 5 seconds in the viewfinder, override the 5 seconds by pressing the
ZOOM button to zoom in and the AEL to zoom out and when
ready for the next shot, just tap the shutter button to clear the auto
review.
Of course, if I want to simulate OPTICAL like a normal DSLR
optical viewfinder, I can switch off the auto review of a
captured image (main menu setting) and then my view of the scene
in the viewfinder becomes uninterrupted except for the flash of the shutter when the shot
is taken - great for 'fast moving' street photography.
I have not switched on the electronic viewfinder EYE-START AUTOFOCUS(in the main menu) for although it is great for instantly
focusing when you put your eye up to the viewfinder what is really
happening is that the viewfinder detects an object appearing at the back
and will instantly autofocus - this means that when the camera is being
carried in front of you on a shoulder strap or down at your side, the
viewfinder detects your body against the eyepiece and starts to 'chimp'
and autofocus on different subjects as their distances change. This can
only wear down the battery power although I admit if you are shooting
all the time with the camera up at your eye, I can see where it would be
a benefit.
Switching the camera using the
Fn button/CREATIVE MODE from VIVID colour to shoot BW
black and white camera jpeg images is relatively simple.
I am shooting 'RAW' plus
Jpeg images in APERTURE PRIORITY MODE and all I have to do is press the
Fn button to bring up the Fn Menu - scroll left/right/up/down
using the tilt button pad on the back of the camera to highlight CREATIVE
MODE, press the AF button to enter sub menu,
scroll up/down using the
tilt button pad on the back of the camera to highlight BW then press the
right tilt WB button on the tilt button pad to enter the
Contrast/Saturation/Sharpness sub menu and after using the tilt button pad to
change my settings to Contrast
+2, Saturation 0, and Sharpness +2, I reverse out of this menu using the left
button on the tilt button pad and finally with the BW highlighted - press
the AF button to set and return the camera to shooting mode. Now that my
contrast/saturation/sharpness have been set-up in BW, all I have to do is
use the Fn button and CREATIVE MODE to switch between BW
and VIVID when I like.
The camera will now shoot black and white 'RAW's and black and white camera
Jpegs. Even better, in the viewfinder or the LCD screen it will also display in
black and white and 'what you see is what you get' in the final image.
The 'RAW' file images will remain as black and white when imported into the Sony
Image Data Suite Software where they can be post processed and if required they
can be changed to colour by changing the CREATIVE MODE in the software.
Unfortunately because Adobe Lightroom 4.1 software (as yet) does not
include a Sony SLT A57 camera calibration profile the 'RAW' image file when
imported, immediately changes to a colour version and you then have to use
Lightroom to convert it to black and white.
The camera black and white jpegs are very good but to obtain the 'optimum'
performance, especially for 'Fine Art' work, you really do require to shoot
'RAW' image files and post process them using a software package such as
NIK Silver Efex Pro
or
Adobe Creative Suite 6
with it's ability to mask and layer sections of the image and facilitate
dodging and burning.
Street Photography -
Frame Rate Benefits
There is no doubt that a fast frame rate is a benefit for street
photography although shooting both file formats (RAW + Jpeg) can
slow the camera down. One of these days, I will have to decide what
format to shoot in and it probably will be 'RAW'. The main reason is
that once in a while a black and white image pops up which is worthy of
post processing and adding in a few effects, such as vignetting although
admittedly, you can still (within limitations) post process
a camera produced jpeg. However, even when shooting RAW and a camera jpeg
together, the camera delivers a more than adequate frame rate. This 500
pixel image was captured with the Sony A57 camera in drive mode= single
shot and using the centre spot autofocus - it is not an ideal example of
street photography but it does convey the frame rate speed. The train
was travelling relatively fast and after the 6th shot, the camera ground
to a pause as the buffer filled up - I did not attempt a 7th shot as the
train had moved almost out of the frame.
For this Frame Rate exercise, these are black and white camera
produced jpeg images which have been re-sized and sharpened in Adobe
Lightroom 4.1 software. They are deliberately sharpened to a high
degree, pushing the jpeg to the limit during re-sizing for the web. The
actual BW camera jpeg (full size) has a very nice balance of
sharpness when the camera is set for Creative Mode=BW,
Contrast +2,
Saturation 0, Sharpness +2. The camera sharpness
can be adjusted in the FN button menu (Creative
Mode=BW)
settings.
Please mouse click on the 500 pixel variant and keep clicking on the
1200 pixel variants to view the 6 shots that were taken, one after
another. The first shot of the train commences with it nearest the
camera and it gradually moved away up the track. The camera was held
over a large metal frame (head height) and the LCD screen was
used to view the scene - the camera was 'hand held' in my right hand to
take the shots -
This is the same image
of one of the train shots but the camera 'RAW'
version, post processed in Adobe Lightroom 4.1 software and converted to a jpeg.
Remember in Lightroom a Sony A57 black and white camera 'RAW' is imported in and
automatically reverts to a 'Adobe' colour variant as there is no Sony camera
calibration file to match the profile to. I have tweaked the saturation,
contrast and softened it a little.
Street Photography - Various Camera Produced
BW Jpeg Images
I did spend some time in Edinburgh with the Sony Alpha A57 and the
Sony DT 35mm f1.8 SAM prime lens shooting street and scenic images. This
black and white camera produced jpeg image
was re-sized, slightly cropped for effect and sharpened
using Adobe Lightroom 4.1 software.
Please click on the 500 pixel image to view the camera BW jpeg version
and then click again to view the colour 'RAW' conversion to BW
jpeg version which was also processed using
Adobe Lightroom
4.1 software -
These are various black and white jpeg images straight
from the
(hand held/no flash) camera, shot in Fn button/menu -
CREATIVE MODE=BW,
Contrast
+2, Saturation 0, and Sharpness +2.
The camera electronic viewfinder and/or the LCD screen displays the
scene as black and white and produces a black and white camera jpeg.
They have been resized/sharpened using Adobe Lightroom 4 Software, some
have been slightly cropped for effect. I have made no other adjustments
in Lightroom and the
camera was set to AWB - Auto White Balance.
I like the tonality in the indoor shot which was captured at ISO:800,
aperture f2 and shutter speed 1/80sec. The 'lens draw' in the picture on
the far wall and the gambling machine are very impressive. The seagull
image was shot with the lens wide open at aperture f1.8 and the bokeh
holds up reasonably well.
The colour 'RAW' file image variants of the above black and white camera
produced jpegs (taken at the same time) can be viewed in the Adobe
Lightroom 4.1 Software Section.
Wide Open - Aperture f1.8 - Camera Jpeg Image
Samples Most photographers when
they purchase a 35mm fast aperture (f1.8) prime lens
tend to immediately check out the 'wide open' image quality so I guess I
am no different. The first shots as usual are nothing special but the
Sony DT 35mm f1.8 SAM lens can cut a 'thin slice' focus out
of a scene, even when the subject is quite a distance away from the
lens. In the restaurant shot, the brick wall was about 8 feet away from
the lens and the centre spot point AF is on the edge of it, locked in
focus by a shutter button hold and the scene re-aligned before pressing
the shutter button home.
The leaves on the top of the tree sapling at the bottom of the garden
image were about 6 feet away from the lens
and the centre spot point AF is in the middle of them - again
the scene was re-aligned. The leaves on the extreme right are further
back than the point of focus. That reminds me, in November, I must move
and replant that sycamore (a seed plant from a bird) before it grows
to its full size of around 100 feet.
For a closer subject, check out the wine glass where the centre
spot point AF was on the writing (250mL) and whilst the
background and foreground are out of focus so is the stem of the glass,
which is an incredible thin area of focus from this lens - again the
scene was re-aligned.
The 3 flower 'close up' shots also display a very fine area of focus -
I am not a bokeh specialist but the out of focus
areas in all the shots are not bad and reasonably pleasing to my eye. The
image quality of the lens at f1.8 is reasonable, it should reach it's optimum at
f5.6 and still prove reasonable at f11 which I will not go beyond. I
hope that my lens copy is as good as the copy that
photozone
reviewed - time will tell.
These are ISO:100, wide open aperture f1.8
(hand held/no flash)
Sony DT 35mm f1.8 SAM prime lens
camera jpegs which have been
re-sized and sharpened in Adobe Lightroom 4.1 software for the web. They
have not been altered in any way, other than renaming them.
This f1.8
aperture Sony DT
35mm f1.8 SAM prime lens
camera jpeg image was captured up in the Pentland Hills, Edinburgh at
dusk with 'limited' light from the open fields (behind the camera)
and you can see it reflecting in Brad's eyes. It was shot under the tree
canopy at ISO:400
(hand held/no flash)
the shutter was set at 1/50sec
and the image has
been
re-sized and sharpened in Adobe Lightroom 4.1 software for the web. It
has not been altered in any way, other than renaming it.
The exposure was locked using the AEL (toggle) button, the centre
spot autofocus was on Brad's face, locked by a half shutter button
press/hold and the scene re-aligned before pressing the shutter button
fully home.
The Sony DT 35mm f1.8 SAM lens
can be used for close up insect shots although using an aperture of f1.8
with it's hair thick 'depth of field' does does not allow for any error.
These are
(hand held/no flash)
camera jpegs all shot at aperture f1.8 and have been
cropped for effect, re-sized and sharpened in Adobe Lightroom 4.1 software for the web. They
have not been altered in any way, other than renaming them.
The Sony DT 35mm f1.8 SAM lens - Various Camera Jpeg Images
These are various jpeg images straight from the Sony SLT
A57 camera and the Sony DT 35mm f1.8 SAM prime lens
(hand held/no flash)
and resized/sharpened using Adobe Lightroom 4
Software. I have made no other
adjustments to the saturation, colours, brightness or anything else in Lightroom
and the
camera was set to AWB - Auto White Balance.
The Sony Image Date Suite
Software (bundled with camera purchase) does not appear to have a
method of re-sharpening the images after they have been resized.
Chromatic
Aberrations
I have noticed that when the Sony DT 35mm f1.8 SAM prime lens is wide open, even
stopped down to aperture f2.8 some captured COLOUR images display chromatic aberrations. This is usually
purple fringing on chrome edges in certain lighting conditions. The Sony
camera/lens firmware does not always manage to fix this wrinkle although
using Adobe Lightroom 4.1 to post process a camera jpeg,
(or the RAW file variant) easily removes it. However for
photographers who only shoot camera jpeg image files and take the memory
card straight to the printers, it could pose a problem. Stopping down
the aperture to around f5.6, f8 and f11 will help.
This following image is an example,
click on all the images through this section - the first 1200 pixel
version clearly shows up the purple fringing around both cars
windscreens, front grilles, front bumpers and the second (corrected) version is the
same camera jpeg post processed in Adobe Lightroom 4.1 software. At this
time, there are no such tools
in my Sony Image Data Suite software (version is 4.0.01.09151)to correct chromatic
aberrations in camera produced jpegs but in the case of post processing
'RAW' image files, there is a limited function in the 'Highlight Color
Distortion Reduction Section' but it could not remove the purple
fringing in the 'RAW' variant of this image.
This is not a deal breaker for me, I have had to 'post process' away
similar
chromatic aberrations with far more expensive lenses. In any case this
little wrinkle with some colour images cannot outweigh the sharpness of this lens at aperture
f2.8, it should be great for black and white street photography.
I very rarely shoot cars or
chrome, this was a test shot using the Object Tracking - AF Button(middle of large dial on rear of
camera back) - used for tracking a subject which is moving within the
viewing frame. View the scene and press the AF button in the middle of
the rear control pad and a white rectangle appears in the middle of the
scene. Line this white rectangle up on the subject and press the AF
button again - the rectangle now has a double white outline and begins
tracking the moving subject which must remain in view within the frame -
press the shutter button to take the shot or press the AF button again to cancel the
operation.
The Sony Alpha A57 SLT camera and Sony DT 35mm f1.8 SAM Prime lens
make for an interesting combo, considering that both are aimed squarely at the
'consumer' marketplace and
in the scheme of things they are very moderately
priced.
I
recently visited Edinburgh Castle in Scotland and put the combo through it's
paces - I wanted to see how the lens handled at wider f1.8/f2/f2.8 apertures.
These 12 shots were captured indoors with the combo 'hand held' and the flash
was not used. I kept the shutter speed reasonably high as there were a great
number of tourists milling around and I had small gaps in-between to take the
shots. The images of the soldiers were captured whilst they were in conversation
with tourists and moving about in the Castle's Great Hall. The Sony Alpha camera
is ideal for adjusting the exposure to create an effect in a scene, as you can
see the changes in the viewfinder - similar to the
image in the middle of the top row. I then like to lock my
exposure using the AEL button and thereafter I am free to focus on a primary
subject with
the centre spot autofocus point, press/hold the shutter
button to lock the focus, re-align the scene and press the shutter button home
to take the shot.
The combo delivers a native eye, 52.5mm field of view which with the wide open
aperture of f1.8 can still achieve a bokeh effect with primary subjects which
are a good distance from the camera. The lens does suffer from
bokeh fringing and can produce green and/or purple tinges on bright reflective areas
in scenes when the lens is wide open at f1.8 and even stopped down to f2.8. The
camera makes a very good job of removing these aberrations from it's jpegs but there is the odd one that is not
completely clear. If you shoot
'RAW' image files and post process using software
such as Adobe Lightroom 4, you can easily remove fringing but the task can be quite a
long one as Lightroom does not have a camera or lens calibration profile so removing the
imperfections is done manually. After I completed these 'RAW' to jpeg
conversions, I cross checked them against the camera jpegs that I had taken at
the same time and apart from a few images with slight traces of bokeh fringing, the camera
jpegs were equal or better than my software conversions.
The other night (Christmas 2012) I visited a camera store in Edinburgh to check
out
the new Fuji X-E1 digital camera and to get my customary 3 month haircut. It was
a hell of a night, the rain was lashing down and the wind had picked up - most
folks had umbrellas and were fighting the elements as they rushed home or
finished their Christmas shopping. Fortunately the rain stopped very briefly and
as my Sony Alpha A57 camera and Sony DT 35mm f1.8 SAM lens were not waterproof,
I quickly grabbed these camera Jpeg and 'RAW' image file shots.
I used the camera in electronic viewfinder mode which was not a problem and the
images were captured hand held and without flash.
The camera was set to Creative Mode = BW so the viewfinder was displaying a
black and white scene - I enjoy shooting night photography in black and white
but with the option of a 'RAW' image file.
This first one of Fraser Hart was captured 'hand
held' and the settings are ISO:1600, aperture f2.8 and shutter 1/250sec. I upped
the (ISO) shutter speed to ensure any movement was frozen - the smaller image is the
camera produced jpeg which has been re-sized and re-sharpened using Adobe Lightroom
4.2 software. The two larger jpeg variants were produced from the
'RAW' image file converted
(images updated 19/11/13) in Adobe Lightroom
5.2 software.
This second shot was taken 'hand held'
and the settings are ISO:1600, aperture f2.8 and shutter 1/125sec.
The smaller image is the camera produced jpeg which has been re-sized and
re-sharpened using Adobe Lightroom 4.2 software. The two larger jpeg variants
were produced from the 'RAW' image file also converted (images updated 19/11/13)
in Adobe Lightroom 5.2
software.
The Sony Alpha A57 SLT camera and the
Sony DT 35mm f1.8 SAM lens are a relatively compact and
lightweight combo for carrying around, especially if you are out and about at
night and you do not want to carry around a tripod or get into flash
photography. The combo offers
some very important technology that increases your chances of capturing
excellent images -
Image
Stabilisation (camera body has Steady Shot)
High ISO
Rating (camera has good image quality at ISO:1600 and ISO:3200 in good
light)
Focus Peaking (camera aid for manual lens focusing)
A fast f1.8 aperture lens with a 53mm field of view
Monochrome or
colour jpeg image files (plus a 'RAW' variant)
Monochrome or
colour viewing through the electronic viewfinder (also LCD screen)
The combo is capable of getting right down there at around 1/8sec shutter speed,
aperture f2 and still delivering a very reasonable image quality in extremely
low light (dark conditions) at ISO:1600. Considering that it is a 53mm
field of view, it is quite impressive for a consumer lens. At a pinch the
aperture can be fully opened to f1.8 but the primary subject should be
reasonably close to achieve good resolution and image quality.
At a shutter speed of around 1/8sec, the 'hand held' combo (without flash)
behaves similar to using a tripod - the background (non movement) is
steady and any subject movement is captured with a slight blur. I could raise
the ISO above 1600 to lift the shutter speed but the higher I go, the lower the
resolution and image quality becomes, especially with more distant shots.
Thankfully a great number of the night scenes are reasonably well lit under the
street lights and can be shot at ISO:1600, aperture f2 with a high enough
shutter speed to freeze any subject movement. The autofocus of the combo is
fast, accurate and excellent but the camera also includes focus peaking for
those occasions in very dark conditions where the centre spot AF will not lock
on and I have to switch the lens to manual and use the camera's
focus peaking of sugar white frosting to outline the
subject in the viewfinder or the LCD screen.
This image was taken with the
combo 'hand held' and without using a flash. The settings are - aperture
priority mode, auto white balance, ISO:1600, shutter 1/50sec, aperture f2.8,
exposure multi-segment metering and the lens was used in center spot
autofocus mode. There are 58 images in total in this series of night shots, 29 colour and
29 monochrome variants. They were all shot in 'RAW' image mode and
converted to jpegs for the web using (updated in Adobe Lightroom 5.2 software
19/11/13) Adobe Lightroom 4.2 software.
All the images in the 'Christmas in Edinburgh 2012 Web' were taken using the
electronic viewfinder of the camera with the camera set to monochrome
(Creative Mode=BW) so I was viewing the scene in black and white. Virtually
all the shots were captured at ISO:1600 with a few at ISO:800 and ISO:400 - you
can retrieve the full Exif data from each image. The electronic viewfinder was
most excellent for viewing night shots and I had no trouble whatsoever in
clearly viewing the entire scenes in monochrome mode.
The Sony Alpha A57 SLT camera is amazing for the price, it has technology that
many professional cameras lack and it is without question an amazing piece of
kit for street and especially for 'hand held' night photography without using a
flash. The
Sony DT 35mm f1.8 SAM lens is
terrific for a consumer priced lens and a lot of
fun to use. There is no doubt that to draw the best out of this lens for night
shots you require
to shoot in 'RAW' image file format and post process it in Lightroom or a
similar package, although in certain even night light conditions the camera produced jpeg
can be very good.
___________________________________________________ Sony Image Data Suite
Software
(My
version is 4.0.01.09151 - bundled with the Camera)
This is very important, I use the Microsoft Windows 7 operating
system and although the software is supported across the Windows
platform, please read this
Sony SLT A57 Camera Manual(Window)
in relation to any Apple Mac installation notes. The Sony Image Data
Suite Software is bundled with the camera body (or camera + kit lens
purchase)
and comes in a single CD disc which contains software for working with
and managing your images, also a camera manual to view
(handbook.pdf)
or copy to the PC drive or print out - there is also a shorter version
of the manual in book form in the camera box. The software is very easy
to install on the computer, insert the CD in the disc caddy and just
follow the instructions. There are 2 sections to the image software, the
Image Data Converter and the Play Memories.
I installed the Image
Data Converter as I have no need for the Play Memories Software to
display and manage my images - I have other software for that purpose
but I may re-visit the Play Memories Software at a later time. The Image
Data Converter can be used to post process camera jpegs but the
adjustment controls are very limited - nevertheless, jpeg files can be
improved and given a little bit more 'POP'. The software is relatively
easy to use and combined with the Play Memories software, you have all
the tools required to enhance and manage your camera jpeg files. As of
this date (31st May 2012) I have not been able to find any method
of sharpening a 'full size' jpeg image or re-sharpening a jpeg when
re-sizing for email or web display using the Sony Image Data Suite
Software. In the case of post processing camera 'RAW' file images the
software offers a great deal more functions as I have outlined below.
My
version of the software is 4.0.01.09151 and it recently was upgraded to include
the
'Highlight Color Distortion Reduction Section' (only for RAW editing)
which offers 'limited' capability for correcting
chromatic aberrations.
I am not going to attempt an in-depth analysis of the Sony software but
I will cover some of the main areas and the parts that are missing,
which would provide more post processing options - to read more advanced
functions, please link to the
Sony Image Data Suite 'Data Converter' Online
Guide
Main Adjustment Tool Bar - In the RAW Conversion - Development
Section I found all the basic adjustment steps in the menu very
easy to follow and they all have reset switches. When you finish with a
'RAW' file it prompts you to save it and that is a trifle worrying but
when you reload it later, you can reset all your adjustments and start
again.
The main adjustments 'RAW' Development Toolbar List -
Brightness
White Balance
Creative Style
Contrast
D-Range Optimizer Reduction
Highlight Color Distortion Reduction (recent web download/upgrade)
Color
Shading Compensation
Sharpness
Noise Reduction
Tone Curve
Display Control
Creative Mode - RAW Black & White Image File
If you shoot a 'RAW' image file in creative mode - black and white, it actually
is black and white when you open it up in the Sony Image Data Suite Converter
software to post process it. However, using the Sony software and the above
adjustment toolbar, you can change it to colour and/or indeed any other creative
mode which also includes STANDARD and VIVID colour. However in Adobe Lightroom
the camera black and white 'RAW' image file appears in colour when it is
imported into the software.
Noise vs Image Quality vs Print Size
Even when you are shooting 'RAW' image files, the camera applies noise reduction
and this is carried over into the software settings. When I was post processing,
I found the easiest way to proceed with working on a 'RAW' file was to zero all
the noise reduction and sharpness settings and then gradually introduce noise
reduction and sharpness back in - some of the images, actually required a lot
less noise reduction in their development and as a result delivered greater
image quality. In any case, noise is relative to size and although you may see
it in a 100% view that does not necessarily mean that you will see it in a
smaller print - to produce the optimum image quality in larger prints, it can be
a fine balance between colour, contrast, sharpness, noise and the final print
size.
When you select a Fn menu - 'Creative Style' for using with RAW + Jpeg
shooting, the camera jpeg reflects the creative style setting and when you load
the 'RAW' version into the Sony Image Data Converter software it also reflects
the creative style setting and image result (same as the jpeg) but
instead of calling it the creative style that you chose, it calls it the camera
setting. Therefore a creative style - black and white image produced by the
camera will be black and white in the camera jpeg, also the RAW variant and in
the 'Creative Style' box on the tools task bar (see list above) it will
list it as camera setting when you click on the box. However, at that point you
can select any creative style that you wish, including the STANDARD setting.
Colour Space I am currently using the camera setting colour space but there are options
for Adobe RGB, sRGB and Wide Gamut RGB.For the monitor colour display, I
am using sRGB and the only other option is the monitor manufacturer's profile.
Watermarking (Copyright) Images
I have checked and there does not appears to be any way that you can apply a
copyright/watermark to an image using the Sony Image Data Suite software.
Cropping - Inclination Changes - Re-sizing an Image When working with a 'RAW' file and converting to tiff or jpeg format, the
cropping tool, the inclination tool and the re-sizing tool can be found in the
OUTPUT section and you make your image size changes in the menu - a window
displays those changes which you can then further change by drawing in or out
the aspect ratio of the image on the screen to suit your crop choice,
prior to you finally saving it. You can also work on camera jpegs and other
jpegs/tiff files in the same way. The menu also includes a compression table
which you can use to reduce the amount of data in the jpeg image file for emails
and web use.
Lens Distortion Tools There does not appear to be any tools in the software, it seems that the
camera automatically corrects
(I have the MENU setting for this to AUTO) any lens distortion and
applies it to Jpeg and RAW image files.
The Sony software picks it up as a CAMERA SETTING. However, there is no
such luxury with Adobe Lightroom 4 software, it has to be all corrected manually
as there is no Sony A57 camera calibration or Sony 18-55mm zoom lens profiles
(31st May 2012). NOTE:
Even with the auto correction in the camera for lens distortion it is sometimes
next to impossible to correct some extreme distortion in the straight lines of
very high buildings that are near to the edge of the frame.
Lens Chromatic Aberration Tools It seems that the camera
automatically corrects
(I have the camera MENU setting for this to AUTO) any chromatic aberrations and
applies it to Jpeg and RAW image files. The Sony software picks it up as a
CAMERA SETTING.
At this time, there are no such tools in my Sony Image Data Suite software
(version is 4.0.01.09151)
to correct chromatic aberrations in camera produced jpegs but in the case of
post processing 'RAW' image files, there is a limited function (recent
upgrade) in the 'Highlight Color Distortion Reduction Section' but it could
not remove the heavier purple fringing in some of my test images which were shot
at wide open apertures, f1.8 - f2.8.
___________________________________________________
These are camera 'RAW' image files
that have been post processed and converted to Jpegs using Adobe Lightroom 4
Software - the shot information and a brief outline of the development and
conversion is included on the larger 1,200 pixel plate size. They were shot with
the Sony Alpha A57 and the Sony DT 18-55mm SAM zoom lens.
My version of Lightroom 4 software does not have a camera calibration file for
the Sony SLT A57 camera so any lens corrections, distortions, etc, have to be
manually adjusted. I used the standard Adobe Colour camera profile and in most
cases I left the camera auto white balance settings alone.
The landscape images in the second row held up for reasonably well for
resolution over extreme distances, especially as the sky in both had a very
heavy haze, almost rain like covering.
These are images of
Preston Grange Colliery - see the black and white camera jpeg variants in
the
Black and White Photography Section.
They were shot with the Sony Alpha A57 and the Sony DT 18-55mm SAM zoom
lens and because I shoot 'RAW' as well as camera jpegs, these are jpegs converted from
the 'RAW' variants, which when imported into Adobe Lightroom 4.1 software appear
in colour as the software does not have a camera calibration profile to maintain
their black and white capture settings.
The following jpeg images are from
'RAW' image files captured with the Sony Alpha A57 and my lenses, the
full lens details are below each 1200 pixel image. They have been post processed using Adobe Lightroom
4.1 software.
Black + White Conversions - Fine
Art
These 3 images are examples of (Sony Alpha A57 SLT camera + Sony DT 35mm f1.8
SAM prime lens) colour 'RAW' conversions to monochrome with sepia, basic
black & white and antique gold tints applied. The 'RAW' colour converted jpeg is
immediately above this text and there is a camera produced jpeg in the
Sony DT 35mm f1.8 SAM Prime Lens - Camera Jpeg
Image Samples section.
Post Processing Steps -
The single
'RAW' image file was post processed using Adobe Lightroom 4.1 software to
produce 3 converted colour tiff files with adjusted exposure levels (0, +50,
-50)
Dynamic Photo
HDR 5 software was used to blend the 3 colour tiff exposure variants into a
single final colour tiff file to increase the dynamic range and create
contrasting highlights and shadows
The single
(blended)
colour tiff image file was then put back into Adobe
Lightroom 4.1 software to
convert, re-size and sharpen to
produce the 3 'tinted' jpeg examples for the web. Also,
for the black & white and the sepia variant, some light vignetting was
applied.
For those
photographers who wish to develop 'professional' skills in this type of post
processing to produce fine art prints then the best software to use is
Adobe Creative Suite 6
with it's ability to mask and layer sections of the 'RAW' image and facilitate
dodging and burning. In this way you can process the work with a 'one stop' software
solution whilst retaining the maximum image resolution and quality of the 'RAW'
file.
To take 'Fine Art' into the next level, Corel
Paint and a drawing tablet can be used.
Ease of Use
The Sony SLT A57 camera body is made of 'high grade' plastic with an
awesome grip. It has excellent manual controls for APERTURE
PRIORITY mode and the buttons on the body are well placed for using whilst
the electronic viewfinder is up at the eye. I have read that some photographers
find the menu system rather complex but I disagree. Once the main menu is
set-up, the sub FN button/menu is very easy to navigate and for everyday
shooting it does not require to be accessed that often - all the essential
button controls are on the body. The camera is a joy to use, especially with the
Sony DT 35mm f1.8 SAM lens with it's 52.5mm field of view and the photographer
can put aside all the 'gadgetry' and just concentrate on the basics for great
manual photography.
Electronic Viewfinder
The electronic viewfinder is without doubt most excellent and it really does
provide a 'what you see, is what you get' result. When I adjust the
camera for exposure, depth of field, so the visual experience of the scene
changes and is reflected in the viewfinder - press the shutter home and the
captured image is displayed in the viewfinder (my eye must be over the
viewfinder) including the final adjustment
from the camera's DRO dynamic range optimizer which opens up the dynamic range
of the camera jpeg image. I use the viewfinder with it's dioptre adjustment (no need for
glasses) to auto review my captured images - I now prefer it to the LCD screen. The
electronic viewfinder (immediately after the shot) displays the captured image (I have mine set-up for a 5
second playback) and I can zoom in using the ZOOM button or zoom out
using the AEL button (these button actions overrides the 5 second time
limit) and by lightly tapping the shutter button, I can clear the auto
review
and I am ready for another shot.
With the camera set-up in CREATIVE MODE=BW the
scene is displayed in the viewfinder or LCD
screen as black and white as well as the auto review of the captured camera BW jpeg
image.
Of course, if I want to simulate OPTICAL like a normal DSLR
optical viewfinder, I can switch off the auto review of a
captured image (main menu setting) and then my view of the scene
in the viewfinder becomes uninterrupted except for the flash of the shutter when the shot
is taken - great for street photography.
However,
if you are shooting a very uneven lighting scene - say a dark foreground
with a very bright skyline, the viewfinder may see a correct and visible
exposure on the foreground but the sky might be white and blown out. When you
make adjustments using exposure compensation to darken the sky a little, the
effect on the overall image invariably means that the foreground has darkened to
such an extent that you might not be able to see the outlines of objects in the
dark area. Normally in such circumstances a photographer would use a 2 stop
graduated filter fitted to the front of the lens (grey half top and clear bottom area)
to darken the sky by 2 stops and yet leave the foreground visible. I am writing about
extremes here, not everyday shots with normal lit subjects.
There is room for improvement
and this is really a non issue as I can
take some test shots or bracketing then pre-set and lock my exposure of choice. In the case of an optical viewfinder which can view the overall scene
(in virtually all light conditions) I would have similar problems,
especially as
it does not reflect any exposure adjustments. Therefore, I cannot be sure that the final captured image is correctly balanced
between the skyline and the foreground and so another (adjusted exposure) shot
(or test shots) may have to be taken.
I suspect as Sony moves forward with their next generation electronic
viewfinder, they will improve the 'dynamic range' visual experience in the
viewfinder before the shutter button is pressed.
LCD Screen
The LCD screen offers tremendous scene clarity when shooting or in playback mode
for viewing captured images.
I invariably use the camera with the LCD screen folded inwards against the body
to protect it. I open it up to use for 'above head' shots and for holding the
camera at my waist for low level shots and of course down on the deck for even
lower angles. The tilt swivel is fantastic and makes those awkward angled
shots real easy to take. Virtually all my shots are taken using the electronic
viewfinder but the LCD screen is preferred for night street photography as the
resolution in the display holds up better (in very dark conditions) than
the viewfinder.
Camera Autofocus + Centre Spot Focus + Focus Peaking
I found the Sony A57 autofocus to be accurate with the Sony DT 18-55mm
SAM zoom, my Tamron SP 70-300mm Di USD zoom and now my Sony DT 35mm f1.8 SAM
prime lens. I always shoot in
'rangefinder style' using the centre spot autofocus and when there are
obstructions or light fooling the autofocus (happens very rarely) I use
the manual FOCUS PEAKING facility coupled with the FOCUS MAGNIFIER
button by just flicking the lens barrel switch from AF to MF. Using the manual
focus ring on the lens, I can bring the scene area into focus, fine tune with
the help of the focus magnifier button and the area in focus is outlined with
the focus peaking sugar white frosting. The operational switch between AF to MF
can be achieved whilst the viewfinder is up at my eye.
Optimum Image
Quality
Considering that the Sony Alpha A57 SLT camera is an entry level 'consumer'
model that uses relatively in-expensive zoom and prime lenses it manages to
produce very good camera jpegs, in colour or black and white and the optimum apertures for excellent image quality with all three lenses are f5.6
- f8.
In the real world,
the final quality of an image file is
determined by a number of factors which control it's production. There are limits as to the
amount of editing control that the camera can apply to the final camera jpegs
bearing in mind that some users will edit their own settings in the camera menu
(saturation/contrast/noise reduction/sharpness) which may increase
the final camera jpeg image quality but also may decrease it. There is no doubt that post processing 'RAW' image files and 'tweaking' to
suit (resolution/noise/print size/viewing
distance) will deliver greater control and often
produce a more desirable result. Very often camera jpeg images are judged by
their appearance on a digital display (at various sizes) but in reality
they should be judged on their final print on the wall...............read
more on
Optimum Image Quality
Sony Image Data Suite Software I have tried using the Sony Image Data Suite Software package that comes bundled
with the camera but I remain unimpressed. It is ideal for anyone starting out in
post processing and wishing to experiment but it falls way short of the likes of
Adobe Lightroom 5.2 software. The Sony software lacks the tools for correcting
lens distortion and properly correcting chromatic aberrations which are the
basic essentials for anyone working with camera jpegs and RAW image files.
At this time, there are no such tools in my Sony Image Data Suite software
(version is 4.0.01.09151)
to correct chromatic aberrations in camera produced jpegs but in the case of
post processing 'RAW' image files, there is a limited function in the 'Highlight
Color Distortion Reduction Section' (a recent upgrade) but it could not
remove the purple fringing in some of my Sony DT 35mm f1.8 SAM prime lens 'wide
open' aperture f1.8-f2.8 test images.
Camera Frame Speed + Image Files
The Sony Alpha A57 SLT frame speed is awesome but for this diary, I have been shooting RAW + Jpegs image files
to suite the tastes of different readers and the combined file
writing to the memory card does slow down the 'frame speed' potential of this
exceedingly fast camera. In normal usage it would be a hard call between just
shooting camera jpegs or 'RAW' image files but if I wanted to completely control
the output and/or develop a 'style
of art' in my images with NIK or Adobe software, then I would shoot only the
'RAW' file variant. At a certain point in this diary after there are enough
reasonable camera jpeg image samples, I will shoot only 'RAW' image files.
Sony Alpha A57 SLT Camera + Sony DT 18-55mm f3.5/f5.6 SAM Zoom 'KIT' Lens
This is
a great value 'combo' for the money, together they are lightweight, reasonably
compact and feel great to use - the camera has a terrific grip for
holding the combo down at your side. Sony have gone out of their way to make the
camera just the right size in the hands, not to small, not to large and yet
ideal for manual control. The lens body is made of 'high grade' plastic but
don't let that fool you, it is very capable. The camera produced jpegs are good for image
quality up to ISO:1600 and in good light conditions the image
quality
at ISO:3200 is adequate.
The Sony DT 18-55mm f3.5/f5.6 SAM zoom lens is surprisingly sharp and
set at an aperture of around f5.6/f8 in the lower ISO:100/200 ratings and in the
right light conditions can compete for image quality with higher
specification lenses.
If the distance is pushed to far, especially at higher ISO with wider aperture
settings the camera jpeg quality can deteriorate but these manage to produce
pleasant enough images when printed at a relative size to the final resolution.
The build quality
reflects the low retail price but it really does not impact on the performance
it delivers. The camera makes a great job of correcting lens imperfections
(e.g. distortion at 18mm) in the camera produced jpegs. The image quality of
the Sony A57 camera can be improved but to make that delivery, one would
have to move up to Sony's professional grade lenses, although my prime lens of
choice would be the
Carl-Zeiss
Distagon T* 24mm f2 Prime ZA SSM AF 'prime' lens
which on the Sony A57 camera with it's 1.5x crop APS-C sensor, produces a 36mm field of view and on a Sony 35mm
'full frame' camera it is a native 24mm lens.
Sony Alpha A57 SLT Camera + Sony
DT 35mm f1.8 SAM Prime Lens
The
Sony DT 35mm f1.8 SAM prime lens set at an aperture of around f5.6/f8 in the
lower ISO:100/200 ratings and in the right light conditions can compete for image quality with higher
specification lenses.
It is compact, lightweight and when fitted to the Sony A57
camera (even with the lens hood fitted) it remains an excellent
lightweight combo.
The build quality reflects the low retail price but it really does not impact on
the performance it delivers.
This kit is so discreet it is great for street photography
and a pleasure to use. I guess if you wanted only one lens for the camera and
you liked the 52.5mm field of view (like me) then this lens fits the
bill. You can shoot a very broad range of photography with this lens and
although it is in-expensive and the body is made of 'high grade' plastic, it is
a wolf in sheep's clothing. It is not without it's faults and when using the
lens wide open in the aperture f1.8 - f2.8 ranges it can produce 'purple
fringing' chromatic aberrations in some camera jpeg and RAW images, such as
bright light reflecting of car chrome work and if the distance is pushed to far,
especially at higher ISO with wider aperture settings the camera jpeg quality
can deteriorate but these manage to produce pleasant enough images when printed
at a relative size to the final resolution. The Sony A57 camera firmware does
not always auto correct the
'purple fringing'
and the bundled Sony Image Data Suite software does
not have the tools to post process it out in camera jpegs (although there is
now limited adjustment for RAWs) - Adobe lightroom 5.2 software can
(manually) correct the camera jpegs and the RAW image file variants with
ease.
Sony Alpha A57 SLT Camera +
Tamron SP 70-300mm Di USD
Zoom Lens The Tamron SP 70-300mm Di USD zoom lens is one
of the lightest 70-300mm zoom lenses available today and is a pleasure to use. The combo's
overall weight is not a problem for carrying around and for 'hand holding'
whilst taking a shot. The zoom ring is in the correct position in front of the
manual focus ring and perfect for balancing the combo and zooming the lens. The Tamron is accurate, delivers camera jpeg images with excellent image quality up
to ISO:1600 and in good light conditions the image quality
at ISO:3200 is more than adequate. The lens combined with the
Sony DT 18-55mm f3.5/f5.6 SAM zoom and the Sony DT 35mm f1.8 SAM prime lenses
can be carried around in a shoulder bag without undue strain on the neck,
shoulders or back. In fact the overall weight and the shoulder bag size, makes
the Tamron along with the Sony A57 camera and the other two Sony lenses
ideal for travel offering a 27mm to 450mm field of view system. The Tamron is
not a £4K zoom lens, there are limitations as to the distance it can resolve,
especially at 300mm (450mm field of view) 'hand held' but provided
primary subjects such as people and animals are relatively large in the
viewfinder (at least a third in size) then the image quality is superb.
The Sony Lens Considerations + 35mm 'Full Frame' Route
Whilst the
Sony SLT A57 camera and the Sony DT 18-55mm f3.5/f5.6 SAM zoom lens or
the Sony DT 35mm f1.8 SAM prime lens are
probably all that a photographer requires to step-up from a point and shoot
compact camera - nevertheless, one should consider
the forward route with the Sony 'Translucent Mirror' technology. If
you are considering (at a later stage) moving up to a Sony 35mm 'full
frame' camera like the new Sony Alpha A99 SLT, then it might be prudent
to make the initial investment in Sony 'professional' lenses which can be used on an
'full frame' as well as a
APS-C digital sensor camera.In any case, as of the 12th September 2012, the Sony (APS-C)
DT lenses can be used on the
new 35mm
full frame
Sony Alpha A99.
Sony
Alpha A57 SLT Camera Image Files
I have used a (2005) Canon 5D MK I 'Full Frame' DSLR and Canon L
professional lenses for the last 6 years and enjoyed every minute (still do)
but the Sony Alpha A57 SLT camera with it's 'Translucent Mirror' technology has
proven it is capable of delivering very nice camera jpeg images in a compact and lightweight camera system
which is great to use. The lenses that I am using are relatively in-expensive
but if used correctly in the lower ISO:100/200 ratings, in reasonable light and
at aperture settings around f5.6/f8 it produces excellent camera jpeg files and
the 'RAW' image files post processed in Adobe Lightroom 4.1 software are not that far behind
my Canon. I am very tempted to purchase a
Carl-Zeiss
Distagon T* 24mm f2 Prime ZA SSM AF 'prime' lensas I am sure the Sony A57 digital sensor is
capable of producing greater resolution and the Zeiss is probably the ideal lens
to test it with.
Film SLR Camera Photographers
For anyone stepping up from a 35mm SLR 'Film' camera, who wants to shoot digital
camera jpeg images in monochrome or colour, the Sony A57 is the ideal choice.
Set the camera up for
monochromeor colour (quick Fn menu change)
and the electronic viewfinder and/or the LCD screen reflects the scene to match
your
monochromeor colour choice as well as in the final captured camera jpeg. If you also shoot 'RAW'
image files as well as camera jpegs, then you get a 'RAW' matching your camera
settings which can be
post processed in
Sony Image Data Suite software
and as there is a camera calibration profile in the software, even a monochrome
'RAW' can be processed in colour and vice versa. Please Note: - some software packages,
such as Adobe Lightroom 5.2,do not (as yet) have a camera calibration
profile, so any Sony A57 'RAW' image file (monochrome or colour) is
imported in as a colour variant but can be processed and converted to monochrome
if required.
A Worthwhile Investment?
The Sony Alpha A57
SLT camera delivers technology which (in many cases) can only be found in
cameras three times it's price. The layout of the
manual controls, excellent electronic viewfinder and tilt/swivel LCD screen make
it a pleasure to use and a worthwhile investment. The A57 camera first appeared
on the shelves around April 2012 but potential purchasers should be aware that
there is the possibility that Sony will update it with a newer model sometime around April/May 2013. From early readings of the recently announced Sony Alpha A58 SLT
camera, it would appear that the A58 is not a replacement model for the A57.
___________________________________________________
26th
February 2014
The Sony Alpha A57 SLT
camera with the Sony DT
18-55mm f3.5/f5.6 SAM zoom
lens is fast disappearing in
the marketplace. It has been
replaced by the new Sony A58
and
the
Sony 18-55mm Mark II kit
lens.
The A57 was and is one of
those special 'consumer
priced' cameras that appear
from time to time and often
remain unnoticed by the
masses. To my mind it is
superior to the new A58 and
appears to be one of those
cameras that Sony introduced
with all the essential
ingredients (including
the kit lens) that are
invariably only found in
cameras which are more
expensive. It's digital
sensor is an APS-C type with
16MPixels onboard along with
'Steadyshot' image
stabilisation and capable of
shooting excellent images in
low light.
If you want to capture
'quality' jpegs straight out
of the camera and a video
system that leaves some
expensive cameras trailing
in the dust then the A57 is
the answer and as a bonus,
it is compact and
lightweight.
The camera and
kit lens are now no longer
available but hopefully for those who are seeking the A57 equivalent, a new
camera model may appear in 2014?
26th February 2014 - UPDATE
The model above the Sony Alpha A57 SLT the
Sony Alpha A65 SLT camera body has now come down in
price and is on sale for around £494.99 vat inclusive in the UK. It offers a superior electronic viewfinder, a higher
resolution
digital sensor, similar manual controls and menus to the A57 and the only
downside is that 'marginally' it has slightly more noise in the images at
ISO:3200 and above.
 prime lens with it's lens hood
reverse fitted. With either combo in place, there is just enough room at the
side for the other lens. The front pouch has room for spare memory, cleaning kit and a
spare battery.
I still have to test this bag for room when my lens hood for the 18-55mm
arrives?
prime lens with it's lens hood
reverse fitted. With either combo in place, there is just enough room at the
side for the other lens. The front pouch has room for spare memory, cleaning kit and a
spare battery.
I still have to test this bag for room when my lens hood for the 18-55mm
arrives?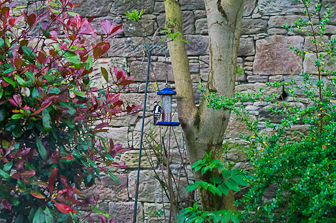 no
doubt in my mind that the Sony SLR A57 camera digital sensor and the
Sony 18-55mm f3.5/f5.6 zoom lens are capable of delivering excellent
images. The following image is an extreme example of pushing the lens
and sensor to the maximum. It was taken through thick glass and the
camera/lens were 'hand held' about 12" from the inside of the glass as
any nearer and (from previous experience) the woodpecker would
have noticed me and immediately flown off.
no
doubt in my mind that the Sony SLR A57 camera digital sensor and the
Sony 18-55mm f3.5/f5.6 zoom lens are capable of delivering excellent
images. The following image is an extreme example of pushing the lens
and sensor to the maximum. It was taken through thick glass and the
camera/lens were 'hand held' about 12" from the inside of the glass as
any nearer and (from previous experience) the woodpecker would
have noticed me and immediately flown off.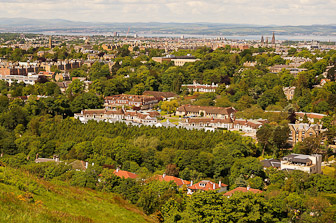 The lens was set for 55mm (82.5mm
field of view)
and the combo was 'hand held'.
The jpeg was
heavily cropped, re-sized and sharpened
in Adobe Lightroom 4 software but I have left all the other settings,
including the auto white balance as it was shot. The small version is
the original scene and the larger version is the cropped example.
The lens was set for 55mm (82.5mm
field of view)
and the combo was 'hand held'.
The jpeg was
heavily cropped, re-sized and sharpened
in Adobe Lightroom 4 software but I have left all the other settings,
including the auto white balance as it was shot. The small version is
the original scene and the larger version is the cropped example.
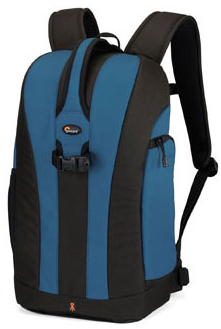

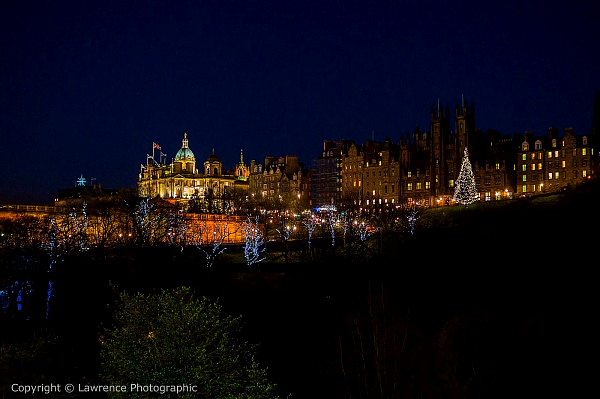


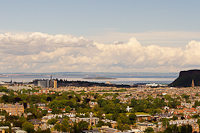
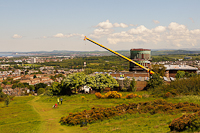
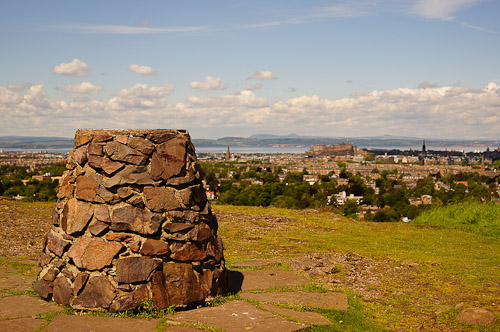
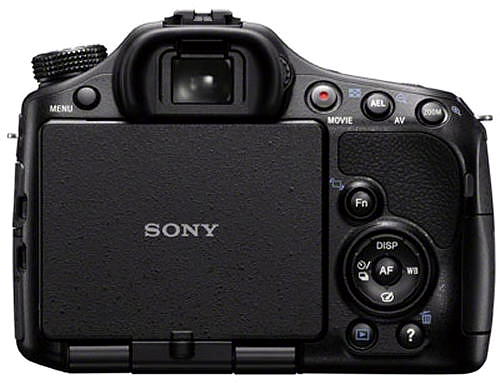
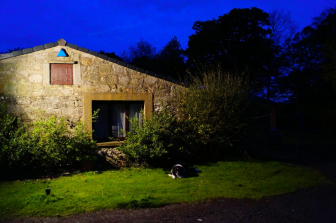
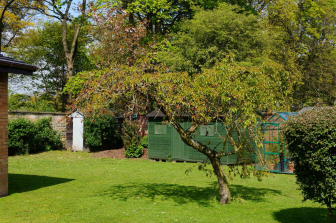
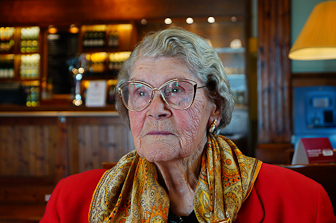
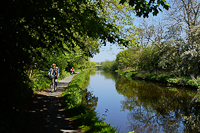

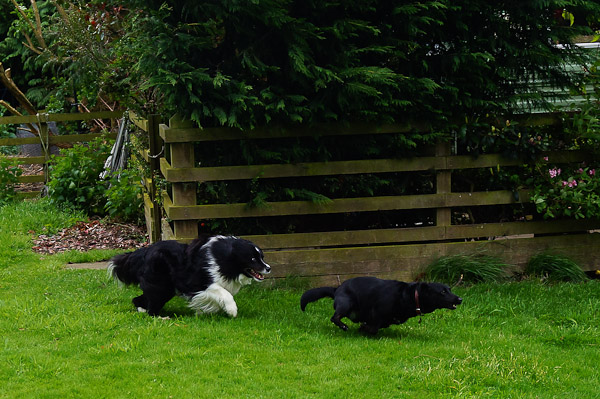

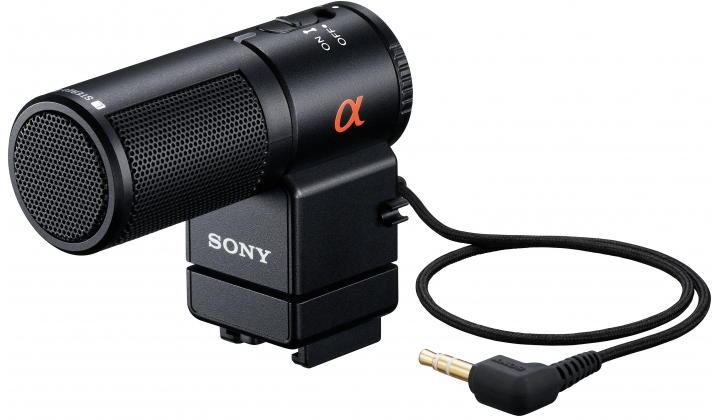
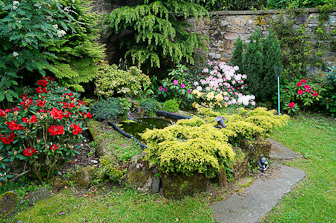


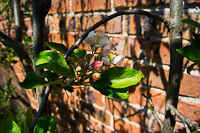
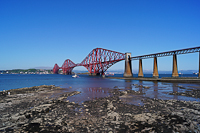
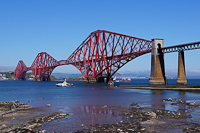
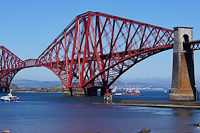
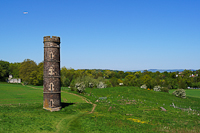

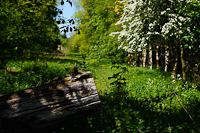
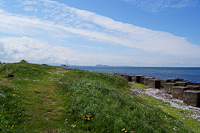
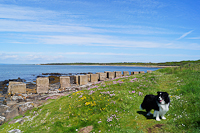
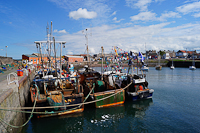


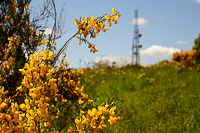


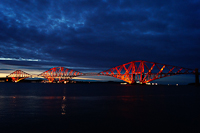
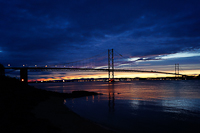
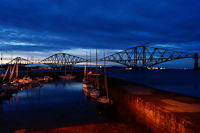
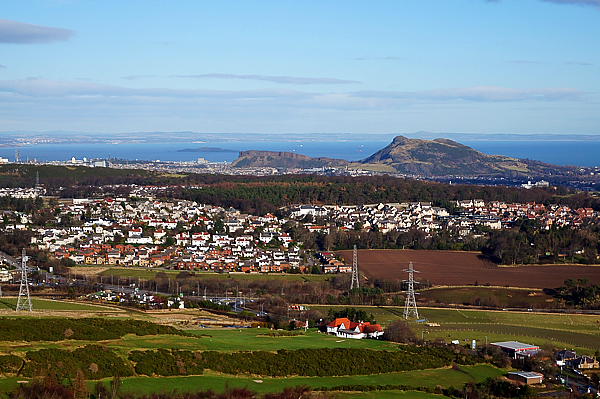
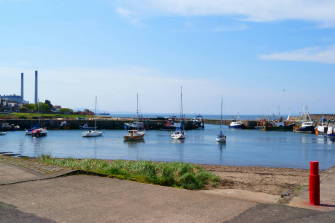


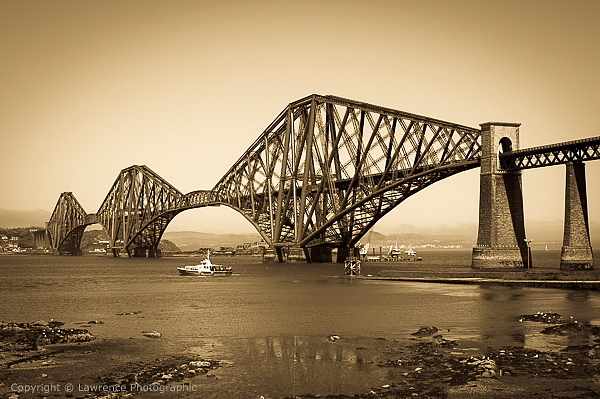
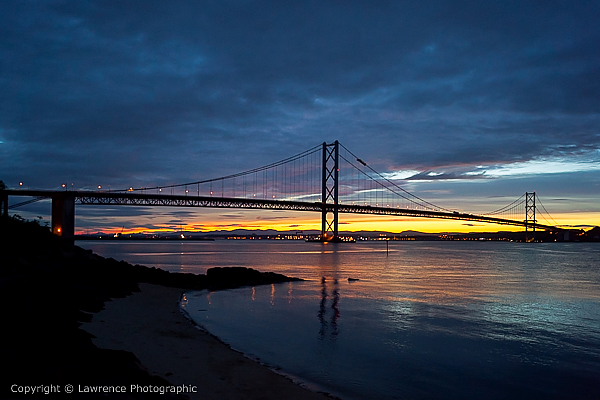
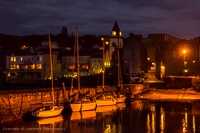
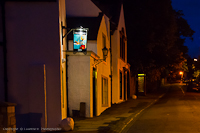
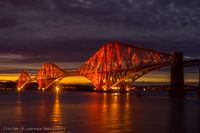
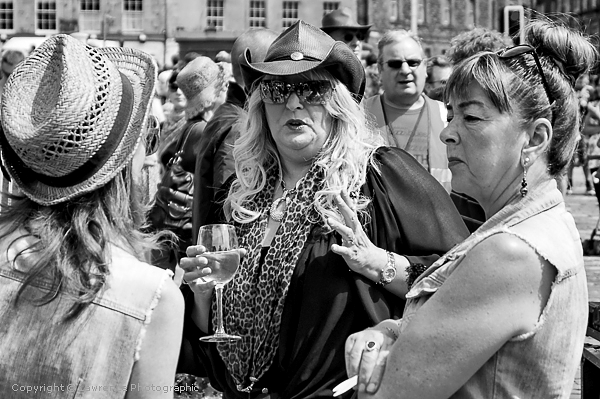
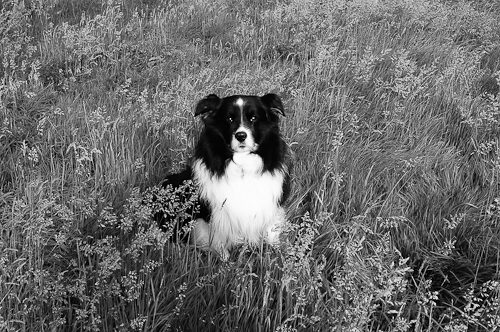
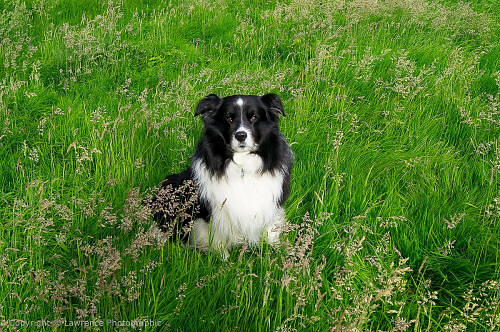
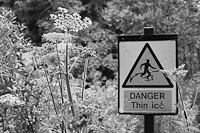
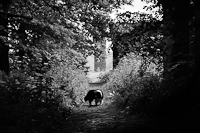
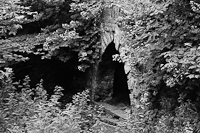
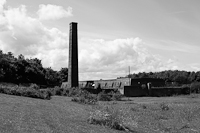


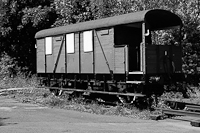


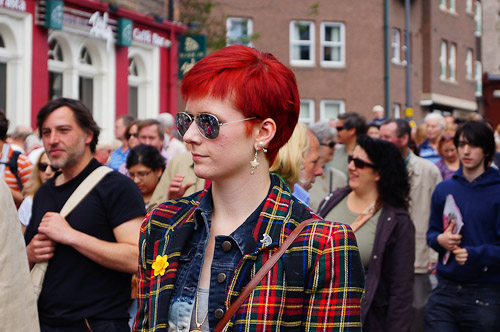
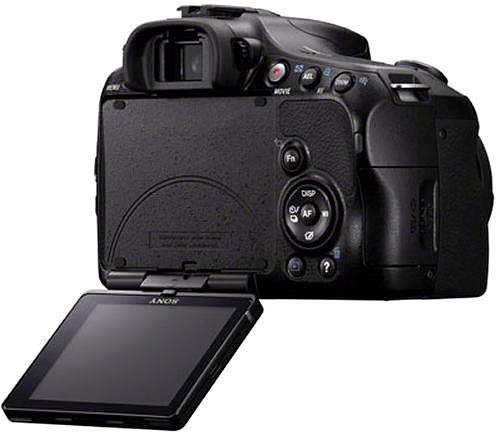


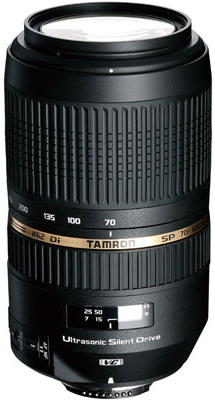
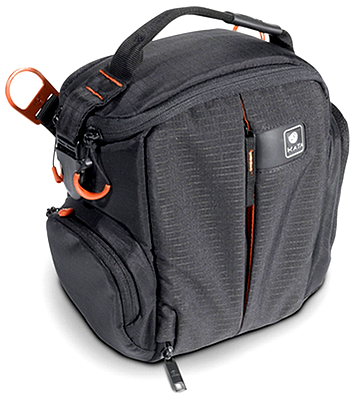 multi-featured
professional holster designed to provide the best carrying, storage and working
solutions. Lightweight and Protective it will cater to the smallest detail of a
professionals working needs. In true holster fashion the Access provides rapid
''pull to shoot'' opening to a main compartment that holds a small to medium
DSLR with a 16-35 lens attached.
multi-featured
professional holster designed to provide the best carrying, storage and working
solutions. Lightweight and Protective it will cater to the smallest detail of a
professionals working needs. In true holster fashion the Access provides rapid
''pull to shoot'' opening to a main compartment that holds a small to medium
DSLR with a 16-35 lens attached. 


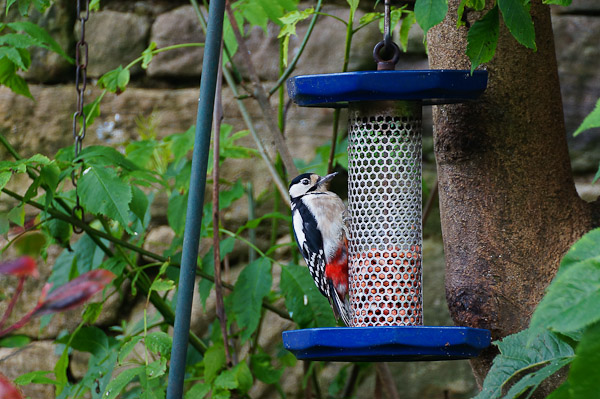
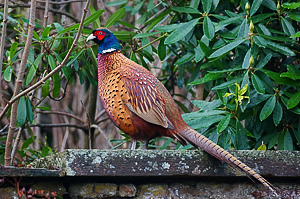
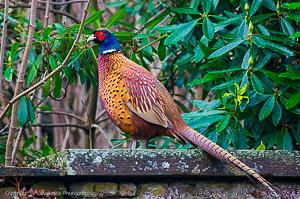
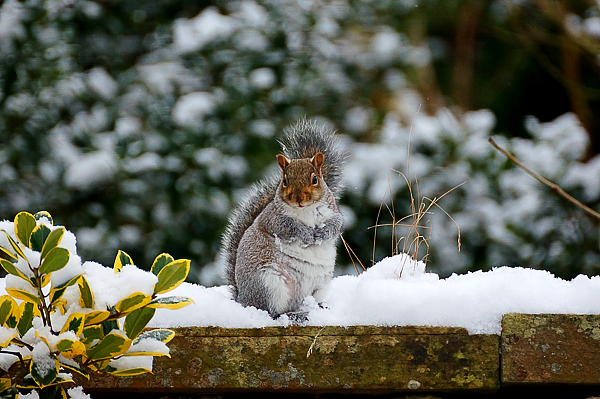
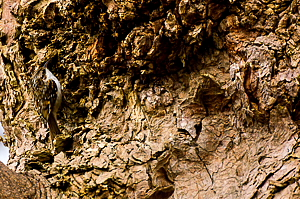
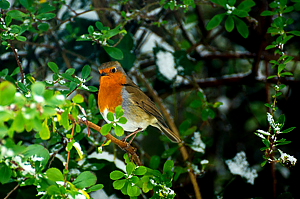
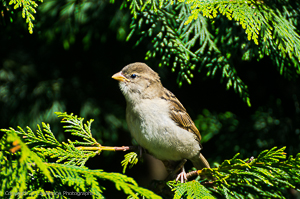
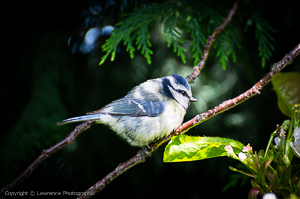

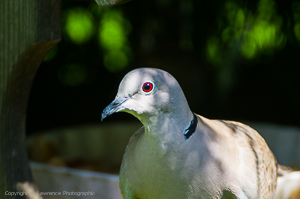
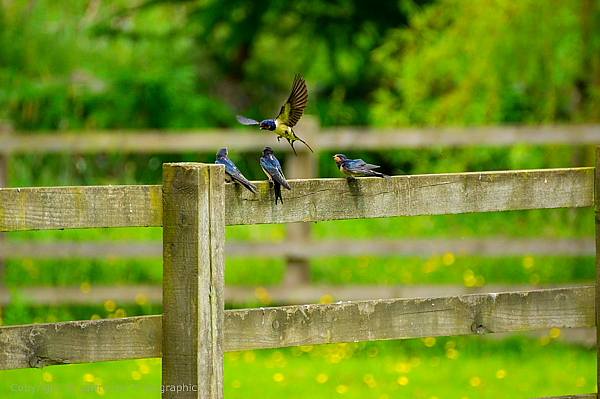
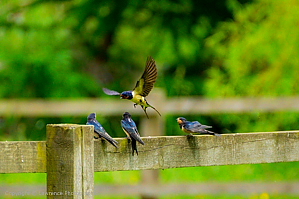
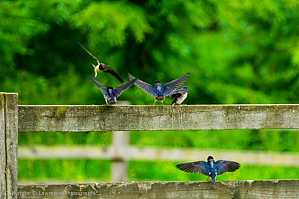
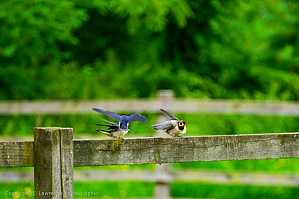
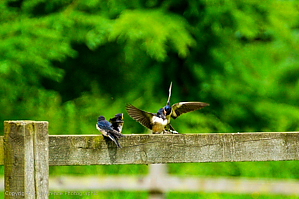
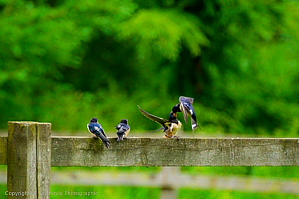
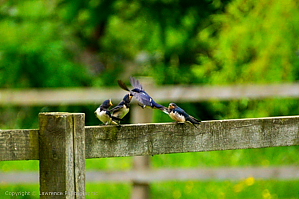
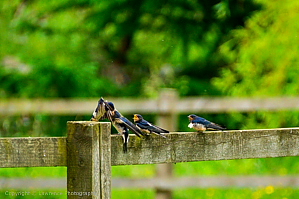
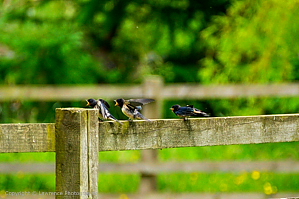
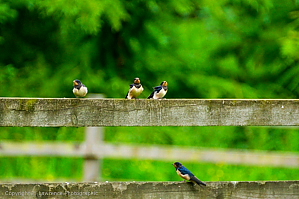
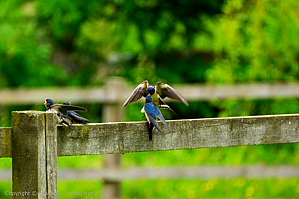
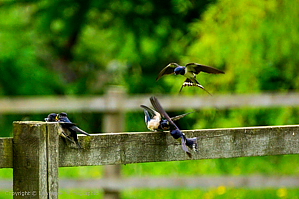
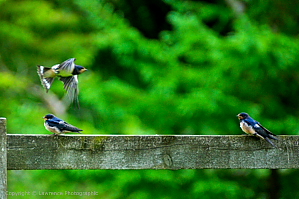


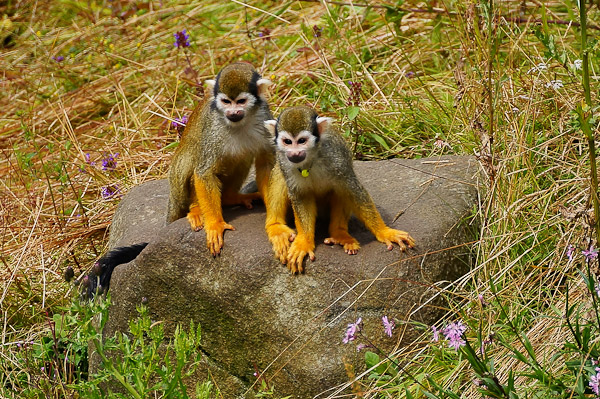


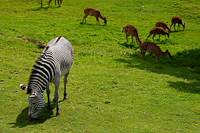
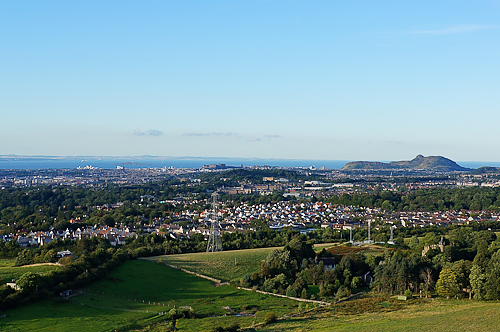

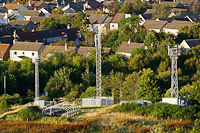
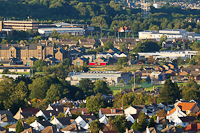
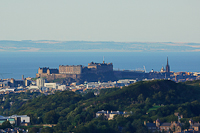
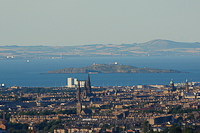
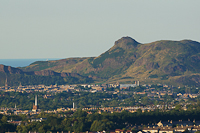
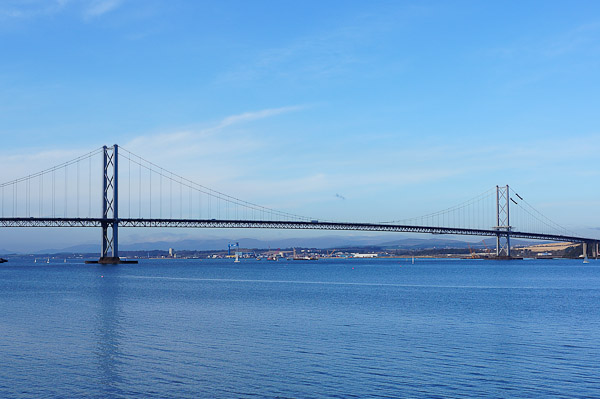
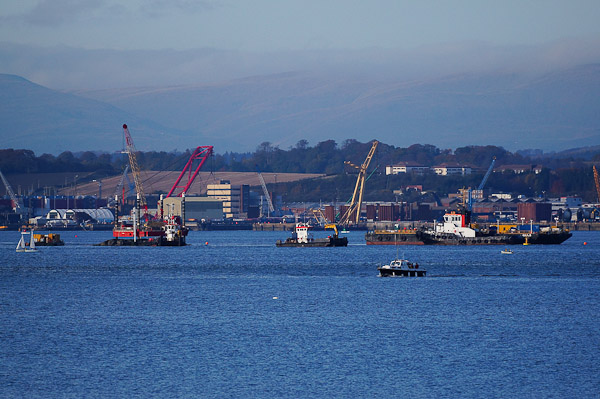
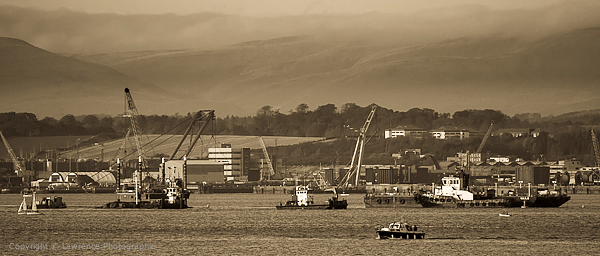
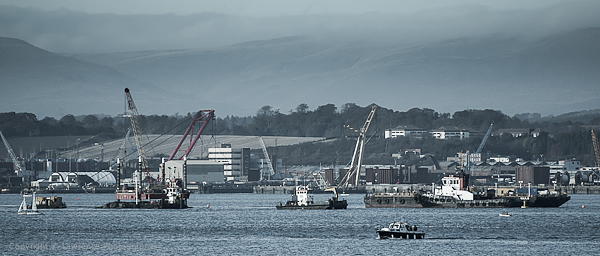

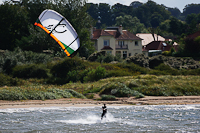

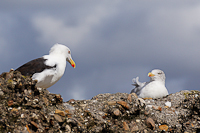

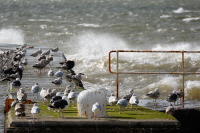

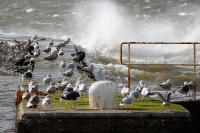
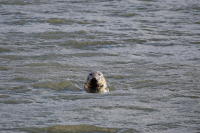


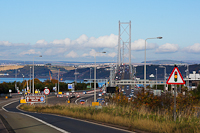

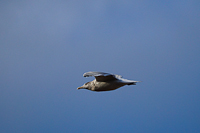
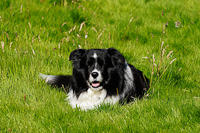
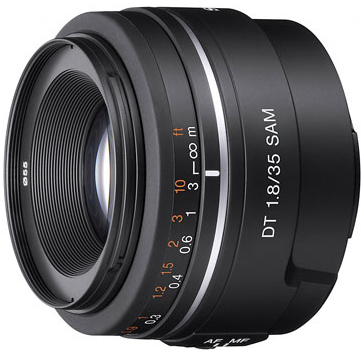 optical qualities it is actually a better choice than the
"mighty" (albeit outdated) Sony 35mm f/1.4 G - Sony's
professional grade full format 35mm lens. The AF performance of
the new SAM drive is pretty decent and we didn't really
experience any issues with AF accuracy during our field testing"
optical qualities it is actually a better choice than the
"mighty" (albeit outdated) Sony 35mm f/1.4 G - Sony's
professional grade full format 35mm lens. The AF performance of
the new SAM drive is pretty decent and we didn't really
experience any issues with AF accuracy during our field testing"