|
Panasonic G6
Camera Review
This is an ongoing review on my
continuing experience using the Panasonic Lumix G6 compact
system camera.
I am not a professional photographer, photography for me is a hobby and a continual learning curve.
I receive no remunerations from any third party mentioned
herein. However if you have enjoyed your visit or any of my
articles have assisted you - Please consider donating
(the minimum is
£2)
to the
Sick Kids Friends Foundation
|
 |
Last Updated
- 23rd May 2020
INDEX
Introduction
March 2017 - Please
Note:
The G6
was replaced
with
the
Panasonic G7 Micro Four Thirds Camera which
is still available and the latest variant, the
Panasonic G80 Micro Four Thirds Camera. I
have not upgraded from the G6 as I am using the G6 for street
'stills'
photography.
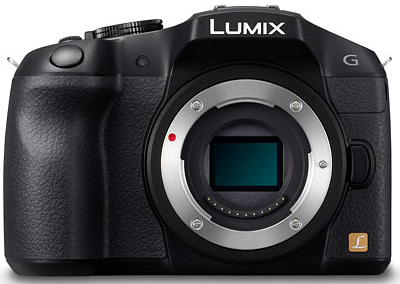
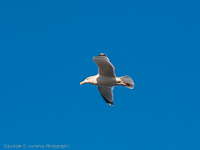
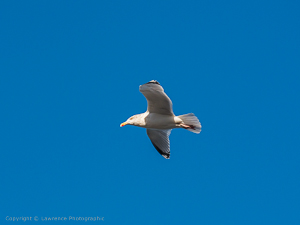
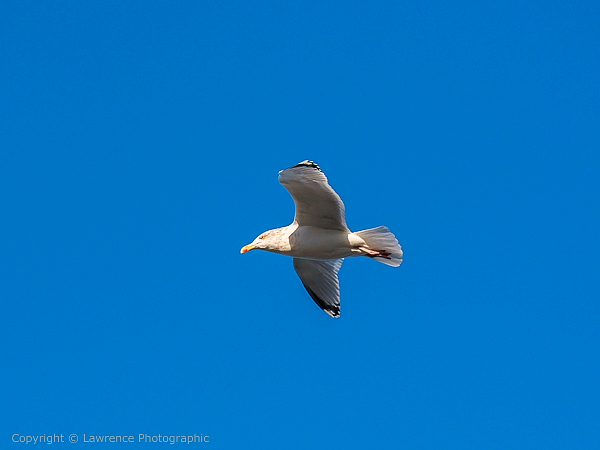
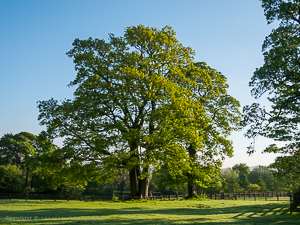
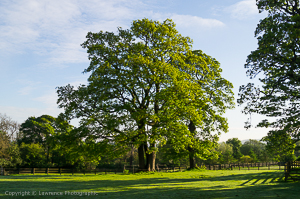
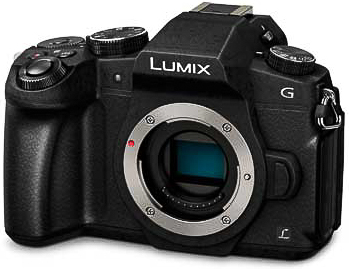 The
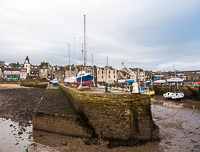
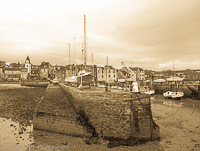
Panasonic G6 sensor, for image quality, more than holds it's own
against the G7 and the new G80 (G80 image on the right). The
Panasonic G6 sensor, for image quality, more than holds it's own
against the G7 and the new G80 (G80 image on the right).
This is an ongoing review of the
Micro
4/3rds
Panasonic
G6 camera which I will be using during the course of 2014
for social and casual photography, including street, portraits
and wildlife.
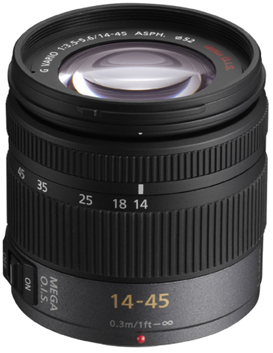
The lenses that I will be using are the
Panasonic Lumix 20mm f1.7 ASPH prime
and the Panasonic Lumix
14-45mm f3.5/f5.6 OIS zoom lens. For my casual and social use at
the zoo and when visiting nature reserves and around my home, I
will be using the Panasonic Lumix 100-300mm f4/f5.6 OIS zoom lens.
I first purchased a Micro 4/3rds camera in 2009 and the
Panasonic GF1 with it's 'rangefinder style' body served me well but with the Lumix 100-300mm lens it
lacked the image quality at ISO:1600 to completely fulfill my
casual wildlife photography. Another problem was the 'clip on'
electronic viewfinder
which had a restricted viewing screen and low resolution.
Prior to purchasing the Panasonic G6 camera body, I also
researched the Micro 4/3rds Olympus OM-D E-M1 and the Panasonic
GX7 cameras and concluded that at ISO:1600 rating, the image
quality vs noise was very similar. This was not apparent in the
camera produced jpegs as the Olympus had the lead. However, as I
intended to shoot 'RAW' image files with the GF1 replacement and
develop them using
Adobe Lightroom 5.3 Software,
I downloaded 'RAW' sample images
for all 3 cameras
from the internet
and concluded there was no
discernable image quality differences with A3 size prints.
I was left with the electronic viewfinder technology to take into
account. From the 'feedback' from gear forums and professional review
sites, I expected the electronic viewfinder (4:3 ratio viewing) to
show an advantage to the E-M1 with the G6 OLED version a shade behind it
and the GX7 coming last. My shooting style is old school, aperture
priority mode, manual controls and using the viewfinder for 90% of my
shots. This works well with my Lumix 100-300mm zoom lens (200mm-600mm
field of view) and either the Olympus OM-D E-M1 or the Panasonic G6
camera would prove ideal.
Purchase Costs
Once I established that either camera was fit for my purpose,
well
the
G6 body costing £399.00 was a no brainer over the E-M1 at
£1,299.00 so I purchased the G6 on the 7th January 2013 and
started this article. I followed the purchase up with
a spare battery, a SanDisk 16Gb 95M/bits sec SDHC memory card
and a Joby Black Wrist Strap costing £128.98 which totals
at £527.98 for the camera body and the accessories.
Shooting 'RAW' Image Files + Print/Digital Sizes
With the Lumix G6,
I intend to shoot 'RAW' image files, develop them using Adobe
Lightroom 5.3 software and convert to tiff and jpeg formats. Print
for framing at 16" in width
(around A3 size) and for a digital display on my website re-size and
re-sharpen to around a 1650 pixel width a converted
jpeg image.
More information regarding the Panasonic G6 Compact System
Camera on the
Panasonic Website and more
information regarding the
Panasonic Lumix Lenses
____________________________________________________
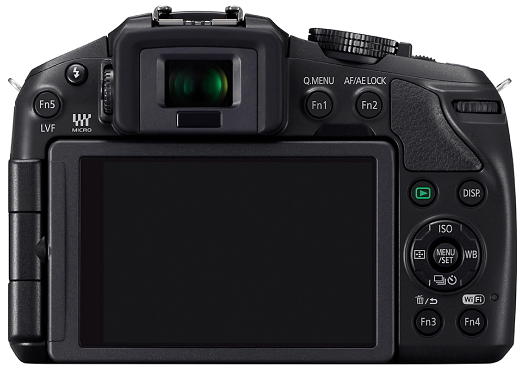
Electronic Viewfinder
The G6 electronic viewfinder or the 'live view' finder because it
is a reflection of the LCD screen is a massive improvement over
my 'clip on' electronic viewfinder for my current Micro 4/3rds
Panasonic GF1 camera.
The G6 is a joy to use with my
Panasonic Lumix 100-300mm f4/f5.6 OIS zoom lens
and the electronic viewfinder with it's 4:3 very wide viewing
area is fantastic. Thankfully whether I use aspect ratio 4:3,
3:2 or 16:9 the viewing width remains constant and the
resolution is terrific without any tearing during panning.
I like the G6's slightly larger camera body and the combo is now
more in proportion, offering a better balance and control. When
you are working with a zoom lens that offers a 200mm-600mm field
of view, the electronic viewfinder is a must and the
programmable control buttons on the G6 allow me to shoot with
the EVF up at my eye all the time.
The electronic viewfinder is
well built and the dioptre
control is an absolute
pain to adjust as it is small and very tight. However, on the
plus side, once it is set, it is unlikely to ever accidently
move and change it's setting - I like that a lot.
I don't have any complaints regarding it's use - it
just does what it is supposed to do!
____________________________________________________
About the
Camera & Accessories
Coming from a Point & Shoot Camera
For any photographer who is coming from a point and shoot
compact camera the Panasonic G6 camera offers an excellent
step-up to a compact system camera and interchangeable lenses
which are reasonably priced. The camera can still be used in
fully automatic point & shoot mode but the technology is there
for any photographer who wishes to manually operate the camera
and become more creative with their photography.
The Effect of the
Digital Sensor on the Lenses
The Micro 4/3rds Panasonic G6 compact system camera employs a
16MPixel digital sensor which has a 2x crop effect on the focal
length of a lens. This means that a 20mm lens remains a 20mm
focal length (in true terms) but the sensor crops into
it, narrowing the view to produce (double the focal range)
a 40mm field of view. Therefore my 100-300mm zoom lens is
actually delivering a
200mm-600mm field of view
BUT the final image remains at 16MPixel resolution even
at the 600mm
field of view.
My Shooting Methodology
The Lumix G6 has a menu control structure that lets you set it
up for how you shoot images. Many photographers will elect to
use the camera touch screen as they may be familiar with touch
screen mobile phones and others may expand on this by using the
Wi-Fi controls to upload images to their personal computer,
tablet and the internet. Unfortunately, I am 'old school' from
the 1960's so I will be using the camera in 'retro' style with
the emphasis on the electronic viewfinder and the manual button controls.
Electronic Viewfinder
I will use the electronic viewfinder (with the LCD screen
folded into the body) for 90% of my photography. It is set-up in the menu to
be always on when the LCD the screen
is turned in against the body. The electronic viewfinder will
remain on when the camera is powered up and even when I remove my
eye from it.
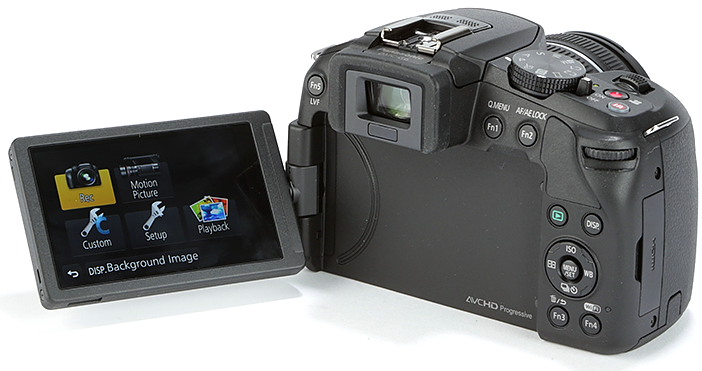
LCD Screen
I will have my LCD screen facing inwards, locked
against the camera back and the EVF/LCD eye switch set to off in
the menu which allows me to
set the electronic viewfinder up for use without the LCD coming
on when I remove my eye. To use the LCD screen, I can then
unlock it, pull it out to reveal the screen for viewing (see
image below) and it switches on automatically whilst
switching the electronic viewfinder off. I can turn
the LCD screen over backward 180% and then forward 180% to the
original position before locking it back into it's recess with
the LCD screen again facing inwards against the camera back. As I plan to use mine,
with the screen turned in against
the body for 90% of my shots, I will not be purchasing a
protective glass shield for it.
I plan to use the LCD Screen for low/high
shooting (over fences, low on the ground) and for certain
types of action shots or when using a
tripod. I prefer to use the shutter button, so I do not intend
to use the touch screen.
Camera Shake/Blurred Image and Image Stabilisation
The G6 compact system employs (in some lenses) image
stabilisation which simply means that it allows you to hold the
camera and OIS lens at a lower shutter speed than normal.
In
lower light conditions this will allow you to lower the ISO
rating whereby the image quality is raised vs the noise in the
final image. However, there is a camera shake/blurred image slow
shutter speed threshold for every lens, even with image
stabilisation and the photographer will eventually determine
that threshold. A lower ISO rating and a
slower shutter speed for night time photography will not prevent
the blur in the movement of people walking in the street. Image
stabilisation does not prevent the blur in fast moving wildlife
or sports, only a faster shutter
speed will accomplish that - although by lowering the shutter speed and panning the camera sideways
with a fast moving subject whilst pressing the shutter button,
can sometimes produce a 'speed atmosphere' in the image as most
of the subject is in focus but speed blur is added to the
background.
Memory Card + Spare Battery + Wrist Strap
I
 purchased a SanDisk 16Gb Extreme Pro
95MB/s SDHC UHS-I memory card to use with my purchased a SanDisk 16Gb Extreme Pro
95MB/s SDHC UHS-I memory card to use with my
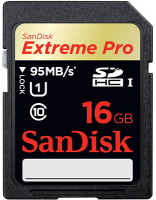 G6 and it offers a
very fast write speed for my 'RAW' image files and full HD video. So far, I have
not experienced any problems with the card and when in use, the
camera menu system informs me that it is good for 800 shots. I
formatted the memory card using the camera menu system
(FORMAT) before using it. G6 and it offers a
very fast write speed for my 'RAW' image files and full HD video. So far, I have
not experienced any problems with the card and when in use, the
camera menu system informs me that it is good for 800 shots. I
formatted the memory card using the camera menu system
(FORMAT) before using it.
The battery that comes with the camera is smaller than the one
that I used with my GF1 and it does not appear to offer
me the same number of shots per charge. In any case because I
will be
using the 100-300mm zoom lens for a larger number of
shots and
 probably some video,
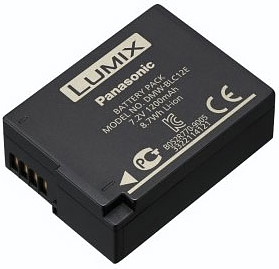
I decided to purchase a spare
Panasonic BLC12E battery. probably some video,
I decided to purchase a spare
Panasonic BLC12E battery.
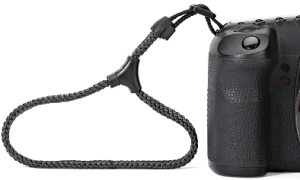
I purchased a Joby wrist strap so that I could carry the camera without fear of it falling to the ground. Wrist
straps are not as easy to work with as a neck strap
because you always have your right hand rendered useless thanks
to the camera being attached to it.
However, the wrist strap makes the camera more discreet as I
carry mine down by my side using the grip to hold it. The Joby
is one of those wrist straps that is not going to accidently
loosen and
slip of your wrist. It automatically draws tight when you put it
on and pick the camera up but it can be a real pest to get off
your wrist when you are finished shooting.
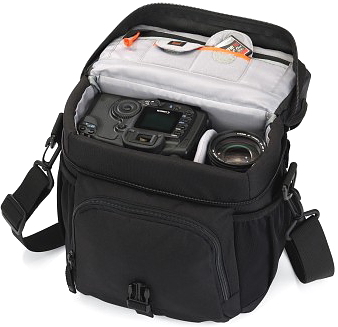
Shoulder Bag for the
Panasonic G6 Camera
I like the 200mm-600mm field of view from the Lumix 100-300mm OIS zoom and when
mounted on the G6 the combo offers great value for money, especially as the
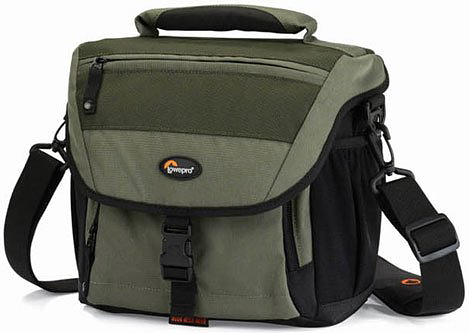 lens is equipped with image stabilisation.
In relation to other zoom lenses of a similar focal range, especially DSLR
lenses, the 100-300mm is compact and
lightweight and when
fitted to the G6 camera body the combo is measuring out at 7.5" in length
(front cap to rear of viewfinder) and that includes a UV filter and lens cap fitted. lens is equipped with image stabilisation.
In relation to other zoom lenses of a similar focal range, especially DSLR
lenses, the 100-300mm is compact and
lightweight and when
fitted to the G6 camera body the combo is measuring out at 7.5" in length
(front cap to rear of viewfinder) and that includes a UV filter and lens cap fitted.
I live in Scotland so I am exposed to many different weather patterns in a single day,
this is a country that can start of in the morning with beautiful sunshine,
change to hail by lunchtime, sunshine again and then rain.
Finding a shoulder
bag for the Panasonic G6 fitted
with a Lumix
100-300mm zoom can prove quite difficult, especially if you
wish to keep the combo assembled and top load it into the bag
for easy retrieval. It is even more difficult if you
also want to carry around a general zoom and a prime lens as
well. There has to
be certain pre-requisites in the design AND for recommendation purposes, it has
to be still available.
I already own such a bag which matches my
pre-requisites -
Weatherproof with proper waterproof built in 'pull out' slip cover
(part of the bag)
Takes the G6 body, Lumix 100-300mm zoom, Lumix 20mm prime and Lumix 14-45mm
zoom lenses + accessories
The bag will accept the Panasonic G6 with any lens fitted
(holster
section)
The bag weighs only .58g
Still available for sale
Most
 shoulder bags are black but my
Lowepro Nova 170 AW shoulder bag is
brown/green
(black is an option) in colour. It is deep enough to take the G6 camera with the Lumix 100-300mm zoom lens fitted
(in the holster section) with
enough room in the side section to accommodate my 14-45mm and 20mm lenses. shoulder bags are black but my
Lowepro Nova 170 AW shoulder bag is
brown/green
(black is an option) in colour. It is deep enough to take the G6 camera with the Lumix 100-300mm zoom lens fitted
(in the holster section) with
enough room in the side section to accommodate my 14-45mm and 20mm lenses.
The front pocket is large enough to take all the necessary spares, like
filters, spare battery, cleaning kit and even the Lumix 20mm lens.
The front flap has a zip slot and there is a zip slot in the rear of the
bag for holding large papers. Inside the main lid are pouches and a zip
section for memory cards and other small accessories.
The Lowepro Nova
170 AW is weatherproof but like other bags it could eventually take in
'heavy rain' and surround the camera gear in dampness.
However,
the Nova also has a pull out 'waterproof' plastic cover that is
permanently stitched to the front inside base. All you do is open the
tab and pull out the shaped plastic sheet from it's slot which then
covers the entire bag and prevents heavy rain seeping through into the
gear.
If the bag is exposed to
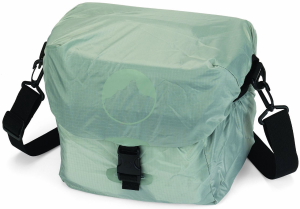 heavy rain, I always dry out the entire
kit when I get home, I remove the camera and lenses and along with the bag fully opened
(including the hanging plastic cover) I dry the lot in a warm
room - I always separate the gear, well away from the bag to ensure that
any dampness cannot creep into the gear whilst it is drying. heavy rain, I always dry out the entire
kit when I get home, I remove the camera and lenses and along with the bag fully opened
(including the hanging plastic cover) I dry the lot in a warm
room - I always separate the gear, well away from the bag to ensure that
any dampness cannot creep into the gear whilst it is drying.
Another tip
is to always keep a sizeable
silica-gel
pack with your gear in the bag at all times so that any dampness is
drawn to the silica-gel pack and not to the glass of your lenses or the
camera body. These
silica-gel
packs can invariable be found in the original manufacturers' delivery boxes.
The Lowepro Nova 170 AW shoulder bag holds a great deal of kit but
the external dimensions measure out at 24.2 x 18 x 24.5 cm (9.53
x 7.09 x 9.65 in) which makes it around medium size and of course it
only weighs in at .58g which compliments the already lightweight
Panasonic Micro 4/3rds gear.
Digital 'RAW' Image Files + Software Development
As I have mentioned before,
I intend to shoot 'RAW' image files, develop them using
Adobe Lightroom 5.3 Software
and convert to tiff and jpeg formats. Print for framing at 16" in width
(around A3 size) and for a digital display on my website re-size and
re-sharpen
to around a 1650 pixel width a converted jpeg image.
____________________________________________________
Main
Controls & Shooting Images
I will use the camera's 'electronic live view finder' for 90% of
the time and the LCD screen for high and low shots as well as
for shooting using a tripod.
The camera will be set in
Aperture Priority Mode
-
Top Wheel dial set to
A
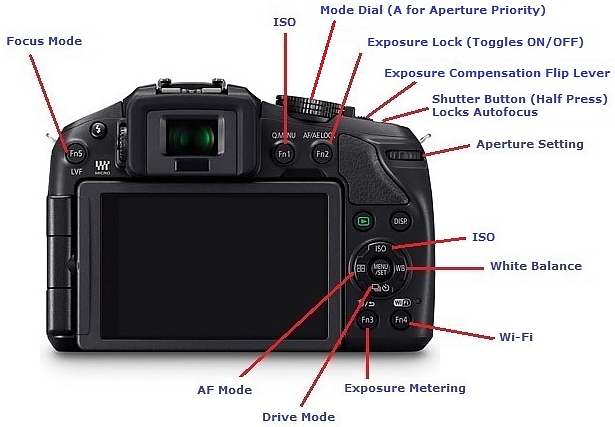
CAMERA MENU CHANGES
The camera menu defaults have been left with the exception of
these menu settings -
Rec Menu
Aspect Ratio = 4:3
(this is a default setting)
Quality = RAW (no jpeg)
Focus Mode = AFS (this is a default setting)
Custom Menu
AF/AE Lock = AE Lock
(this is a default setting - exposure lock only)
AF/AE Lock Hold = ON (this enables the AF/AE button to lock
only the exposure - toggle ON/OFF)
Shutter AF = ON (this enables a half/press/hold of the shutter
button to lock the autofocus)
Eye Sensor AF = OFF
MF Assist = Peaking Aid
Peaking = ON
Highlight = ON (warns of blown highlights in the image by
blinking the blown area in auto review or playback)
Auto Review = 4 sec (holds the captured image in the
viewfinder or LCD screen after the shot)
Fn Button Set -
|
Fn 1 |
ISO Button (doubles as
the rear paddle top key) |
|
Fn 2 |
AE Lock Button (exposure
toggle ON/OFF lock |
|
Fn 3 |
Exposure Metering Mode
(Multi Metering/Center Weighted/Spot) |
|
Fn 4 |
Wi-Fi |
|
Fn 5 |
Focus Mode
(AFS single shot/AFF flexible shot/AFC continuous
shot/MF manual focus) |
Eye Sensor/LVF/Monitor Auto = OFF
Shoot W/O Lens = ON (this is for using with my adapted Nikon
AI-S manual focus lenses)
CAMERA
CONTROLS
- Using Live View Finder
Brief Summary of Controls - See Menu Settings Above
-
Aperture Priority -
Top large control dial - set to A for
aperture priority
-
White
Balance AWB - Press right WB of rear set control pad -
calls up a menu
-
use top/rear wheel to highlight selection OR use the set control pad
to scroll the menu and set
to AWB -
press set button in the centre or tap shutter button to set
-
Metering
Mode
Multi Pattern -
Press Fn3 Button - calls up a menu -
use top/rear wheel to highlight selection OR use the set control pad
to scroll the menu and
set
to multi pattern exposure metering -
press set button in the centre or
tap shutter button to set
-
Shutter Drive Mode Single Frame Shot -
Press
base
of rear set control pad -
calls up a menu
-
use top/rear wheel to highlight selection OR use the set control pad
to scroll the menu and
set
to single -
press set button in the centre or
tap shutter button to set
-
Focus Mode AF-S Single - Press Fn5 Button - calls up a menu -
use top/rear wheel to highlight selection OR use the set control pad
to scroll the menu and set
to
AF-S -
press set button in the centre or tap shutter button to set
-
AF Mode 1-Area (Centre Spot Focus) -
Press
left
of rear set control pad - calls up a menu
-
use top/rear wheel to highlight selection OR use the set control pad
to scroll the menu and
set
to 1-Area -
press set button in the centre or
tap shutter button to set
-
Aperture Setting Control -
Rear top/right of camera recessed
knurled wheel - For setting up the
aperture f# stop which is shown in the viewfinder and/or the
LCD Screen -
ISO
- Fn1 Button on top rear/centre of camera - calls a menu -
use continual presses of Fn1 button to toggle through all the ISO
ratings -
or use top/rear wheel to highlight selection - or use
set control pad to scroll the menu -
press set button in the centre or
tap shutter button to set -
Exposure Compensation Meter - Flip Lever on top of camera
behind shutter button - calls a menu - use flip lever to
adjust + is right - is left - adjust as necessary
-
Exposure Lock - AF/AE - Fn2 button - set to 'toggle' auto
exposure lock on and off when pressed
-
Locking Autofocus Point - Half press of shutter holds focus
point locked until pressed full down or released
-
Capture Instant Playback - After the shot
is taken the image is played back in the electronic viewfinder or LCD
screen for 4 seconds and any blown areas are blink highlighted - a tap
of the shutter button instantly clears
-
Playback - Green arrow button on the rear/right
of the camera - for previewing captured images
Expanded Detail of Camera Manual Controls
(Aperture Priority) Top Control Dial - Set to A
(large round wheel on top of camera)
I
will be shooting in Aperture Priority Mode which means
(very simply) that I will select my aperture of choice to
suit the style of image (wide open e.g. f1.7 for a very
shallow focus area in the scene or
stopped down e.g.
f8 for a deeper focus area), select my ISO setting (e.g.
ISO:200 for a slower shutter speed or
e.g. ISO:1600 for a
faster shutter speed) and the camera will automatically select
the shutter speed pertaining to the aperture and ISO settings. I can increase the shutter speed by
raising the ISO rating (e.g. 200 to 400) or lower the
shutter speed by decreasing the ISO rating
(e.g. 400 to 200) but the higher the ISO rating
the more noise (speckle) will start to appear in the final captured
image.
Aperture priority mode has one weakness, once you have set up
the menu system in the camera and start to use aperture priority
mode - if you you then change a setting (e.g. the ISO:
rating) the menu system will retain that setting in aperture
priority mode until you again change it. This means that you are
in total control of the camera but you must check your settings
and relate to them at all times as you may use the wrong setting
and ruin your captured image. Aperture priority puts the
photographer into 'Creative Mode' and I even use it as opposed
to 'Shutter Priority Mode' as my emphasis is on the control of
my aperture for the area in focus pertaining to the subject and
the scene.
White Balance - Rear Pad Dial - Right Tilt/Flap
Because I normally shoot 'RAW' image files, I never adjust the white balance - If I have
to make any changes, due to different lightening set-up (e.g. florescent
lights, etc) I make them during post processing in software. Any RAW images
I capture are therefore captured using the AWB (auto white balance) setting. However
jpeg users may wish to use this WB button to change the scene colouring to suit the environment
they are shooting in, which is reflected in the viewfinder and the LCD screen.
If you are shooting jpegs only, you have to make sure this WB setting is correct
for the scene lighting.
Warning
- If you are
shooting only camera jpeg images and rely on your white balance
settings, be careful that you do not change them by accident whilst shooting.
Exposure Metering - Fn3 Button then Menu Change (button on
top/left of camera
back)
Virtually all my photography is shot in exposure multi-pattern metering
mode, but
the choices
are multi-pattern, centre weighted
and spot.
I use spot metering on the odd occasion, for example a shot of the moon where I
would take a spot reading of the centre. If I used multi-pattern metering, the
moon would be blown out against the very dark sky and lose it's clarity and
resolution.
Shutter Drive Mode - Single Shot
- Burst Shots - Timer - Bracketing
- Rear Pad Dial - Base Tilt/Flap
I use this mainly for single frame shot photography although there are times
where I will use the 10 second timer for when the camera is
fixed on a tripod to assist in avoiding any movement when the
shutter button is pressed. I am unlikely to use burst mode
although with close up wildlife action shots there might be the
odd occasion where it could come in handy.
Focus Mode -
Fn5 Button then Menu Change (button on camera back)
Virtually all my photography is shot
in AF-S mode, autofocus single shot. The setting choices are AF-S single-shot, AFF still/moving
subject, AF-C continuous focusing and MF manual focus.
AF Mode -
Rear Pad Dial - Left Tilt/Flap
Virtually all my photography is shot in 1-Area (centre spot) autofocus.
The choices are Face Detection, AF Tracking, 23-Area (pattern), 1-Area
(spot)
and Pinpoint.
Aperture Setting Control - Rear
Control Wheel
(semi recessed large ridged wheel on rear of camera)
After I have set the top control dial to aperture priority A - I can then rotate the ridged control wheel
on the top/rear of the camera which
allows me to set the aperture f# of my choice which appears in the
viewfinder and/or the LCD screen -
I will select my aperture to suit the style of image (wide open e.g. f1.7 for a very
shallow focus area in the scene or
stopped down e.g.
f8 for a deeper focus area), select my ISO setting (e.g.
ISO:200 for a slower shutter speed or
e.g. ISO:1600 for a
faster shutter speed) and the camera will automatically select
the shutter speed pertaining to the aperture and ISO settings. I can increase the shutter speed by
raising the ISO rating (e.g. 200 to 400) or lower the
shutter speed by decreasing the ISO rating
(e.g. 400 to 200) but the higher the ISO rating
the more noise (speckle) will start to appear in the final captured
image.
ISO Button - Fn1 Button
then Menu Change (button on camera back)
This is similar to the old film days where you select the ISO for the
speed of the film - ISO:100 for slower film to ISO:3200 for faster film.
In the film days the slower the film the less the grain on the image and
the image quality was optimum. The faster the film the more grain and
the image quality was not as good. Faster film tended to be used for low
light shots and faster moving subjects. It is the same today with the
modern digital sensor but grain or digital speckle is now known as 'noise'. The ISO setting
of my choice, using the ISO button and menu, plays an important part as
ISO:160 will match a slower shutter to my choice of aperture whilst
ISO:200-3200 will select faster shutter speeds.
Exposure Compensation -
Flip Lever +/- Button (button
on top of camera behind the shutter button)
Once I have set-up my aperture setting (then perhaps ISO/shutter
adjustment) I might find that my scene in the viewfinder or LCD
screen is too bright in the sky or perhaps too dark in the foreground.
The flip lever when moved (right = + and left = -)
will bring up a (-.....0.....+) dotted line and using the
flip lever, I can
alter the cameras exposure metering by increasing the exposure + or
decreasing - it. I also may choose to use the AF/AE Fn2 button
instead for speed (see below).
The exposure compensation 'flip lever' on the top of the camera
is lightning fast and along with the electronic viewfinder,
provides the best exposure compensation controls that I have
ever used.
AF/AE Fn2 Button
(button on camera back)
I have this button
programmed to 'lock ONLY the exposure'. After I have set-up
the camera for the shot, I may find that the scene requires less or more
exposure and I may want to lock that exposure so that I can focus on a
part of the scene only. I have two choices, I can use the +/- exposure
compensation flip lever
and adjust the metering and then press the
Fn2 button to lock the
exposure (press again unlocks it) or I can just raise or lower the camera and lock an exposure as the
metering of the camera automatically changes as it sees more light or
less light. This then allows me to focus on my given subject and even
re-arrange my scene in the viewfinder or LCD screen - see the shutter button part
below.
Manual Focus
+ Focus Peaking Magnification
Manual focus is selected by pressing Fn5 button,
on the rear of the camera, which raises a menu
and
using the Fn5 button continually, or the rear control pad cursor flaps, or the rear top
knurled wheel, I can toggle between the choices and use the
menu set button or a tap of the shutter button to set the MF (manual focus) highlighted choice.
This puts the lens and the camera into manual focus mode, whereby the AF
lens can be manually focused using the focus ring on the barrel. Whether
I use the viewfinder or the LCD screen, both will display sugar coating
frosting on the edges of the subject when it comes into focus.
(Peaking must be set to ON in the camera Custom Menu) IMPORTANT:
When using a dedicated (third party) manual focus lens
that has been adapted (using an lens adapter with camera menu
set to
Shoot W/O Lens = ON)
my setup of the
Fn5 button focus selection ceases to function
as the camera automatically adjusts to manual focus mode for a
third party adapted lens.
Shutter (Half Press AF Focus) Button
- Top at the Front Right
Using the shutter
button, I can half press it to autofocus on the part of the scene that I
want in focus (using the AF centre spot in the viewfinder) and by still holding the half
press, I can re-arrange my scene in the viewfinder or LCD screen and then fully
press down the button to take the shot. This is ideal for 'isolating the
focus' of subjects in an overall scene.
Image Inspection
on Playback - Full Preview Display with Histogram, Data and Highlight Blink Mode
I have my initial capture 'delay' viewing time set
to 4 seconds - which applies to the viewfinder and the LCD screen. It is
set for a full image display and minimum data. In
the case where I want to properly preview an image for more than 4 seconds
(right after the shot is taken) then I will press the PLAYBACK
green
arrow button on the rear of the camera, use the viewfinder (or LCD screen) press the DISP
button on the rear control pad and toggle it to select one of my displays to suit the preview
which include colour histograms, highlight
warnings and full image capture settings.
Low/High Shots using the LCD Screen
The LCD screen is ideal for using the camera held over fences or
low down on the ground.
I prefer to use the shutter button rather than the touch screen.
The LCD screen is ideal for certain types of action shots
and tripod work.
____________________________________________________
Panasonic
100-300mm f4/f5.6 OIS Zoom Lens
Introduction
The Panasonic Lumix 100-300mm f4/f5.6 OIS zoom is terrific
for general and casual use photography. It is one of those great
compact
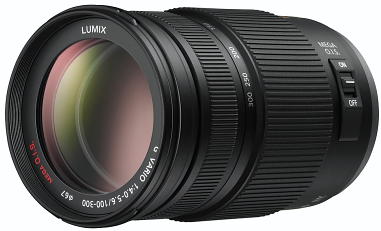 and lightweight zoom lenses that when mounted on a
Panasonic G6 Micro 4/3rds camera can be carried around in
one hand, all day long, without any strain on the arm, neck or
shoulders. and lightweight zoom lenses that when mounted on a
Panasonic G6 Micro 4/3rds camera can be carried around in
one hand, all day long, without any strain on the arm, neck or
shoulders.
The lens is at home on well lit days and I envy those
photographers in sunny countries that get months of good light,
morning to night. At the native 300mm the lens has a maximum
aperture capability of f5.6 which in Scotland with it's ever
changing weather can pose a problem in keeping the ISO rating
down, especially if you are seeking a fast shutter speed of
around 1/1250secs. However you get used to it and you look
forward to those days when you can really get the best out of
the lens and work at ISO:160. The winter months are the worst
but in the summer the lens provides more buzz than the bees.
This is a lens that delivers a great deal of fun photography and
so many subjects that are usually out of reach with a general
zoom lens or a prime are suddenly considered as a suitable
subject. It's that 200mm - 600mm field of view that makes all
the difference, especially in a lens that when fitted to the G6
camera with it's UV filter and lens cap on measures out at 7.5"
in length and that is from the front of the lens cap to the back
of the viewfinder.
With the zoom fully extended to 300mm (without
the lens cap fitted) it measures out at 9.75" in length.
Its not a lens for fitting to a tripod or
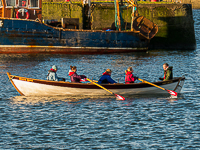
monopod to shoot serious wildlife photography - you have to recognise it's limitations and enjoy what it can produce.


It is a lens that can be used for all types of photography even
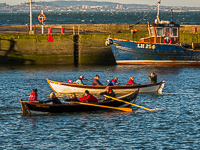
street photography and because it has such a long reach with a
600mm field of view you can pull in subjects, especially boats
which appear to be far away to the eye but are large in the
viewfinder when the lens is fully extended.
The inner barrel does not creep even when the combo is being
carried with the lens facing down and I usually carry the camera
by the grip in my right hand at my side with a wrist strap as
backup. The only criticism I have is that the zoom mechanism is
a little bit tight (in colder weather) which unfortunately means that any video
shooting is not steady when zooming in or out on a subject.
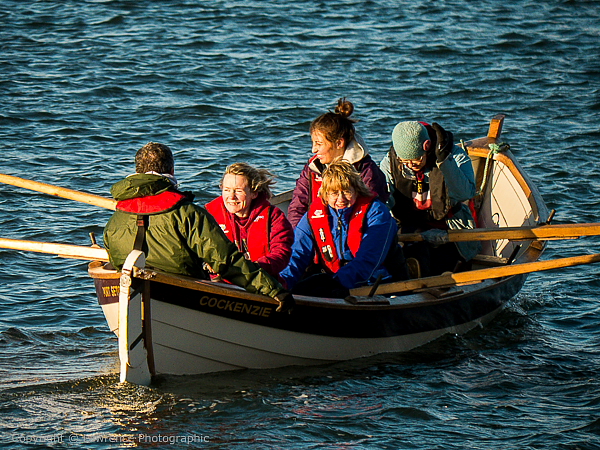
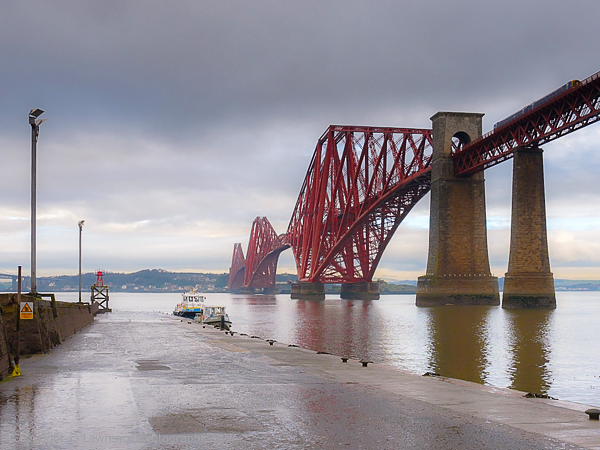
The following 600 Pixel image was shot using the Panasonic G6
and the Lumix 20mm f1.7 ASPH prime lens AND from the same
position I also used the G6 and the Lumix 100-300mm f3.5/f5.6
OIS zoom lens to pull in distant subjects. The images of the
train in the centre and the road bridge pillar to the far left
were zoomed into and the rest of the zooms were shot out of the
image frame. If you check out the centre image of the crane at
Port Edgar, you can see two flocks of geese high in the sky.
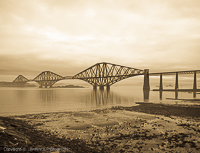
These images were shot down at South Queensferry, Scotland and
feature the Forth Rail and Road Bridges, the Port Edgar
facility, the blue crane at the Rosyth Dockyard facility where
the new aircraft carriers are under construction and the yellow
crane in the middle of the firth is working on the pillar
foundations for the new road bridge.
Please click on each image to open up to a 1650 Pixel variant -
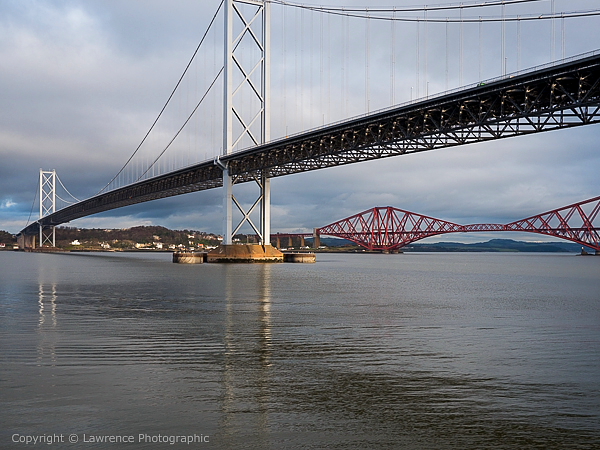
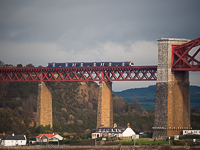
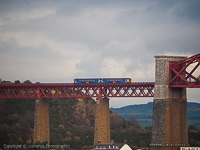
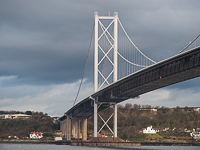
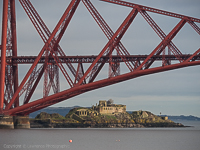
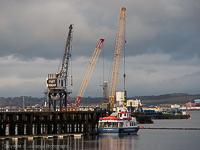

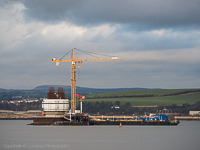
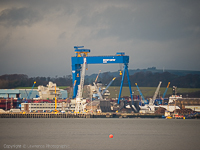
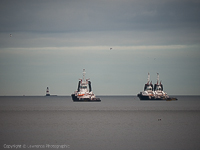
Image Stabilisation
The
Panasonic Lumix 100-300mm f4/f5.6 OIS zoom lens employs image
stabilisation
which simply means that it allows you to hold the
camera and OIS lens at a lower shutter speed than normal. In
lower light conditions this will allow you to lower the ISO
rating whereby the image quality is raised vs the noise in the
final image. However, there is a camera shake/blurred image slow
shutter speed threshold for every lens, even with image
stabilisation and the photographer will eventually determine
that threshold. A lower ISO rating and a
slower shutter speed for night time photography will not prevent
the blur in the movement of people walking in the street. Image
stabilisation does not prevent the blur in fast moving wildlife
or sports, only a faster shutter
speed will accomplish that - although by lowering the shutter speed and panning the camera sideways
with a fast moving subject whilst pressing the shutter button,
can sometimes produce a 'speed atmosphere' in the image as most
of the subject is in focus but speed blur is added to the
background.
You can get 'way down' the shutter speed range when shooting
(hand held camera) a very stationery subject. However, the
keeper rate might not be high as I experienced with this image
which was captured indoors at 300mm on the zoom (600mm field
of view) at ISO:1600, aperture f5.6 and a shutter speed of
1/40secs. It was the only image which was decent in the three
that I ran off at the same time. However, when the zoom range is
reduced to 200mm to 100mm and the subject remains large in the
view of the viewfinder (as shown in the image below) the
keeper rate should increase.
Optimum Image Quality
To gain the optimum image quality. the lens has to be treated
with respect so it is essential that it's distance to a subject
is not over stretched, especially in outdoors low light when the
ISO rating is around ISO:1600/3200. It is advisable that the
primary subject takes up around 1/3rd at least or more of the
view in the viewfinder and shutter speeds, especially at the
300mm focal length (600mm field of view) are kept high
when hand holding the combo. Small 'flighty' birds and very fast
moving subjects (e.g. a running dog) are best captured at
around 1/1250secs or more but the shutter speed can be reduced
if you are fast panning the subject to achieve background blur,
whilst pressing the shutter button. It is important to remember
that a 300mm lens is actually reaching a 600mm field of view
because it is projecting the image onto a 2x crop digital sensor
so the photographer does have to spend time to determine their
own shutter speed threshold for hand holding the rig - there is
a great deal of movement in the viewfinder at 600mm but the
larger the subject in the viewfinder the lesser the movement.
With a stationary subject, it is possible to set the chosen
aperture to a low ISO rating (e.g. 160/200) and obtain a
decent image with a shutter speed below the focal range used in
the zoom (e.g. 1/200secs for native 300mm) but you will
suffer a lower rate of keepers. Image blur is often not seen in
digital images displayed at 1,000 pixel width size but can be
seen in the 1650 to full size range and this is more obvious in
images that contain a bird's feather or dog hair outlines. I
have outlined more on this in the section above on image
stabilisation.
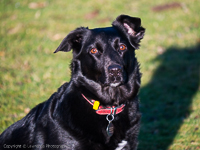
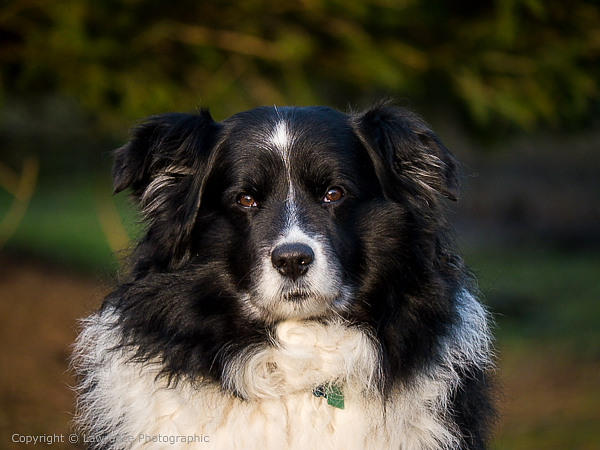
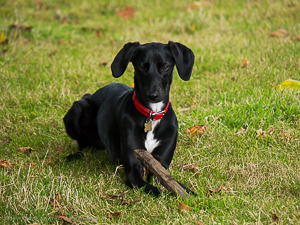
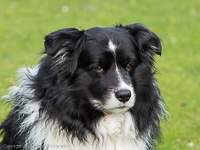
This image of Brad my dog was shot 'hand held' at 300mm
(600mm field of view) at ISO:200, aperture f5.6 and a
shutter speed of 1/200secs.
|

1000 Pixel Size |

1300 Pixel Size |
|
1650 Pixel Size |
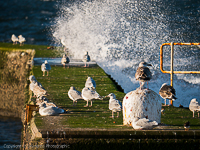
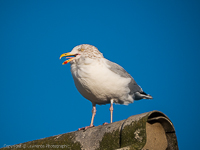
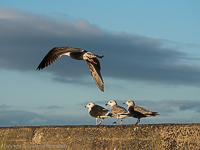
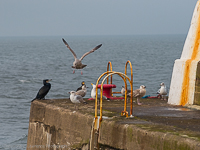
When using the lens at 300mm (600mm field of view) I
found it almost impossible to keep a seagull within the
viewfinder. They appear to glide but what a speed they travel at
and I guess you would have to be dedicated to that type of
photography 'birds in flight' to achieve the proper skills. The
best I achieved was at 100mm (200mm field of view) and
some cropping of the image in post processing to pull the bird
closer in the final image. The trade off is that the final print
or digital size cannot be enlarged to their normal limits as
noise starts to creep in and the image quality suffers.
|
1000 Pixel Size |
1300 Pixel Size |
|
1650 Pixel Size |
The Panasonic G6 camera and the 100-300mm zoom lens is ideal for
head shots, in fact all sorts of street photography and can even
be used indoors at the 300mm end of the zoom but shooting with a
600mm field of view and at f5.6 pushes the ISO rating way up to
around ISO:3200. At that ISO rating noise is bound to creep in
and even although the image is not cropped, the eventual print
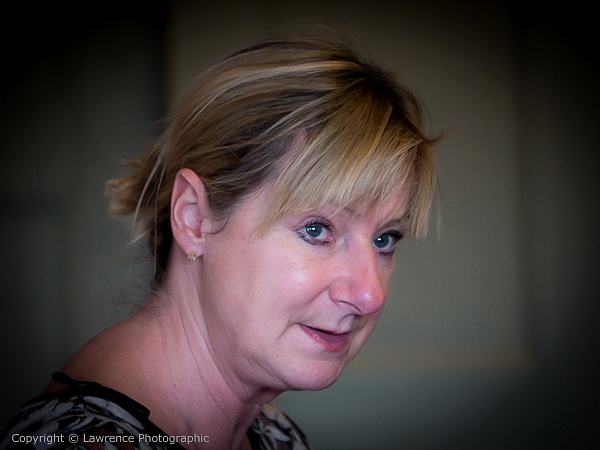
and digital display size can be limited. The following image was captured
indoors in a local restaurant at ISO:3200 and
the woman was moving her head around whilst she was talking to a
friend who was sitting in front of her - she did give me a smile
at one point but that was the one shot that turned out to be
blurred.
|

1000 Pixel Size |
1300 Pixel Size |
|
1650 Pixel Size |
Lumix 100-300mm f4/f5.6 OIS Zoom Lens vs Canon
300mm f2.8 IS L USM MK I Prime Lens
The Lumix 100-300mm f4/f5/6 OIS zoom lens like all lenses does
have image quality limitations in relation to subject distance
vs ISO rating vs final print size. Also, the Lumix 100-300mm
zoom lens image quality weakens at the longer end (300mm)
of the zoom so as the print size increases the resolution
decreases. This can been seen in the following images which were
the best ones taken from a series of 10 each.
The following images were shot 'hand held' using the Panasonic
G6 camera with the Lumix 100-300mm f4/f5.6 zoom lens and a Canon
5D MK I DSLR 'full frame' camera and a very expensive (£3.5K)
Canon 300mm f2.8 IS L USM MK I prime lens. They were post
processed in Adobe Lightroom 5.3 with minimum saturation
applied, NO noise reduction and hard sharpened for effect.
Note: The G6 aspect ratio is 4:3 whilst the Canon 5D is 3:2
- Click on the smaller images to open up the larger pixel sizes
to compare -
2000 Pixel Image Samples -
|
Panasonic G6 + Lumix 100-300mm f4/f5.6 OIS Lens |
Canon 5D MK I + Canon
300mm f2.8 IS L Lens |
 |
 |
|
150mm (300mm field of view) |
150mm (300mm field of
view) |
2000 Pixel Image Samples -
|
Panasonic G6 + Lumix 100-300mm f4/f5.6 OIS Lens |
Canon 5D MK I + Canon
300mm f2.8 IS L Lens |
 |
 |
|
300mm (600mm field of view) |
300mm (Cropped in
Software - 600mm field of view) |
The 300mm images on the bottom row show that the Lumix 100-300mm
f4/f5.6 OIS zoom lens at the full 300mm extent of it's zoom
(600mm field of view) has been stretched beyond it's
resolution limits for a 'hand held' shot at that distance. You
can see this in the detail of the rocks and the walls of the
castle which are starting to blend and lose their fine detail.
It is not so apparent in the section of the image where there is
writing on buildings such as the NOVOTEL writing near the bottom
of the images. However, in fairness the Lumix shot could have
been improved using a tripod and remote or timed shutter
activation to steady the rig and using the f8 aperture which has
the edge on f5.6.
All in all, the Lumix lens is terrific value for money as
long as you keep the subject large in the viewfinder and don't
over stretch the subject distance at 300mm (600mm field of
view).
Image Quality Table
I have put a table together below of my aperture image quality
findings. Please note that these findings were based on the
combo being 'hand held' with decent shutter speeds and low ISO
ratings. I have used a 1-5 marking system with 5 being the best
possible image quality.
|
100mm |
f4 |
f5.6 |
f8 |
f11 |
| |
5 |
5 |
4 |
3 |
|
200mm |
f4.9 |
f5.6 |
f8 |
f11 |
| |
4 |
4 |
5 |
4 |
|
300mm |
--- |
f5.6 |
f8 |
f11 |
| |
--- |
4 |
5 |
4 |
With
subjects that are prone to some movement and the centre spot (area
spot focus) is moving around in the viewfinder on the 'primary'
subject of focus, I try and steady my arm on a tree, fence or any other
object. If this helps but the focus spot is still not 'dead' and I mean
DEAD steady, I will raise the shutter speed above the minimums, I have
specified below.
I tend to now operate at the
following minimum shutter speeds to maintain my image 'keeper' rate -
-
'Hand Held' at
100mm (200mm Field of View) - Minimum 1/200secs
-
'Hand Held' at
200mm (400mm Field of View) - Minimum 1/400secs
-
'Hand Held' at
300mm (600mm Field of View) - Minimum 1/650secs
For subjects that are
fast moving, small birds, animals running, I tend to shoot at 1/1250 sec or above for all focal ranges within the 100-300mm zoom,
although I often have relapses.
I know that the G6
and the 100-300mm lens can operate at lower shutter speeds on certain
stationery subjects as the image stabilisation is excellent, especially when
shooting LARGE in the viewfinder.
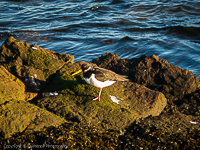
Some images captured using the Panasonic G6 and the Lumix
100-300mm zoom lens at my home at Hermiston -
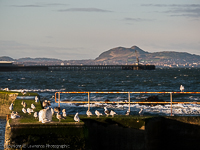
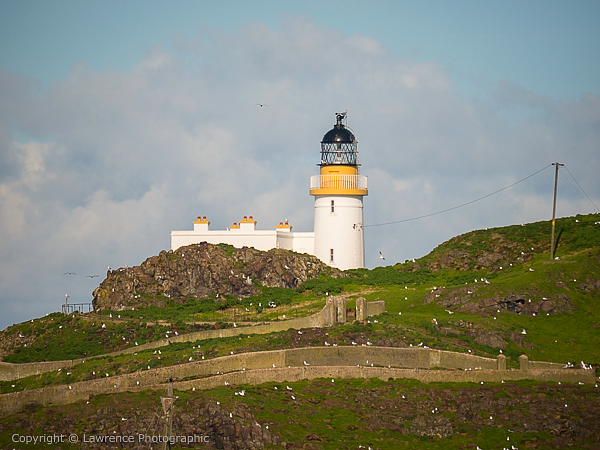
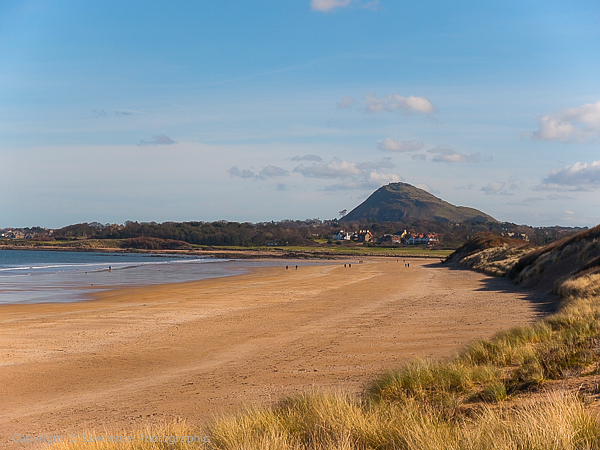
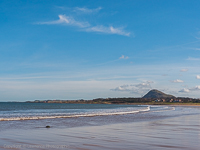
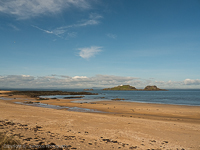
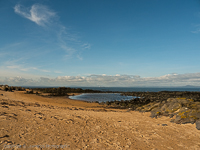
These images were captured at Yellowcraigs Beach
(Broad Sands Bay) near North Berwick, Scotland using the
G6 and the Lumix 100-300mm OIS zoom lens. The image of the
lighthouse is over stretched for distance and the resolution at
300mm (600mm field of view) has lost it's fine detail in
the grass, walls and the rocks. You can see the true distance of
the lighthouse in the images (Plate 83) captured at the
same time in the Lumix 14-45mm f3.5/f5.6 OIS zoom lens section -

These images were captured at the Craiglockhart Pond in
Edinburgh
using the
G6 and the Lumix 100-300mm OIS zoom lens -
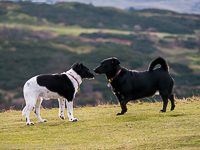
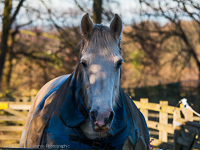
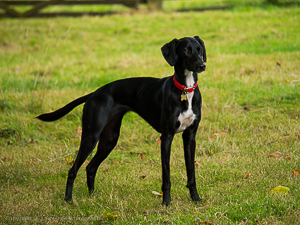
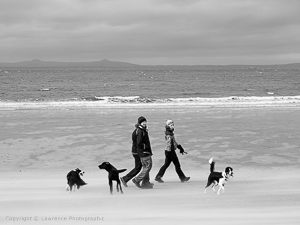
The Panasonic G6 and the Lumix 100-300mm zoom lens is an
excellent combo to leave lying around the house, ready to pick
up when I go out for a walk with the dogs. The 200mm to 600mm
field of view zoom is terrific for capturing those long distance
scenes that you would normally miss with a shorter lens. These
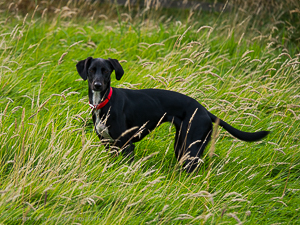
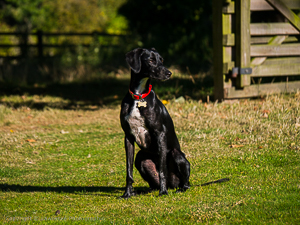
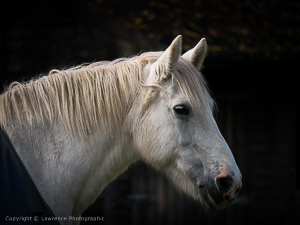
are images captured at Hermiston where I live and the cute dog
in most of the images is 'Jazz' who I am looking after for 4
months whilst her owners are abroad. My own dog 'Brad' displays
his usual cool pose whilst 'Lady' my horse has seen something in
the fields -
____________________________________________________
Panasonic
14-45mm f3.5/f5.6 OIS Zoom Lens
Introduction
The
 Panasonic Lumix
14-45mm f3.5/f5.6 OIS zoom is a compact and lightweight zoom
lens which when mounted on a
Micro 4/3rds
Panasonic G6 camera can be carried around in
one hand, all day long, without any strain on the arm, neck or
shoulders. Panasonic Lumix
14-45mm f3.5/f5.6 OIS zoom is a compact and lightweight zoom
lens which when mounted on a
Micro 4/3rds
Panasonic G6 camera can be carried around in
one hand, all day long, without any strain on the arm, neck or
shoulders.
The lens when fitted to the Panasonic G6 camera's 2x crop
digital sensor delivers a 28mm-90mm field of view which covers a
broad spectrum of photography and is ideal as a zoom lens that
is used for general and casual use. It has built in image
stabilisation which is great for 'hand holding' the combo even
in low light conditions.
My
Panasonic Lumix 14-45mm f3.5/f5.6 OIS zoom is a relatively old
lens which dates back to 2009
and it is a larger size than most of the newer general zoom
lenses from Panasonic. However, I like the size because it is
easy to work with and I feel that anything smaller would be more
difficult to operate. The zoom does not creep when the lens is
carried facing down and it is relatively smooth.
The lens when fitted to the G6
camera with it's UV filter and lens cap on measures out at 5" in
length and that is from the front of the lens cap to the back of
the viewfinder. With the zoom fully extended to 45mm (without
the lens cap fitted) it measures out at 5.75" in length.
The
Panasonic G6 camera has
terrific manual controls and the 'flip lever' on the top of the
camera is the best exposure compensation control I have ever
used.
When I first used the combo it was on a very wet rainy day which
is not unusual for Scotland during winter. The images reflect
the rain, the dampness, the clouds and the camera and lens held
up very well. It was matter of stepping out the car, taking a
quick shot and back inside again; although for the shots of the
cars, I was walking around
in the rain.
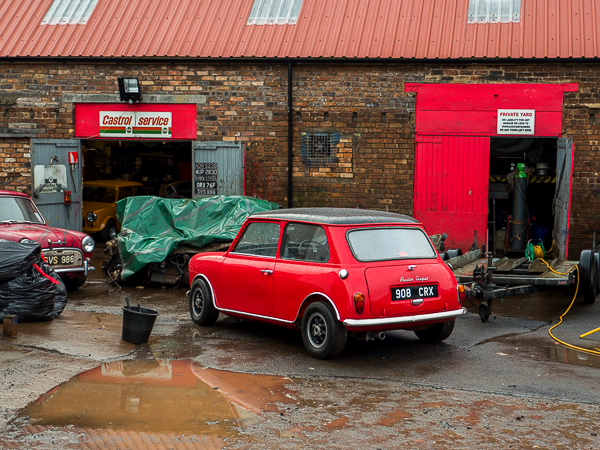


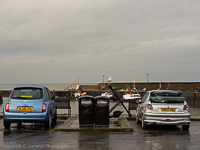
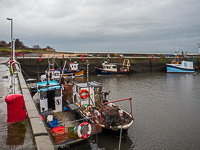
Image Stabilisation
The
Panasonic Lumix 14-45mm f3.5/f5.6 OIS zoom lens employs image
stabilisation
which simply means that it allows you to hold the
camera and OIS lens at a lower shutter speed than normal. In
lower light conditions this will allow you to lower the ISO
rating whereby the image quality is raised vs the noise in the
final image. However, there is a camera shake/blurred image slow
shutter speed threshold for every lens, even with image
stabilisation and the photographer will eventually determine
that threshold. A lower ISO rating and a
slower shutter speed for night time photography will not prevent
the blur in the movement of people walking in the street. Image
stabilisation does not prevent the blur in fast moving wildlife
or sports, only a faster shutter
speed will accomplish that - although by lowering the shutter speed and panning the camera sideways
with a fast moving subject whilst pressing the shutter button,
can sometimes produce a 'speed atmosphere' in the image as most
of the subject is in focus but speed blur is added to the
background.
You can get 'way down' the shutter speed range when shooting
(hand held camera) a very stationery subject but
shooting indoors with at 45mm (90mm field of view) and at
a maximum wide aperture of f5.6 pushes the ISO rating way up to
around ISO:3200. At that ISO rating noise is bound to creep in
and even although the image is not cropped, the eventual print
and digital display size can be limited. The following image was
captured indoors in a local restaurant at ISO:3200 -
|
1000 Pixel Size |

1300 Pixel Size |
|
1650 Pixel Size |
An example of ISO:800, aperture f5.6 and shutter speed 1/15sec
with image stabilisation -
|
1650 Pixel Size |
It is turning out to be a very rain filled winter with extensive
flooding in England and (February 2014) it is still
raining in Scotland. I shot these images with the G6 and the
Lumix 14-45mm f3.5/f5.6 OIS zoom lens in South Queensferry
whilst it was raining and heavy with damp mist, some have been
softened and colour boosted - click on an image to open a 1650
Pixel variant -
An image captured at Gullane Beach - Scotland where the sand was
being whipped up around the subjects feet. The first variant has
been softened, click on an image to open up a 1650 Pixel variant
-
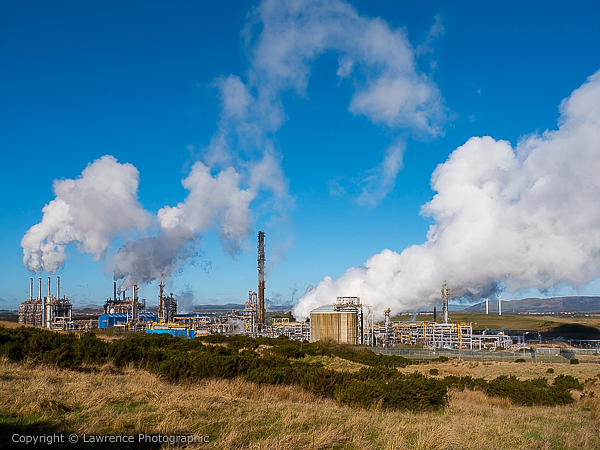
These are images of the Mossmorran Oil Refinery near Lochgelly
in Fife, Scotland taken with the G6 and the Lumix 14-45mm OIS
zoom lens. I found that I could not sharpen the wider focal
length images as high as the longer focal length images because
the blue sky developed small aberrations in certain areas if I
pushed the sharpness.

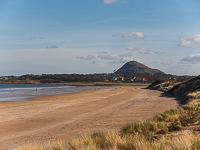
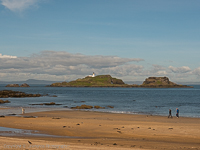
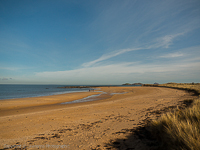
This landscape image was captured at Yellowcraigs Beach
(Broad Sands Bay) near North Berwick, Scotland using the
G6 and the Lumix 14-45mm OIS zoom lens. Every lens has it's
limitations for resolution vs distance and the Lumix is no
different but even
at the full 45mm (90mm field of view) stretch of the zoom
the Lumix 14-45mm lens still manages to produce a reasonable
result and the combo was hand held. The 600 pixel image
has been softened and the saturation boosted, please click
images to open up to 1650 pixel
variants -
More images -
I have put a table together below of my aperture image quality
findings. Please note that these findings were based on the
combo being 'hand held' with decent shutter speeds and low ISO
ratings. I have used a 1-6 marking system with 6 being the best
possible image quality.
|
14mm |
f3.5 |
f5.6 |
f8 |
f11 |
| |
6 |
5 |
4 |
3 |
|
25mm |
f4.9 |
f5.6 |
f8 |
f11 |
| |
5 |
5 |
4 |
3 |
|
45mm |
--- |
f5.6 |
f8 |
f11 |
| |
--- |
5 |
4 |
3 |
The camera and the 14-45mm zoom lens combo is straight forward
to use and I did not experience any
problems using it 'hand held' at any of the zoom ranges.
More Images to Follow!
____________________________________________________
Panasonic
20mm f1.7 ASPH Prime Lens
Introduction
The
Panasonic Lumix 20mm f1.7 ASPH Prime Lens
is a compact and l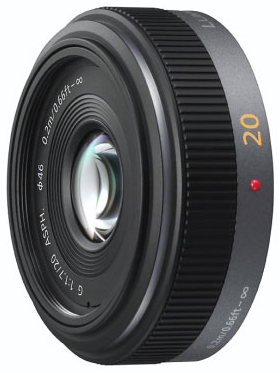 ightweight
pancake
lens which when mounted on a
Micro 4/3rds
Panasonic G6 camera can be carried around in
one hand, all day long, without any strain on the arm, neck or
shoulders. ightweight
pancake
lens which when mounted on a
Micro 4/3rds
Panasonic G6 camera can be carried around in
one hand, all day long, without any strain on the arm, neck or
shoulders.
The lens when fitted to the Panasonic G6 camera's 2x crop
digital sensor delivers a 40mm field of view which covers a
broad spectrum of photography and is ideal as a prime lens that
is used for general and casual use. It has no image stabilisation
but because the native focal range of the lens is 20mm, it is
more than ideal for 'hand holding' the combo,
especially in low light and for night photography under street
lamps.
My
Panasonic Lumix 20mm f1.7 ASPH Prime Lens
is a relatively old
lens which dates back to 2009
and a newer Mark II model has been released.
My lens is still available and
when fitted to the G6
camera with it's UV filter and lens cap on measures out at 3.5"" in
length and that is from the front of the lens cap to the back of
the viewfinder.
During one of the few brighter winter days in Scotland, I had
the chance to use the combo at South Queensferry, Blackness
Castle and at Cammo
Park when out walking with Brad (my dog) and I had forgotten
just how good the image quality was with the 20mm lens -

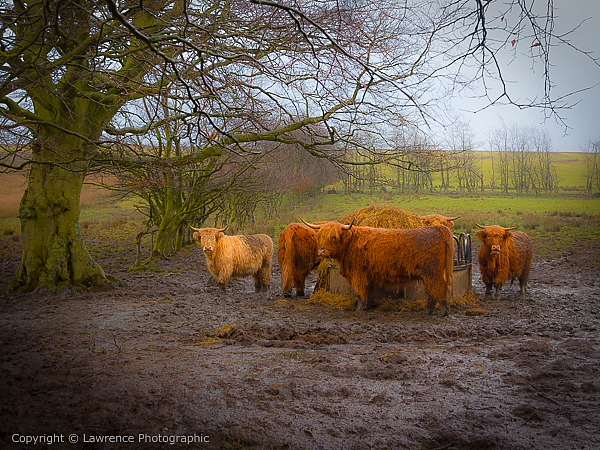
Weather changes fast in Scotland and this image of highland
cattle was shot using
the combo on a very wet and rainy day. To add to this I was
standing on the verge of the road with heavy lorries passing
feet from me and throwing up even more spray. The Panasonic G6
camera and the Lumix 20mm f1.7 ASPH prime lens held up well
despite all this and I was able to grab this image before the
cattle moved off on seeing me.
The 'RAW' image file was post processed and converted to various
styles of jpeg for the web using Adobe Lightroom 5.3 software
and I have softened the (larger image) PA version.
Please click on the images to open up 1300 pixel variants -

The Panasonic G6 and the Lumix 20mm f1.7 ASPH lens produce an
extremely sharp image in low light and the noise vs image
quality ratio holds up very well even in larger print sizes.
This image was shot with the aperture wide open at f1.7 -
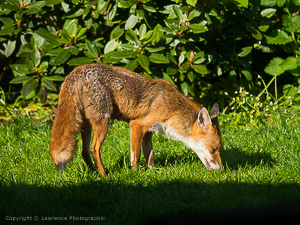
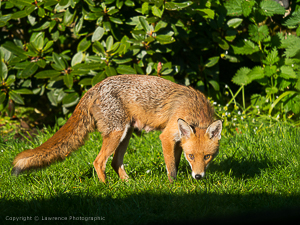
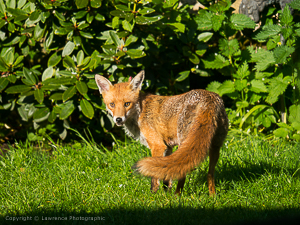
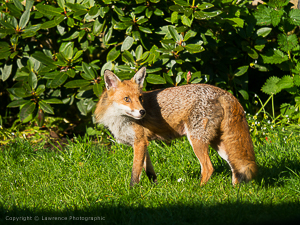
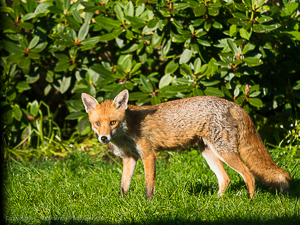
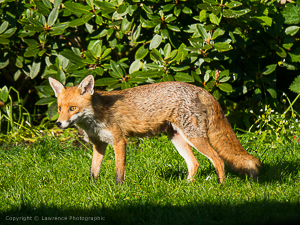
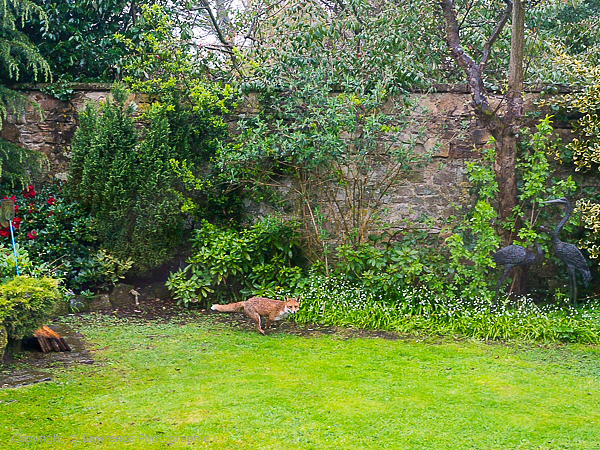
Spring brings with it lots of baby rabbits and a fox that will come out
in all weathers, even pouring rain to get his share. Capturing
an image of a very fast moving fox in your back garden with the
Panasonic G6 and the Lumix 20mm f1.7 ASPH lens
and shot through thick glass at aperture f2.8 and a relatively
high ISO of 1600 can prove daunting but by focusing on the part
of the garden you expect him to emerge onto from the bushes sure
helps to get the shot and the image quality is reasonable. I
slightly panned the G6 with the fox which is probably why the
animal is more in focus than the background. This 'CROPPED' jpeg
image was converted from a 'RAW' file, which was post processed
using Adobe Lightroom 5.3 Software -
I have put a table together below of my aperture image quality
findings. Please note that these findings were based on the
combo being 'hand held' with decent shutter speeds and low ISO
ratings. I have used a 1-6 marking system with 6 being the best
possible image quality.
|
20mm |
f1.7 |
f2 |
f2.8 |
f4 |
f5.6 |
f8 |
| |
4 |
5 |
6 |
5 |
4 |
3 |
The camera and the 20mm lens combo is straight forward
to use and I did not experience any
problems using it 'hand held'.
More Images to Follow!
____________________________________________________
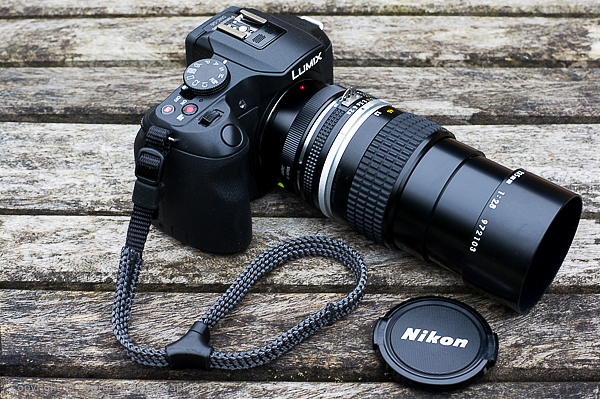
Nikon
135mm f2.8 AI-S Prime Lens (Adapted)
Introduction
The Nikon 135mm f2.8 AI-S prime is a manual focus lens and
it can be used with the Panasonic G6 camera by mounting it using
a
Voigtlander Micro Four Thirds to Nikon F
Adapter. The 2x crop digital sensor of the
Panasonic G6 camera with the Voigtlander adapter and Nikon 135mm
lens mounted, delivers a 270mm field of view.
The Nikon 135mm f2.8 AI-S lens is solidly made (metal)
with a nice wide ribbed manual focus ring and aperture click
stops on the barrel. There is also a field of view scale on the
top of the lens barrel against the aperture stops but this is a
lens that produces a very fine depth of field and the majority
of shots are taken with the manual focus on the primary subject
as opposed to using the DOF scale. This AI-S lens in mint
condition can still be purchased (second hand) from most
good Nikon second hand suppliers (Grays of Westminster)
in the UK and costs around £345.00 vat inclusive.
Panasonic G6 Camera Menu Settings
The combo has a good balance for manual focusing and the camera
menu has to be set to -
MF Assist = Peaking Aid
Peaking = ON
Shoot W/O Lens = ON (this is for using with my adapted Nikon
AI-S manual focus lenses)
I have these settings on all the time so I can just switch my
Nikon lens with my Micro Four Thirds lenses without any other
setting change. The combo has no image stabilisation so a
relatively high shutter speed has to be adopted otherwise you
MAY experience camera shake when the combo is hand held,
although with a subject that is very steady and large in the
viewfinder you can get the shutter speed down; so far I have
used the lens at 1/200sec (see image of Brad my dog).
Click on image to open up a larger variant -
Basic Operation of Combo
The camera works beautifully with the Nikon 135mm lens and
delivers a 270mm field of view and my basic 'manual'
operation is fairly straight forward -
* Camera set to aperture priority mode
* Exposure meter set to multi-pattern
* White balance set to AWB (camera jpeg users might want to
change this depending on the scene)
* The Fn5 button ceases to function and the camera is
automatically setup for manual focus (see note below)
* Select chosen aperture on the lens barrel for depth of field
effect to primary subject
* The camera exposure metering displays a corresponding shutter
speed
* Select ISO rating to bring up or lower the shutter speed
for 'hand held' use
* Check the overall scene exposure and lock using the AEL button
(toggles on/off)
* Manually focus the lens and focus peaking automatically kicks
in with a sugar frosting on the primary subject outline
* To enlarge the focus area on the primary subject for fine
manual focus - press the rear/right aperture setting ring
* When focusing is accurate, tap the shutter button (or press
the aperture setting ring again) to return to full scene
* This allows you to also re-align the overall scene as the
focus is held always on the primary subject
* Press the shutter button to take the shot
IMPORTANT: When using a dedicated (third party)
manual focus lens that has been adapted (using an lens
adapter with camera menu set to
Shoot W/O Lens = ON)
my setup of the
Fn5 button focus selection ceases to function
as the camera automatically adjusts to manual focus mode for a
third party adapted lens.
Shallow Depth of Field + Loss of Aperture Record in Exif Data
+ Infinity Stop
You have to be careful in the f2.8 to f5.6 aperture range
(even at f8 to f32 depending on the closeness of the subject)
as the depth of field is very shallow. The image sample of the
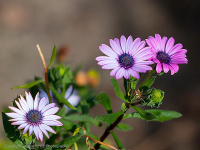 flowers is a good example of a very shallow depth of field and
from memory, I think it was shot at f4. The downside to the
Nikon adapted lens is that the camera does not record the
aperture setting in the Exif so if you want that data, you are
obliged to record the aperture for each shot either using a
notepad or perhaps record it on a dictaphone. I will eventually
post some accurate image samples per aperture setting but to
date I have not recorded any aperture settings on the image
samples but I have maintained my shots in the f2.8 to f8
range. Although the Nikon 135mm lens on the Voigtlander adapter
should hard stop at infinity, I always manually focus the
lens for infinity and cross check with the focus peaking aid as
in the past I have found that due to tolerance differences in
the adapter, the lens focuses at infinity just a shade short of
the hard stop on the lens barrel. flowers is a good example of a very shallow depth of field and
from memory, I think it was shot at f4. The downside to the
Nikon adapted lens is that the camera does not record the
aperture setting in the Exif so if you want that data, you are
obliged to record the aperture for each shot either using a
notepad or perhaps record it on a dictaphone. I will eventually
post some accurate image samples per aperture setting but to
date I have not recorded any aperture settings on the image
samples but I have maintained my shots in the f2.8 to f8
range. Although the Nikon 135mm lens on the Voigtlander adapter
should hard stop at infinity, I always manually focus the
lens for infinity and cross check with the focus peaking aid as
in the past I have found that due to tolerance differences in
the adapter, the lens focuses at infinity just a shade short of
the hard stop on the lens barrel.
Dimensions
The length from the back of the camera viewfinder to the front
of the lens (fully retracted) with the B+W 52mm UV filter
and lens cap fitted, is 7" and with the lens barrel
focused/extended for the closest subject (approx 3 feet)
with it's hood slid out the length is 8". The combo
remains relatively light and can be easily carried around in one
hand with a wrist strap for backup.
The lens hood is terrific because it is fixed to the lens and
slides out on the barrel for use.
Bokeh - Background Out of Focus Areas
With most 135mm lenses the background bokeh tends to be
excellent, especially with closer subject shots. The Nikon 135mm
f2.8 AI-S prime lens is no exception and it even manages a glow
effect around the subject edges at aperture f2.8 which I like a
lot for an artistic look, especially if you soften the image in
post processing.
Types of Photography
The
Nikon 135mm f2.8 AI-S prime manual focus lens
is ideal for all types of photography even street photography
where you may want to pull in a head shot rather than mingle
with the crowd. Distant landscapes can be cropped into to pull
out an 'old world' cottage on a distant hill. The lens is ideal
for portrait shots although you will have to stand back to
achieve more than a head shot but the bokeh is worth it and even
within reason you can shoot 'close up' images of flowers, birds
and animals starting at about 3 feet away. With it's relatively
fast f2.8 aperture the lens is fast enough for sports and
wildlife photography in the 270mm field of view range.
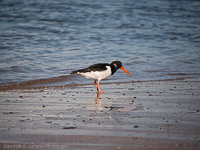
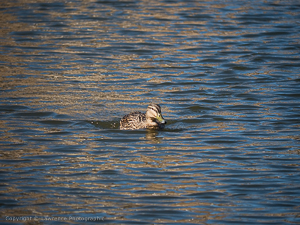
Ease of Use + Fast Moving Sports/Wildlife
The Nikon 135mm f2.8 AI-S prime manual focus lens with the
Panasonic G6 camera is straightforward to use and delivers
purism to your photography. However, if you intend to use the
 lens for fast moving sports or wildlife, especially closer
shots, it would be best to set the aperture to at least f5.6 for
a larger depth of field to allow for slight focus error,
whilst maintaining a corresponding shutter speed of around
1/1250sec to freeze the action with the lowest ISO rating
possible. It is best to err towards the worse
lower light
changes (overcast/shadows) in the scene and set the the
ISO rating accordingly and with the G6 camera, I prefer to work
in the ISO 160-1600 range BUT always remembering that the
camera shutter speed tops out at 1/4000sec. This image sample of
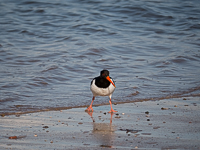
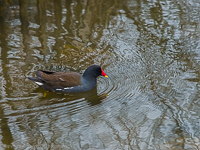
the water fowl with the red beak is a classic example of
where I screwed up and shot at a lower shutter speed of 1/400sec
whereby you can see a slight blur in the image which is due to the
shutter speed being too slow to freeze the movement of the bird
and/or because it was too slow to avoid camera shake when using
the combo 'hand held'.
The blur is not so apparent in a
smaller digital image size. lens for fast moving sports or wildlife, especially closer
shots, it would be best to set the aperture to at least f5.6 for
a larger depth of field to allow for slight focus error,
whilst maintaining a corresponding shutter speed of around
1/1250sec to freeze the action with the lowest ISO rating
possible. It is best to err towards the worse
lower light
changes (overcast/shadows) in the scene and set the the
ISO rating accordingly and with the G6 camera, I prefer to work
in the ISO 160-1600 range BUT always remembering that the
camera shutter speed tops out at 1/4000sec. This image sample of
the water fowl with the red beak is a classic example of
where I screwed up and shot at a lower shutter speed of 1/400sec
whereby you can see a slight blur in the image which is due to the
shutter speed being too slow to freeze the movement of the bird
and/or because it was too slow to avoid camera shake when using
the combo 'hand held'.
The blur is not so apparent in a
smaller digital image size.
Image Quality + Manual Focus Accuracy
Prime lenses invariably have the edge over zooms and the
Nikon 135mm f2.8 AI-S manual focus lens with the
Panasonic G6 camera is displaying excellent image quality at
it's 270mm field of view BUT as the distance from the
lens to subject increases the image quality will deteriorate.
Even at f8 there is a shallow depth of field for 'head shot'
portrait work and the accuracy of the manual focus is critical
and the best method of focus is achieved when you have a still
subject and using the magnified manual focus method as described
above in the 'Basic Operation of Combo' section.
Some Other
Image Samples - Click to open up
1650 pixel size -


____________________________________________________
Landscape - 4 Camera
Comparison
The following were all captured within minutes of each other
(5 shots each - best used) and
the 'RAW' image files from each camera were post processed using
Adobe Lightroom 5.3 Software and re-sized and re-sharpened using
Canon DPP Software. Click on each image to open up a 1650 Pixel
variant which is approximately A3 print size.
The Cameras + Lenses
Used -
* Panasonic G6 Lumix Camera + Panasonic Lumix 20mm f1.7 ASPH MK
I Prime Lens
(No image stabilisation)
* Sony Alpha A57 SLT Camera + Sony DT 18-55mm f3.5/f5.6 SAM MK I
Zoom Lens
(Camera image stabilised)
* Fujifilm X100s Compact Camera with 23mm f2 Fixed Prime Lens
(No image stabilisation)
* Canon 5D MK I DSLR Camera + Canon 24-105L f4 IS Zoom Lens
(Lens image stabilised)
The Panasonic G6 camera has a Micro Four Thirds (2x crop)
16 Mega Pixel digital sensor, the Sony Alpha A57 SLT has
an APS-C (1.5x crop) 16 Mega Pixel digital sensor, the
Fujifilm X100s has an APS-C
(1.53x crop) 16 Mega Pixel digital sensor and the Canon
5D has a '35mm Full Frame'
12 Mega Pixel digital sensor.
The cameras were all 'hand held' and set in the menus for
maximum 'RAW' image file size. The 'RAW' images were all post
processed in a similar fashion with minimum saturation and
contrast applied. The white balance temperature and tint were
matched for all the images. The shadows were slightly lifted in each image and they
all had equal sharpening applied during re-sizing for the web.
Panasonic G6 + Lumix 20mm f1.7 ASPH Lens |
Sony
A57 + Sony DT 18-55mm MK I Zoom Lens |
Fujifilm X100s Compact Camera |
Canon
5D MK I DSLR + Canon 24-105L IS Lens |
____________________________________________________
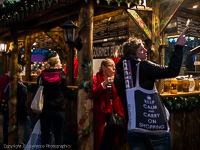
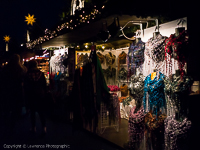
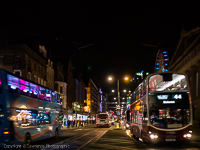
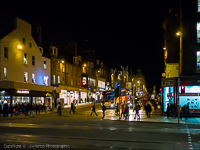
Night
Photography - Camera Hand Held - No Flash
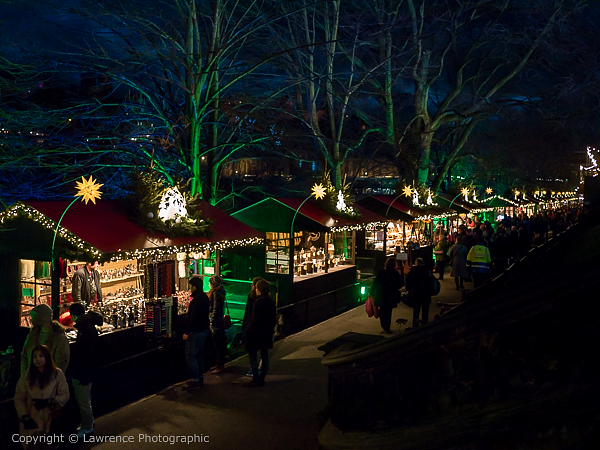
The following images were shot using the Panasonic G6 Camera and
the Lumix 20mm f1.7 ASPH prime lens in street photography mode,
walking around, without using a tripod and no flash used.
The idea of the test shots was to establish the image noise
levels when the camera was set manually to those higher
ISO:800/1600 ranges.
I was working in the f1.7 and f2.8 aperture range to achieve a
reasonable shutter speed for most of my shots.
In these image conditions (see samples)
I found the Panasonic G6 very difficult to focus using the
area-1 centre point autofocus. It was
not impossible but very slow, sometimes it was instant but for
about 90% of the time almost impossible. I found that by
switching to area-23 focus it proved almost instantaneous and with
the lens at f1.7, absolutely flawless and very fast. Of course
area-23 focus proved ideal for general shots but for anything that
required an out of focus background with a primary subject in
focus meant that I had to go back to area-1 centre point
autofocus.
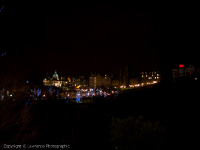
Shooting a very dark background with very bright lights in the
foreground can prove daunting, especially if you want to achieve some
dynamic range with some reasonable brightness in the distant shadows and the lights
not blown out. Again area-23 autofocus and multi-metering
exposure mode delivered the best results with a little to a lot
of (-stop) tweaking using the exposure compensation flip lever on
the top right/front of the camera. I found that in some cases I
was compensating by as much as -3 stops under exposure to make
sure the brightest lights were not completely blown out and to
deliver some texture to the brighter objects in a scene which unfortunately traded of the
DR range in the shadows. Any attempt to lift the shadows in post
processing using Adobe Lightroom 5.3 software, revealed that the
pixels were damaged and beyond recovery so dynamic range was
limited - note this is using the camera at ISO:1600. The image
below is a good example of where I have made no attempt to lift
the shadows and they remain just below the threshold that would
start to reveal the brown areas (instead of black) and
the damaged pixel effect -
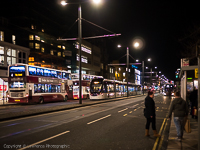
For street photography, I prefer to use area-1 centre point
autofocus and during the daylight hours this is not a problem
with the Panasonic G6 but these images were my first attempt
using the G6 for night photography and in the beginning, I found it very difficult
to achieve any decent focus and proper exposure results. It was
a bit of a wrestling match and I have to admit, I was ready to
call it quits until I switched to area-23 autofocus which made
the experience much more enjoyable. I know that if I was using
the G6 on a regular basis instead of during a protracted and
broken review, I would see an improvement in my
handling of the camera and the images.
The resolution of the G6 digital sensor (with a decent lens)
is superb, even in these very dark conditions. There is so much
resolution that you can apply a great deal of noise reduction
and still achieve a reasonable image print up to A3 in size and
even sharper with less noise at smaller print sizes - please
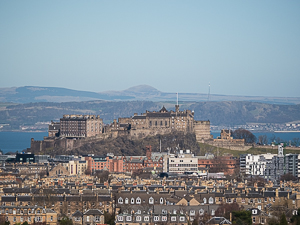
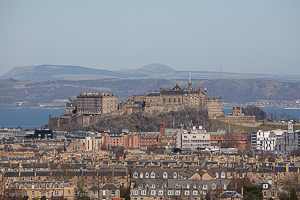
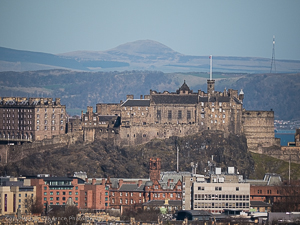
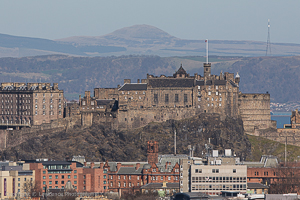
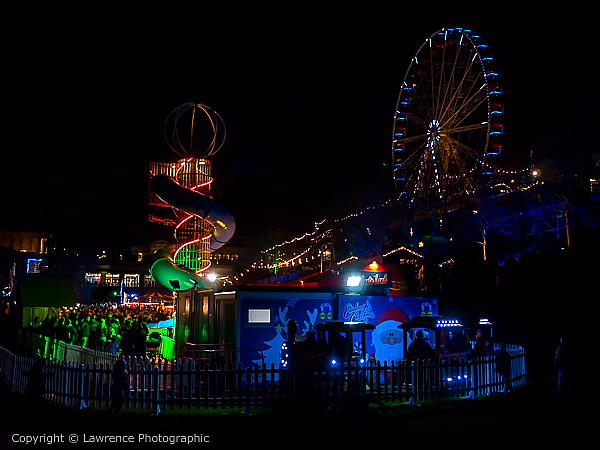
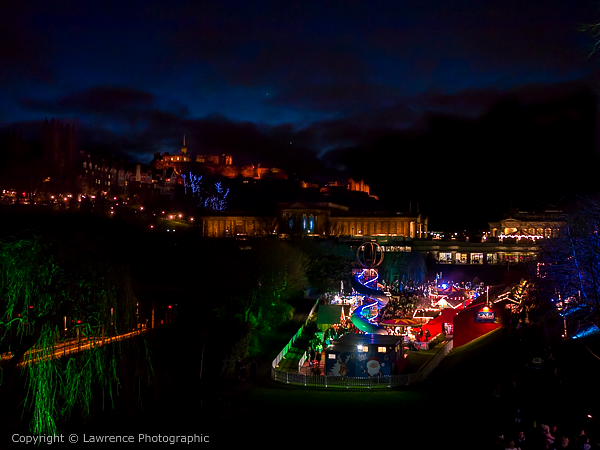
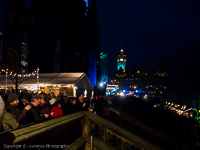
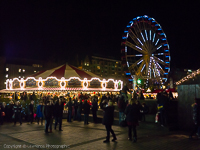
click on 1,000 and 1,250 Pixel Sizes below. This image of
Princes Street with part of the Christmas Fair in the
foreground, the Scottish National Art Gallery and then Edinburgh
Castle up on the hill was pushing the camera to the limits
(hand held - no flash) and a landscape photographer would
have used a tripod, a timed shutter and kept the ISO range down
at around ISO:160 with an aperture of around f5.6 to achieve a
clearer, sharper and larger image. Any movement in the scene
would have been blurred using the (ISO:160/Aperture f5.6)
very slow (forced) shutter speed but the resolution and
dynamic range would have been much better with less noise in the
sky -
1,000 Pixels Size
1,250 Pixel Size
The Panasonic G6 camera with the Lumix 20mm f1.7 ASPH prime lens
is probably at it's limits at ISO:800 for image quality vs noise
when shooting very dark and especially unevenly balanced light
in foreground to background scenes at night. As the image print
size stretches towards A3 (approximately 1,650 pixel image
size for the web) the noise becomes harder to conceal
without reducing the overall image quality. In daylight
conditions, even nearing dusk the G6 will operate at ISO:1600
and in even better light at ISO:3200 with excellent noise
reduction vs image quality but overall, I would prefer to stick
to a maximum of ISO:800. Check out the 3 image sizes in the next
sample -
1,000 Pixels Size
1,250 Pixel Size
These images were also post
processed using Adobe Lightroom 5.3 software and finally
re-sharpened for the web using Canon's DPP software -

____________________________________________________
Conclusions
The Panasonic G6 Micro Four Thirds camera remains true to the
original concept of a compact system whereby the camera body is
relatively compact and lightweight and the lenses compliment the
body. Even my
Lumix 100-300mm f4/f5.6 OIS zoom
lens
is relatively compact and lightweight compared to it's DSLR
counterparts.
The manual controls of the camera are superb, especially the
exposure compensation 'flip lever' on the top of the camera
which is lightning fast and along with the electronic viewfinder,
provides the best exposure compensation controls that I have
ever used. The camera body is probably the right size for
average hands to operate without fumbling from time to time
and even photographers' with larger hands will appreciate that
it is easier to operate than some of the more compact Micro Four
Thirds camera bodies.
I could repeat my excellent findings as outlined in the review
BUT I will only outline the main limitations of
the camera which to be frank are not serious for the majority of
enthusiast photographers. The
Panasonic G6
Micro Four Thirds digital sensor, hits the wall at ISO:3200 in
excellent light where the photographer is seeking a print size
up to A3 which displays the minimum of noise vs excellent image
quality. In low light conditions
in half decent light,
that wall is ISO:1600. In very dark conditions where there are
very bright lights with a black night sky the wall is ISO:800.
These findings are a non issue for a photographer who uses a
tripod with a remote or timed slow shutter release using
ISO:160. However, the ISO:3200 limit could be an issue for a
wildlife or sports photographer who in low light conditions
(half decent light) is using a Lumix zoom lens with a f5.6
(maximum wide aperture) at 300mm (600mm field of view)
because to achieve a fast shutter speed to freeze the motion of
the subject the ISO rating may rise to ISO:3200 whereby it
breaches the ISO:1600 limit - even if the camera and lens are
sitting on a tripod. Remember I am discussing A3 print sizes, so
as the print size decreases (especially normal wallet print
size) these ISO limitations are no longer as limited.
The second limitation pertains to photographers (like me)
who like to use the area-1 centre spot autofocus point for their
photography, especially street photography where subjects are
often framed with the background out of focus. During those
occasions when the light is decent, even low light before dark,
there is not a problem and the camera functions very well but
for night shots under street lights the
area-1 centre spot autofocus is horrific (Lumix 20mm f1.7
ASPH MK 1 lens) and in most cases impossible to
use. The area-23 autofocus is a different story and works very
well in night conditions but of course has it's own limitations
when attempting to place a background out of focus as it can
prove difficult to latch it only on a primary subject in the
foreground, although not impossible.
In decent everyday light conditions,
for those photographers seeking to make prints up to A3 in size,
the Panasonic G6 digital sensor image quality (with top end
lenses) is as good as you will ever get from a Micro Four
Thirds camera with a 16MPixel digital sensor. When you compare
it to other Micro Four Third digital sensor cameras, even those
which are the most expensive and including some DSLRs, you would
find it difficult with
their A3 prints to claim which one displays an advantage.
What makes the Panasonic G6 camera so appealing is of course the
price and this is a camera that for once Panasonic built right -
the size, weight, handling, manual controls, electronic
viewfinder and the image quality are in perfect balance and on a
par, even exceeding, some more expensive Micro Four Thirds
cameras.
Richard Lawrence
Scotland
United Kingdom
Back to Articles Page
|