The purchase of a motorcycle is expensive enough but the accessories
that you require thereafter can prove daunting and most of them are
necessary.
Insurance + Padlock Security System
I obtained my insurance for my motor cycle through Suzuki and I was
surprised that they would even insure me (unlicenced) to ride the
bike during my DAS training.
However
Saltire train you on a 650cc motorcycle so my bike a 1250cc could not be
used.
In the end they insured me fully comprehensive without a licence,
provided I passed the official government full licence examinations,
Modules 1 and 2 (I already had the Theory and CBT tests completed)
within 30 days of the start of the policy. The other conditions were
that the bike was to be garaged when not in use, the steering lock
applied at all times when left unattended and a disc lock device secured
to a braking disc. My less than 2 years riding experience went against
me, so I paid a premium which was under £500 for a years insurance with
a £500 excess in the event of an accident where it was my fault. I was
informed that the insurance in the second year would fall to around
£350.00.
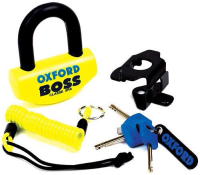
To secure the bike, I purchased an Oxford Boss padlock with a sprung
bright yellow lanyard which clips to the padlock and the other end taken
up and over the bike and clipped onto the front brake lever to remind me
to remove the padlock from the disc brake before I set off.
Sports and Touring Luggage
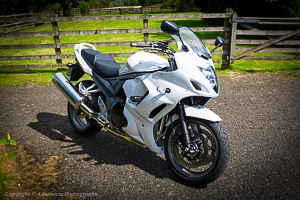
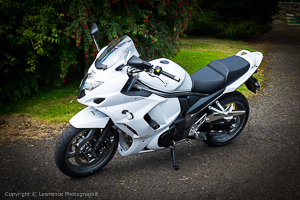
I will be using my bike in sports mode for most of the time and
touring for short week-end breaks. So the luggage for a sports motorcycle was always going to be a bone of
contention with me and
I think every sports biker hates a top box. Unfortunately my
Suzuki 1250FA would require a special metal rack and base plate
permanently fitted to my bike as the grab handle at the back would not
take a GIVI 'universal' top box base plate. Oh the
thought of my lady losing her lines to extra metalwork and a carbuncle
perched out behind her tail and up in the air - perish the thought.
I spent a fair bit of time trying to figure out what luggage I would
require and I was nearly at a loss. There are rear fitted top boxes, side mounted pannier hard
and soft cases, tank cases, rucksacks, rear seat bags, rear tail bags
and it was becoming a bit like photography - what bag do I really require
and do I end up with about 10 of them lying in a cupboard.
In decent weather I will tend to wear my urban clothing (see below)
for sports trips on country roads and I will be meeting up with my mates for lunch at a bar or restaurant. I will
always be carrying my
Fujifilm X100s compact camera and it would be nice
on those country trips to be able to pick up an Indian or Chinese carry-out on my way home. In
the case of inclement weather, I have my touring clothing (see below)
that I can use, especially in heavy rain and wind. I want the
lines of my bike to remain as they are so the luggage has to be of a
type that does not intrude on my sports experience. I am no longer
concerned about my helmet and gloves, they can sit below a chair in the
local bar or restaurant when I am in sports mode and when touring they
can be left at the hotel with my other bike gear.
So I require a small bag for my camera, disc security lock and for carrying a takeaway meal on my way home. That's it - any serious
photography projects will be conducted using the car or if in town,
using the local bus
transport. I have given up on the idea of a soft bag secured to the
rear seat or tail of my bike because of the hassle of connecting the
straps and the problems of mounting and dismounting with the bag fixed.
The tail bag would serve me no better for maintaining the lines of my
bike than a fixed top box.
The solution has to be a tank bag which sits on top of the bike's petrol
tank and is streamlined from any wind by the bike windscreen. I am not
keen on straps or magnets to support it so I guess it has to be a 'tank
lock' design which means that a mounting bracket is fixed/screwed to the
tank fuel cap bracket and the bag is simply dropped on top, pressed down
and clipped into place. The bag has a finger flick release mechanism
lever between the bag and the tank to remove it from the bike when
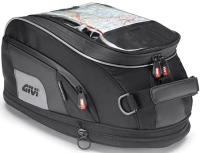
required. I chose the
GIVI
XS307 Tank Lock Bag which is
15 litres in size with a handle and a shoulder strap for carrying it
when not fitted to the bike.
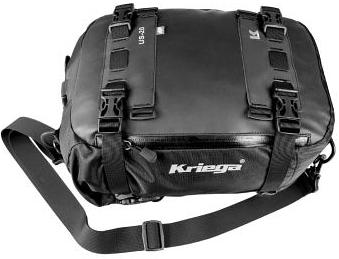
I spoke to a number of sports bikers as to what luggage they used and I did change my mind about a rear seat bag,
especially when I explored the
Kriega US-20 which holds 20 litres of
space - I cancelled the XS307 tank lock bag. The US20 is a bag that is fitted to the rear seat by 4 straps but when
you remove it all you are left with on the bike are 4 small loops poking
out from underneath the seat.
With
the bike seat removed,
the 4 permanent retaining straps are fitted to the bike frame
and then adjusted
by a buckle in such a way that when the seat is placed back on the
bike, all that shows are the 4 strap end loops.
When fitting the 4 permanent retaining straps inside the seat area, I
used an L shaped piece of wire with the smaller end of the L turned
around on itself to provide a smooth finish so as to avoid scratching
the bike frame when I was fishing behind the frame for the strap end to
pull it back up to the buckle. The bag itself retains
the 4
top straps and each end has a open metal clasp that simply slips into the
corresponding (permanent) retaining strap loop
but the design means that it cannot just slip back out by
itself, it must be unclipped in a certain way. The bag when empty
is relatively small and flat on the bike but it can expand and swallow a
lot of gear. This is a bag that will also prove ideal for touring as an
extra bag to my Kriega R35 backpack because it could take a few pairs of
shoes and other items usually kept in the backpack that could dig into
my back if I took a spill.
It is a simple matter to unclip the US-20 from the rear seat loops and
then take each strap and slip/clip each one to a corresponding loop on
the base of the bag (stops them flopping about - the above
image shows them stored), connect the shoulder strap (or waist strap) and you
are ready to go walkabout. Looks cool on the Roamer jacket and with my
other urban gear.
The touring luggage for short week-end breaks is fairly straightforward
and at first I thought about soft saddlebags thrown
over the bike rear seat but I think the best answer for preserving the
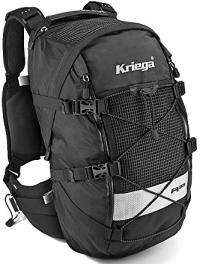
lines of my bike is a
Kriega R35 Backpack carried on my
back. Initially, I discounted the idea of a backpack because
if I took a spill then the contents could dig into my back, however the Kriega range of motorcycle
backpacks
have an optional large back protector inserted inside which is an added bonus to the
one already in my jacket.
I have used a backpack for my photography and
even used one on trips abroad without any hassle. The Kriega
R35 back pack is well supported without placing any strain on my
shoulders. Now I have the added bonus of the
Kriega US-20
rear seat bag that can take additional stuff.
The backpack in the video is the smaller R25 day pack but it is very similar to
the R35 (see image) which I think is the ideal size for more week-end clothes
- click image to open up to a larger size.
Motorcycle Accessories + Maintenance Consumables
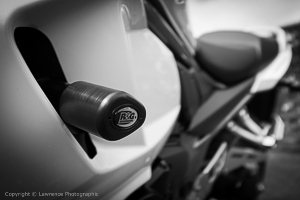
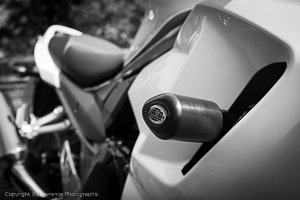
I had Saltire Motorcycles fit R&G aero crash protectors to protect the
bike if it slid onto it's side as a fairing replacement and engine
damage is expensive. These included handlebar bar ends and cotton reels
on the rear swing arm (see more Fuji X100s images below).
The only other extras were an indicator beeper
fitted inside the fairing so that I could hear when the indicators were
working as unlike a car, they are not self cancelling.
There is a certain pre-requisite consumable for any steel/alloy metal
motorcycle and that is ACF-50 anti-corrosion spray which will protect
the bike from water and salt corrosion. It is sprayed onto the bike but
can also be decanted from the spray onto a clean rag and applied to the
metalwork in areas close to the brake discs and brake pads - keep ACF-50
of the brakes and tyres. When I clean my bike chassis I will be reapplying ACF-50 to top
up the protection. The other obvious pre-requisite consumables are top
up oil for the engine, top up (mixed water/antifreeze) fluid for
the radiator and top up brake and clutch reservoir fluid - all as per the
maintenance manual specifications.
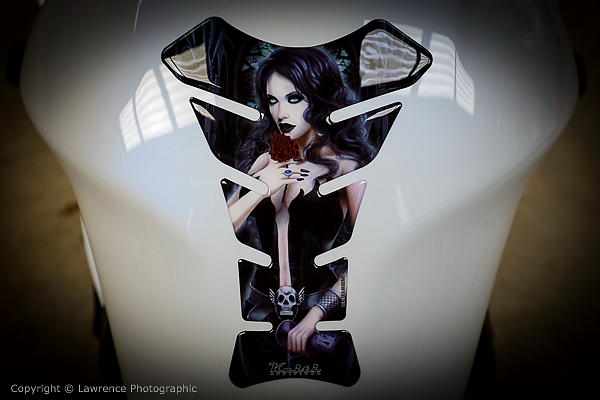
Fitting my Gothic Lady Tank Pad
Of course I had to fit a 'Gothic Lady' tank pad to protect the petrol
tank paintwork when I am getting on and off the bike.
A tank pad is a worthwhile accessory not only for the sport bikes when
you are lying across the tank but for sports/tourer bikes like mine when
you are mounting and dismounting of the bike and your jacket buttons or
zip might cross the paintwork of the tank. I used the following video
instructions (beware of the swear words from the over exuberant bikers)
to fit my tank pad (see image of my 'Gothic Lady' below).
Fujifilm X100s camera image of 'Gothic Lady' on the petrol tank -
Tech Spec SS Snakeskin Tank Grips
The Suzuki GSX-1250FA motorcycle is designated a sports/tourer and the
handlebars are positioned further back and more upright than the droops
found on a full on sports bike. Nevertheless the Suzuki can still be
laid down on the corners to a fair degree but I found the tank grip with
my legs left
a lot to be desired, even with the extra grip material on the inside of
my Rev' It trousers.
So I decided to invest in TechSpec SS Snakeskin tank grips which I
fitted to the flanks of the Suzuki's tank. They made a huge difference
and gave me tremendous confidence when leaning the bike down on the
corners. They were easy to fit using an alcohol wipe to clean the tank, a
hairdryer to heat the metal and were relatively easy to stick on.
Note that the following video and image are not my Suzuki but another
bike used by TechSpec as a demonstration -
Motorcycle Battery Charger
With all those October 2015 weather forecasts of imminent snow storms
for the next few months in Scotland and a prolonged hard winter; it is
unlikely(if there is snow) that I will be out and about on my
motorcycles.
I got to thinking that I require a battery charger for maintaining the
batteries whilst the bikes are laid up but I wanted the convenience of
leaving a battery connected on a bike whilst a maintenance pulse charge
was being applied by the charger.
I figured that I would only require one
charger and 2 sets of eyelet leads, each lead hardwired
to a battery terminals with it's flying lead socket used to connect to the
charger lead plug as opposed to using the crocodile clips. I plan to
alternate the charger between the 2 bikes every couple of days. Swopping
the charger over would be dead simple as all I had to do was unplug the
charger lead plug from the eyelet lead socket in the battery compartment
and then connect the charger lead plug to the other eyelet lead socket on
the other bike.
I checked the Internet for the ideal battery charger which turned out to
be the
Optimate 4 and visited my local
motorcycle dealer 'Saltire Motorcycles' in Edinburgh to purchase one.
Fitting a set of the eyelet leads to the battery of the Suzuki
GSX-1250FA was a breeze as all I had to do was unlock/remove the
seat and using a small socket and wrench, remove the Negative - battery
terminal screw and terminal lead to disconnect the battery; repeat the
process with the Positive + RED terminal lead then fit the Positive +
eyelet and RED terminal cable to the Positive + terminal post and screw
the bolt home. The same process with the Negative - terminal cable and
Negative - eyelet. Once connected, I carefully rolled up the eyelet lead
with it's socket (making sure the socket weatherproof cap was fitted)
next to the battery and replaced the seat. To use the new Optimate 4
eyelet flying lead the seat has to be first unlocked/removed.
However, the Yamaha XV950R was a different story and fitting the
eyelet lead was in this order -
Lift up Mustang
Spring Seat
If Stock Seat - unlock black plastic
panel on left side of bike with ignition key and remove panel
Unscrew stock seat front screw, push
seat back to unclip and remove
Undo rubber band and clip holding down
EC unit on top of battery plastic cover (under seat)
Carefully lift EC unit up and push to
left side (leave both EC plug terminals connected)
Remove 2 screws from metal strap on
right side of bike and remove it and the black plastic cover
Remove matching screw on small
plastic panel and allow the panel with brake reservoir to hang over
The battery should now be visible,
especially the RED terminal cover and terminal cable connector
Undo Positive + terminal screw, fit
positive + eyelet along with terminal cable and screw down
Fit Negative - eyelet along with
Negative - terminal cable and screw down
Arrange eyelet lead so that it is
concealed in battery compartment BUT accessible for charging
If fitted with the Stock Seat, make
sure the eyelet plug can be accessed without removing the seat
Refit the EC unit on top of it's
plastic holder (on top of battery) and refit rubber band and clip
Refit smaller black plastic panel on
right side BUT do not tighten the screw
Refit larger black plastic panel and
the metal strap on right side, insert the 2 screws by hand
Now making sure that all 3 screws have
been screwed in by hand, use the socket/wrench to tighten
Push down seat (if stock seat - clip
rear into holder and refit single screw under seat to secure)
Refit left black plastic panel and
secure with ignition key
Charging either motorcycle is now a breeze because all I have to do is
make sure the ignition is switched off, connect the Optimate 4 flying
lead plug to the bike's eyelet lead socket (pulled out from under seat)
and connect the Optimate 4 unit to the mains. The Optimate 4 does the
rest and recharges the battery to optimum power and then applies a
trickle charge to maintain it. Please Note: I sold the Yamaha
XV950R motorcycle in May 2016.
Service Maintenance and Pre-Ride Checks
My bike
will be maintained by Saltire Motorcycles BUT I will continue to
do my pre-ride check before I set out and remember to ride my bike at limited speed for a few
miles (especially when cornering) until the tyres heat up and
reach optimum grip.
There is no doubt that a motorcycle developing a mechanical fault at
speed (any speed) is a great deal more hazardous to your health
than a car. My
pre-ride checklist may seem over
the top but I believe it is necessary and if it is to hand, then it does
not take long to run through. Of course if anything serious is found
then the adjustment/repair will be conducted by the bike dealership. The
service manual is very clear on these matters, especially in relation to
warranty.
Scottoiler
I also purchased a Scottoiler mechanism that drops oil on the chain when you are riding
along - it has an oil reservoir situated under the seat. The Scottoiler
has an +/- adjustment on the reservoir to regulate the drops of oil
(approximately 1 drop per minute)
on the chain. I bought 500cc of oil from Saltire to top it up when
required.
The Scottoiler (for me) is a must and it is a device that drips
oil on the rear chain sprocket and onto the chain to keep it lubricated
with it less likely to develop kinked links, rust and wear. The
reservoir for holding the oil is situated (on my bike) under the
seat and attached to the frame of the bike. The oil only feeds to the
chain when the engine is running so bear in mind that if you allow the
bike to idle whilst stationary for long period (e.g. in a garage)
the oil will continue to drip but will not be dispersed by the chain
which will also be stationary. The oil should be set to drip at a rate
of about 1 drop per minute and you can easily adjust it by the +/-
control knob on the top of the reservoir.
WARNINGS:
The drip feed timing should be checked on a regular basis and adjusted
as necessary because to much drip flow could send excess oil onto the
inner sidewall of the rear tyre, the part that is used for hard left cornering.
Also, under normal working conditions, consider that if your bike is
fitted with a centre stand and you park it (after a run) on this stand
where the bike is vertical instead of the side stand where the bike is
leaning, oil may continue to drip (a few drops)
from the Scottoiler nib feed at the chain onto the edge of the rear tyre
inner sidewall which is
used for hard left cornering.
I usually park my bike in the garage using the side stand and later raise it onto the
centre stand - in any case and before I set off, I always check the rear
tyre inner sidewall and clean any excess oil of it
using a rough cloth.
Rema Tip Top - Tyre Repair Kit
I was on a trip down the Scottish Borders and there I was sitting
munching on a sandwich in the back of beyond, without a care in the
world, when I suddenly thought "my bike has no spare wheel". WOW, suddenly the beauty of those desolate hills turned into a nightmare
"what if I had a puncture" feeling! It makes you think, it
probably would never happen to me but having to push a motorbike for
about 10 miles would prove a harsh lesson in failing to be prepared.
Then I remembered I had Suzuki 24 Hour breakdown cover which I
automatically received with the purchase of the bike as well as my own
car AA breakdown cover which also covered the recovery/uplift of the
bike to my home BUT I have never been one to place reliance on
any third party unless absolutely necessary.
So, back in Edinburgh, I visited Saltire Motorcycles, wondering how I
could get a tubeless tyre instant repair kit to fit under my bike's seat
as there was only enough room for a small book in the manual slot. I
imagined the kit would be one of those huge gas/rubber cans that
instantly seal the hole in the tyre as well as re-inflating it.
As it turns out the kit was very small and slim, consisting of a piece
of chalk to mark the hole before removing the nail, a needle like rasp device
for cleaning the hole in the tyre and using it to smear the hole with
glue and then inserting a glue covered single rubber plug (3 plugs
supplied) into the hole. A small knife to trim the excess rubber on
the outside of the tread and a nylon conversion thread piece
(connects a gas cylinder to tyre valve) with 3 gas cylinders used to
inflate the repaired tyre. The kit would be capable of repairing a single puncture and
getting me home, albeit a new tyre would then have to be fitted, The kit
costs around £26.99 which is a small price to pay to avoid
wearing out a good pair of shoes (as well as your spirit) pushing
a large motorbike for some 10 miles or more -
Motor Cycle Anti-Corrosion + Polishing
I placed my bike over some newspapers and used a can of
ACF-50 spray to seal all the electrics, frame, handlebars and just about
the entire bike
APART FROM
the tyres and the braking systems. I heated the can up in a basin of
reasonably warm water
until I felt it warm to hold and I shook it for several minutes. This
ensured that I would get as fine a mist of the protective chemical as
possible to coat the bike. It is also great for bringing up black
plastic, spray on and clean off with a clean soft cloth.
ACF-50
also comes with a long plastic knozzle so you fit it to the spray head
and use it to direct the spray into smaller confined areas. WARNING:
Keep ACF-50 of the brakes and tyres and if it does overspill remove it
immediately with a fresh dry cloth.
When I clean my bike chassis I will be reapplying ACF-50 to top up the
protection.
Polishing a motorcycle
is an enjoyable experience, time to listen to some great music while you
work and although it is not as large as a car, there is still some
exercise in the process.
WARNING:
If you use a spray polish be
very careful that you do not inadvertently spray some on your tyres
because it can be missed but it won't be missed when your bike suddenly
skids onto it's side going round a corner on the road.
If you have enjoyed this article - please donate to my
Charity of Choice - The Sick Kids